
How to Save Generated Bannerbear PDFs to Airtable with Zapier
Contents
The PDF (Portable Document Format) is a file type that preserves original format and quality. Because they don’t compress files to the same extent as JPG and PNG file types, they’re great for documents, prints, and projects that involve multiple types of media.
The versatility of this file type is hard to match, and it’s used across industries and departments. Managers, marketers, educators, business owners, accountants—you name it. Since they preserve formatting, they’re also the file type of choice for sending documents to other parties. Teams that need to access static information like brand guides, handbooks, or reference data can benefit from PDFs as well.
When you’re creating PDFs in bulk using Bannerbear, keeping track of all of the files can be difficult. That’s why you shouldn’t stop at automatic generation—build storage directly into your process. In this article, you’ll learn a quick, easy way to save PDF links to Airtable once they’ve been created.
Why Store PDFs on Airtable?
Airtable is a versatile, no-code database platform that offers built-in integrations, automations, and extensive customization. Its cloud-based nature makes it ideal for teams seeking a centralized information hub.
Users can leverage Airtable as a data source for generating PDFs, enabling efficient project tracking and easy data sharing. Storing PDF links within the base creates a centralized, organized information repository.
What You Will Create
Automatically sending PDF links to Airtable after they’ve been created streamlines the process and helps you maintain one source of truth, which is especially helpful if the information is used by a team.
The tools you’ll need to automate the process of saving links are:
- Airtable : To store and link data across teams and processes
- Bannerbear : To design templates and generate PDFs
- Zapier : To trigger actions in different programs based in pre-specified commands
By the end of the tutorial, your Airtable base should have a field that automatically populates itself with links once PDFs are generated.

Keep reading to learn how to set this up yourself!
❗️ Note : You can link PDFs from Bannerbear’s CDN, but keep in mind that accounts have a bandwidth allowance and if you will have high volume needs, it may be better to self-host.
How to Save PDF Links to Airtable Automatically
Zapier simplifies the process of saving PDF links by leveraging Bannerbear and Airtable's built-in integrations. Once you configure the PDF generation and link retrieval steps, you can easily customize the workflow to suit your specific requirements.
Set Up Generation Step
Image generation can be triggered in many ways—when a record is added to a database, when a checkbox is ticked, or even on a schedule. Once you have a trigger event set up, you can then add a generation action.
Bannerbear generates images in JPG and PNG formats by default, but you can also render a PDF via Zapier. To do this, add a new step to your zap, selecting Bannerbear as the app and Create Image as the event.
You will need to connect your account using the key found by clicking the Settings / API Key button of the corresponding project of the Bannerbear app.
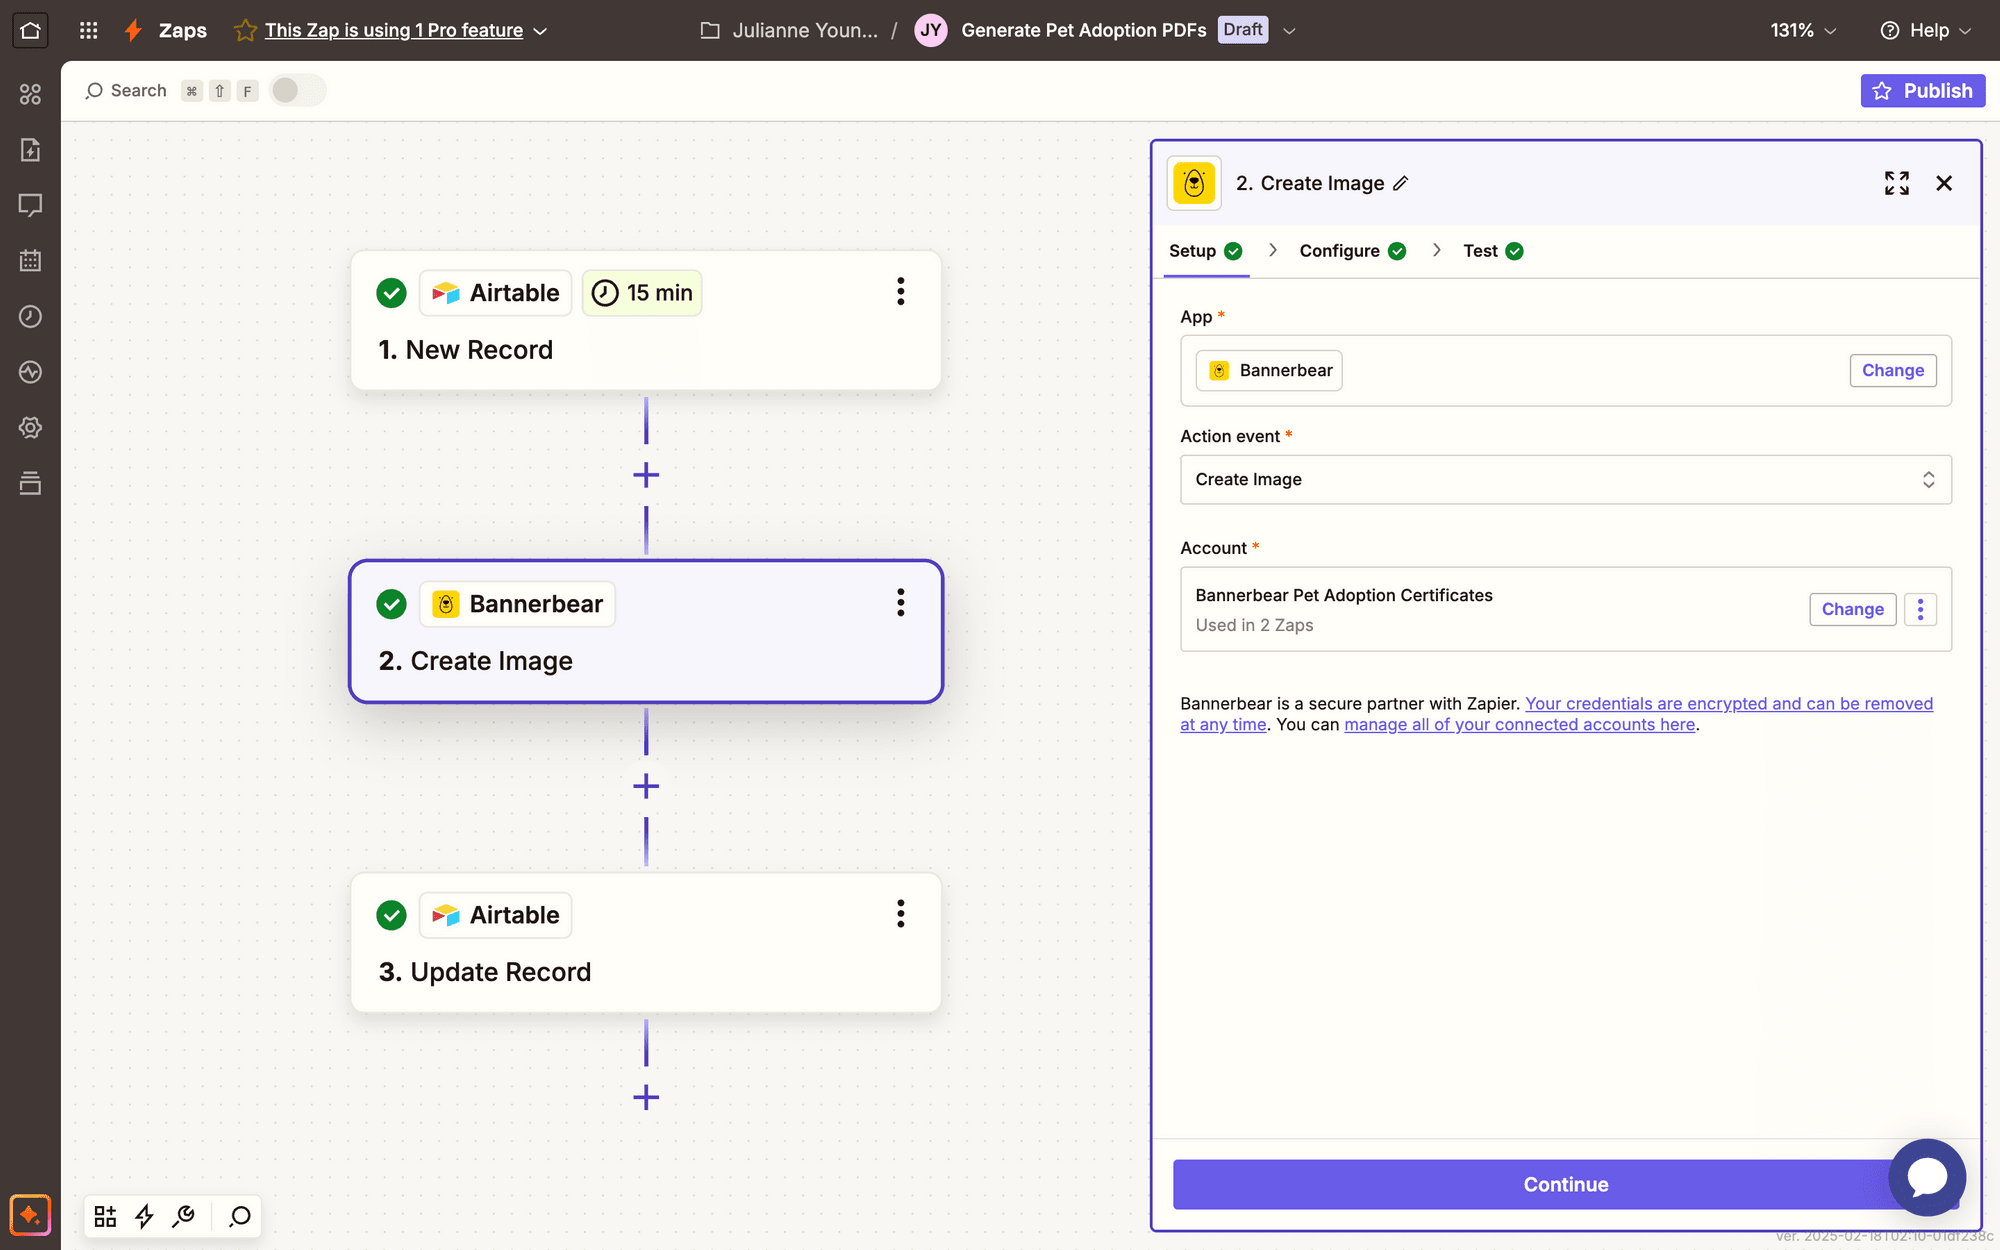
Configure the action just as you would any other image generation task, selecting the template you’ve designed, and mapping any dynamic data to their corresponding fields.
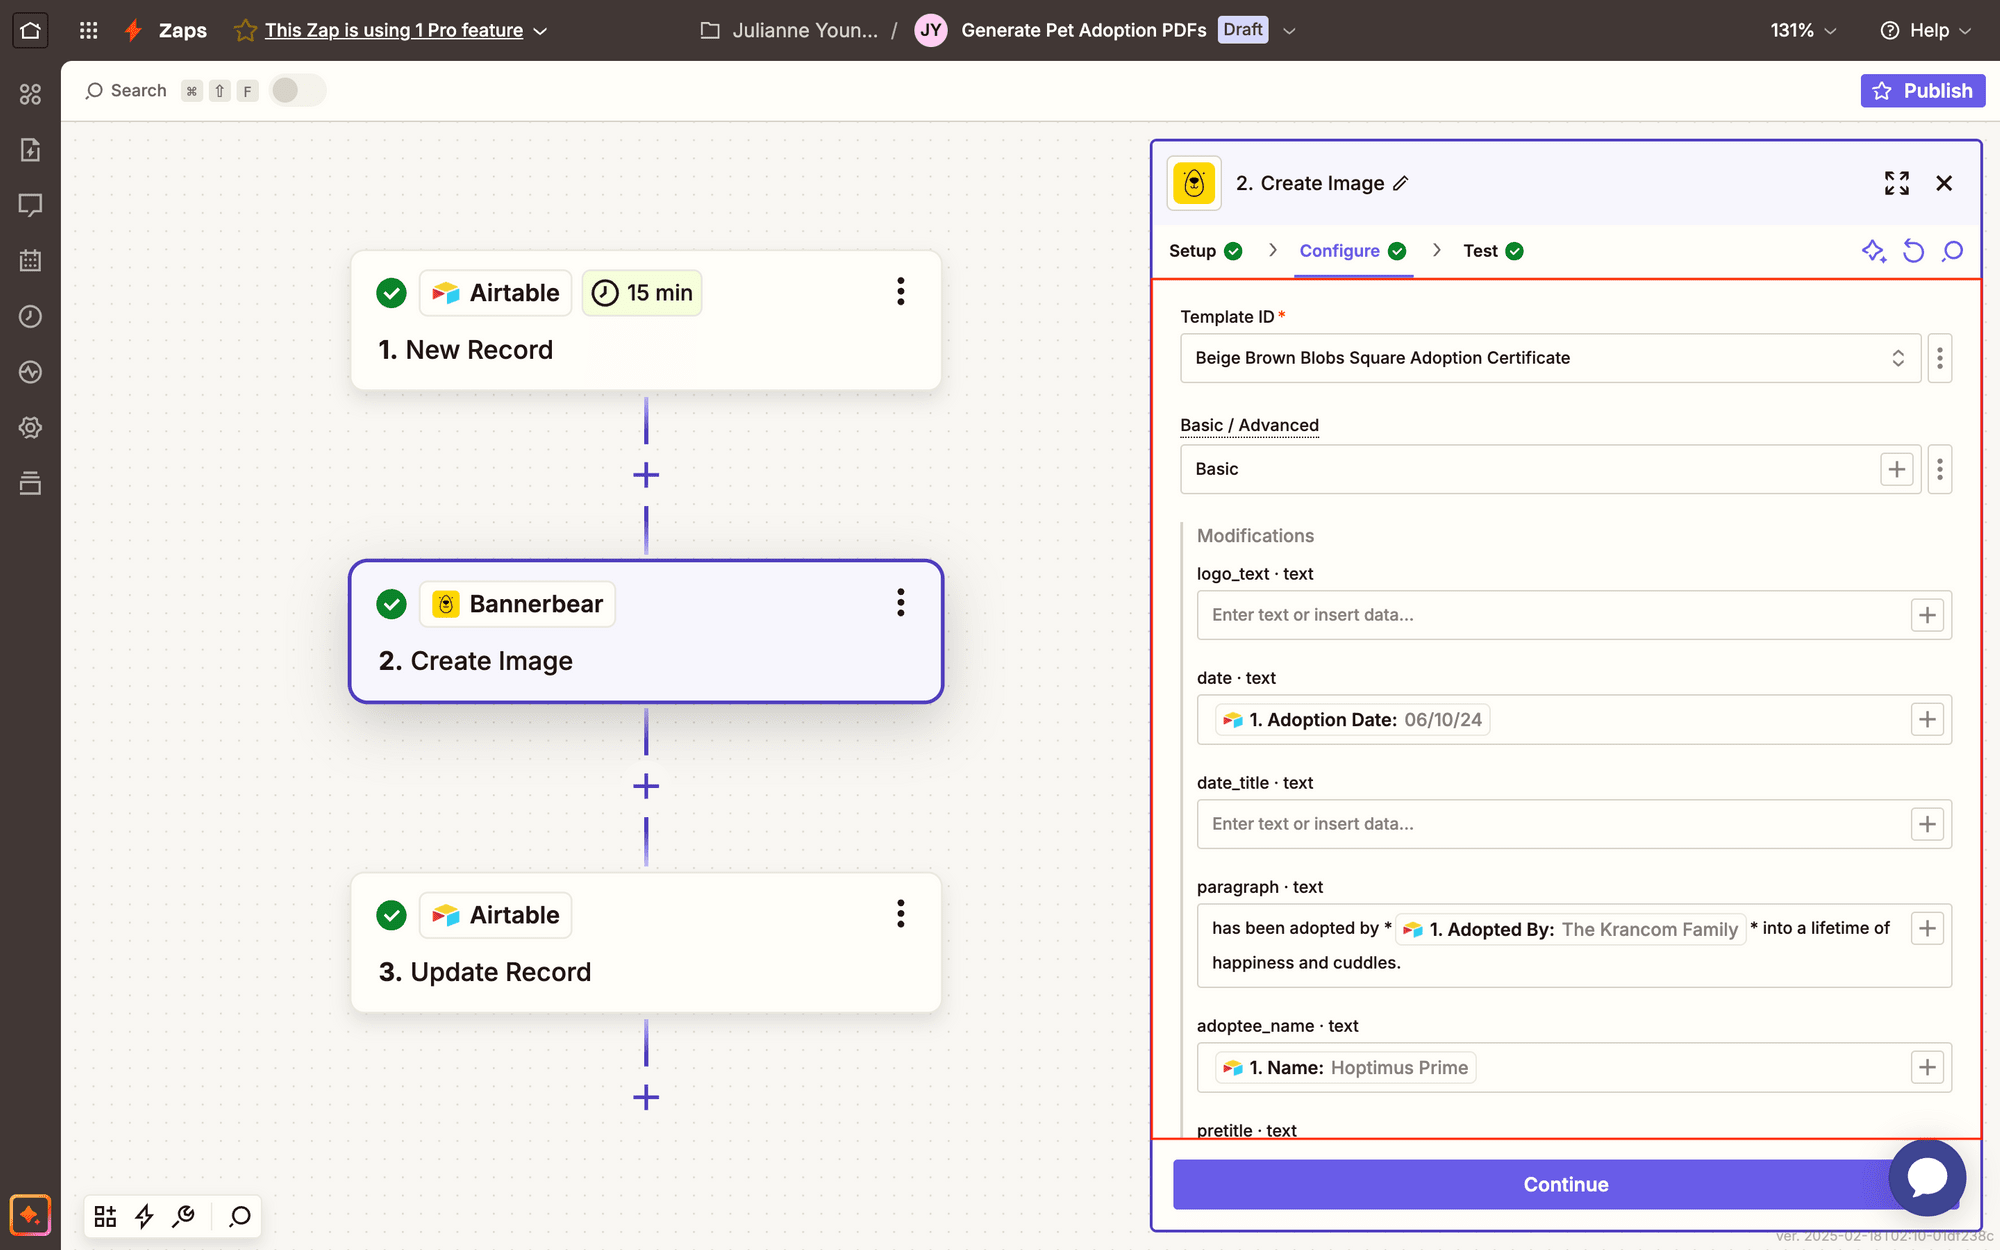
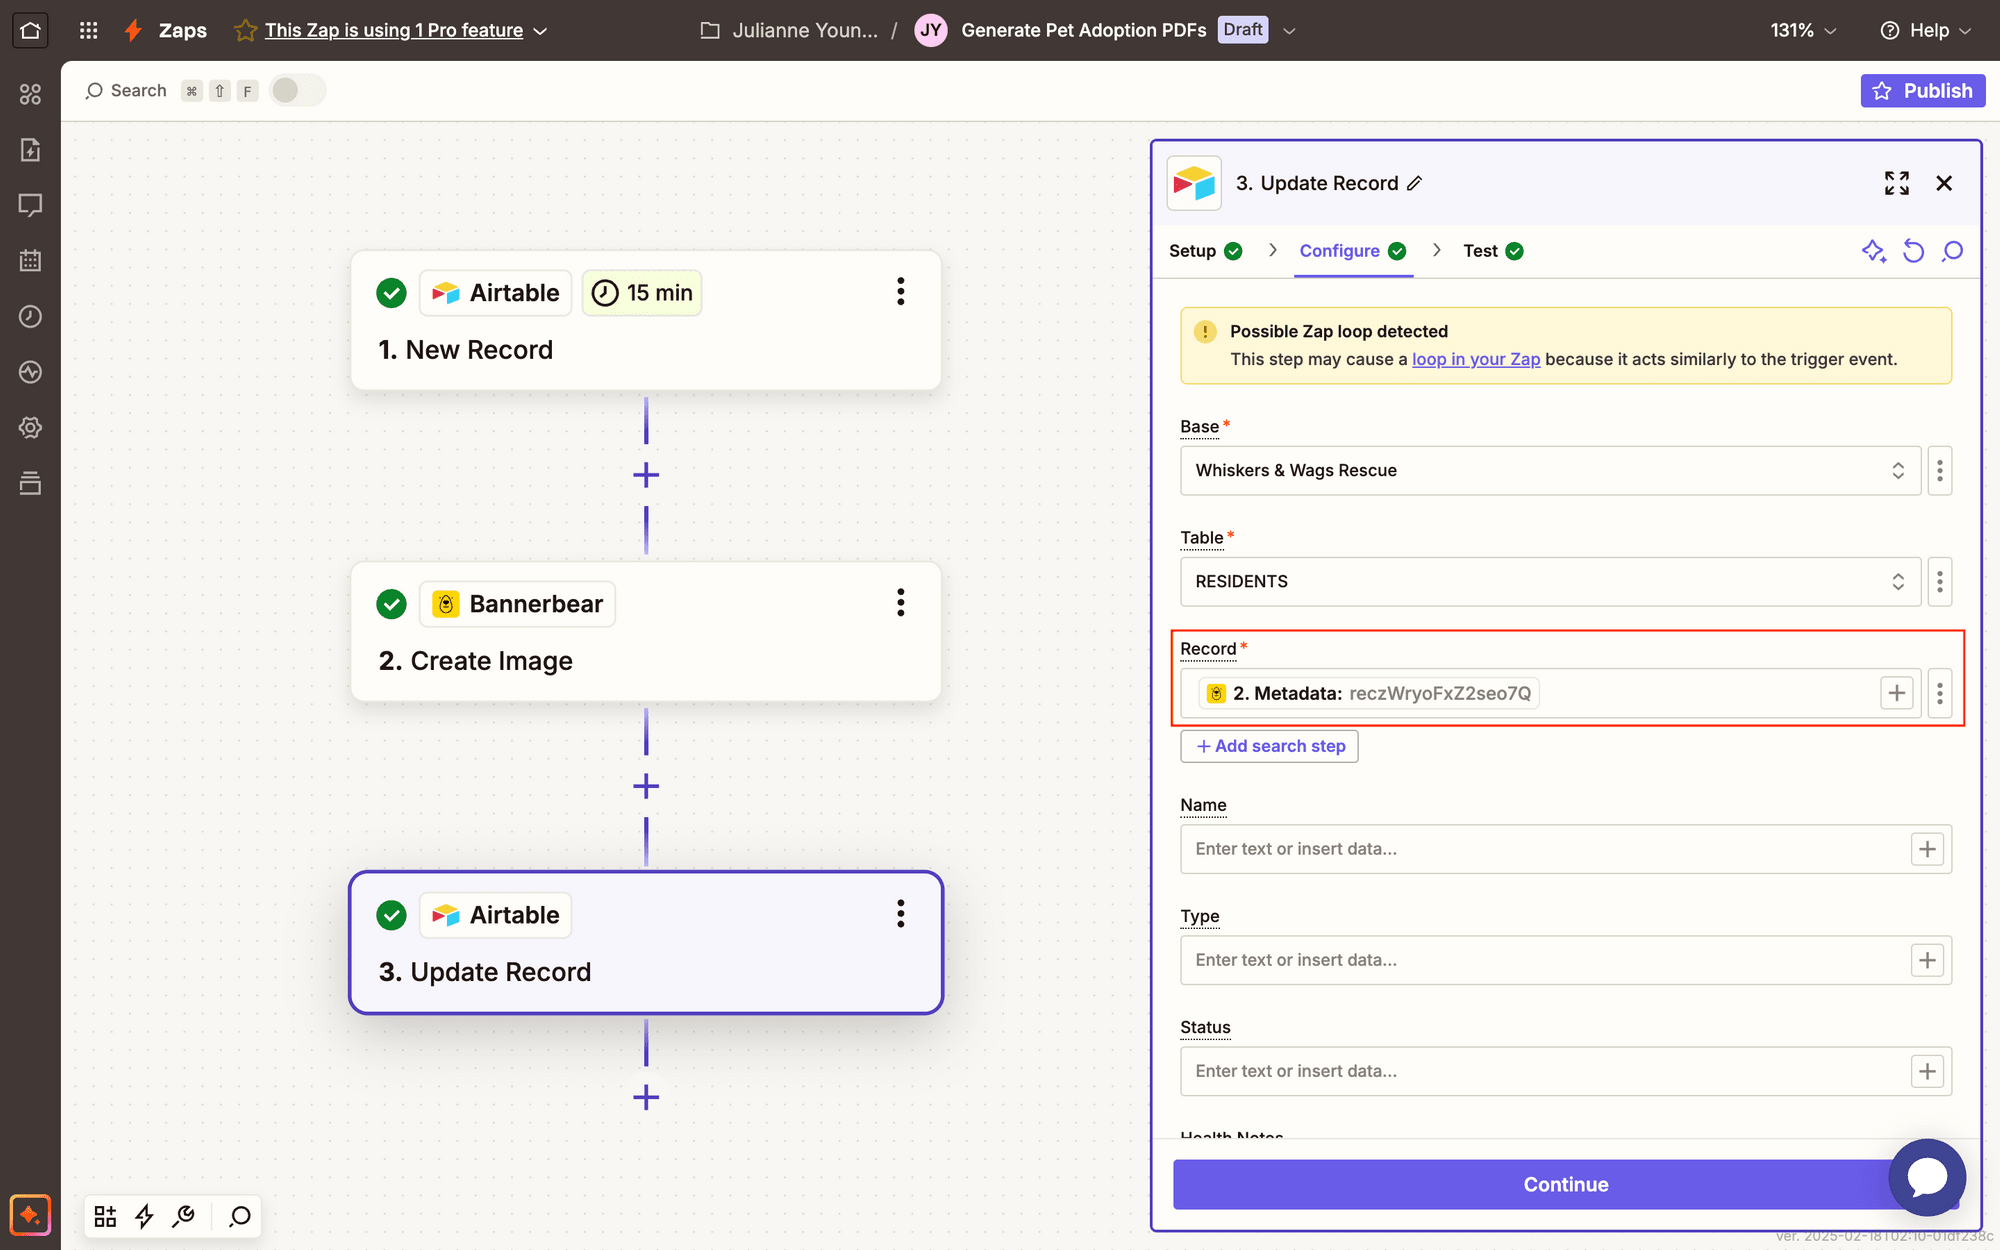
Save the Airtable record’s ID as metadata to make it easier to locate the record later on.
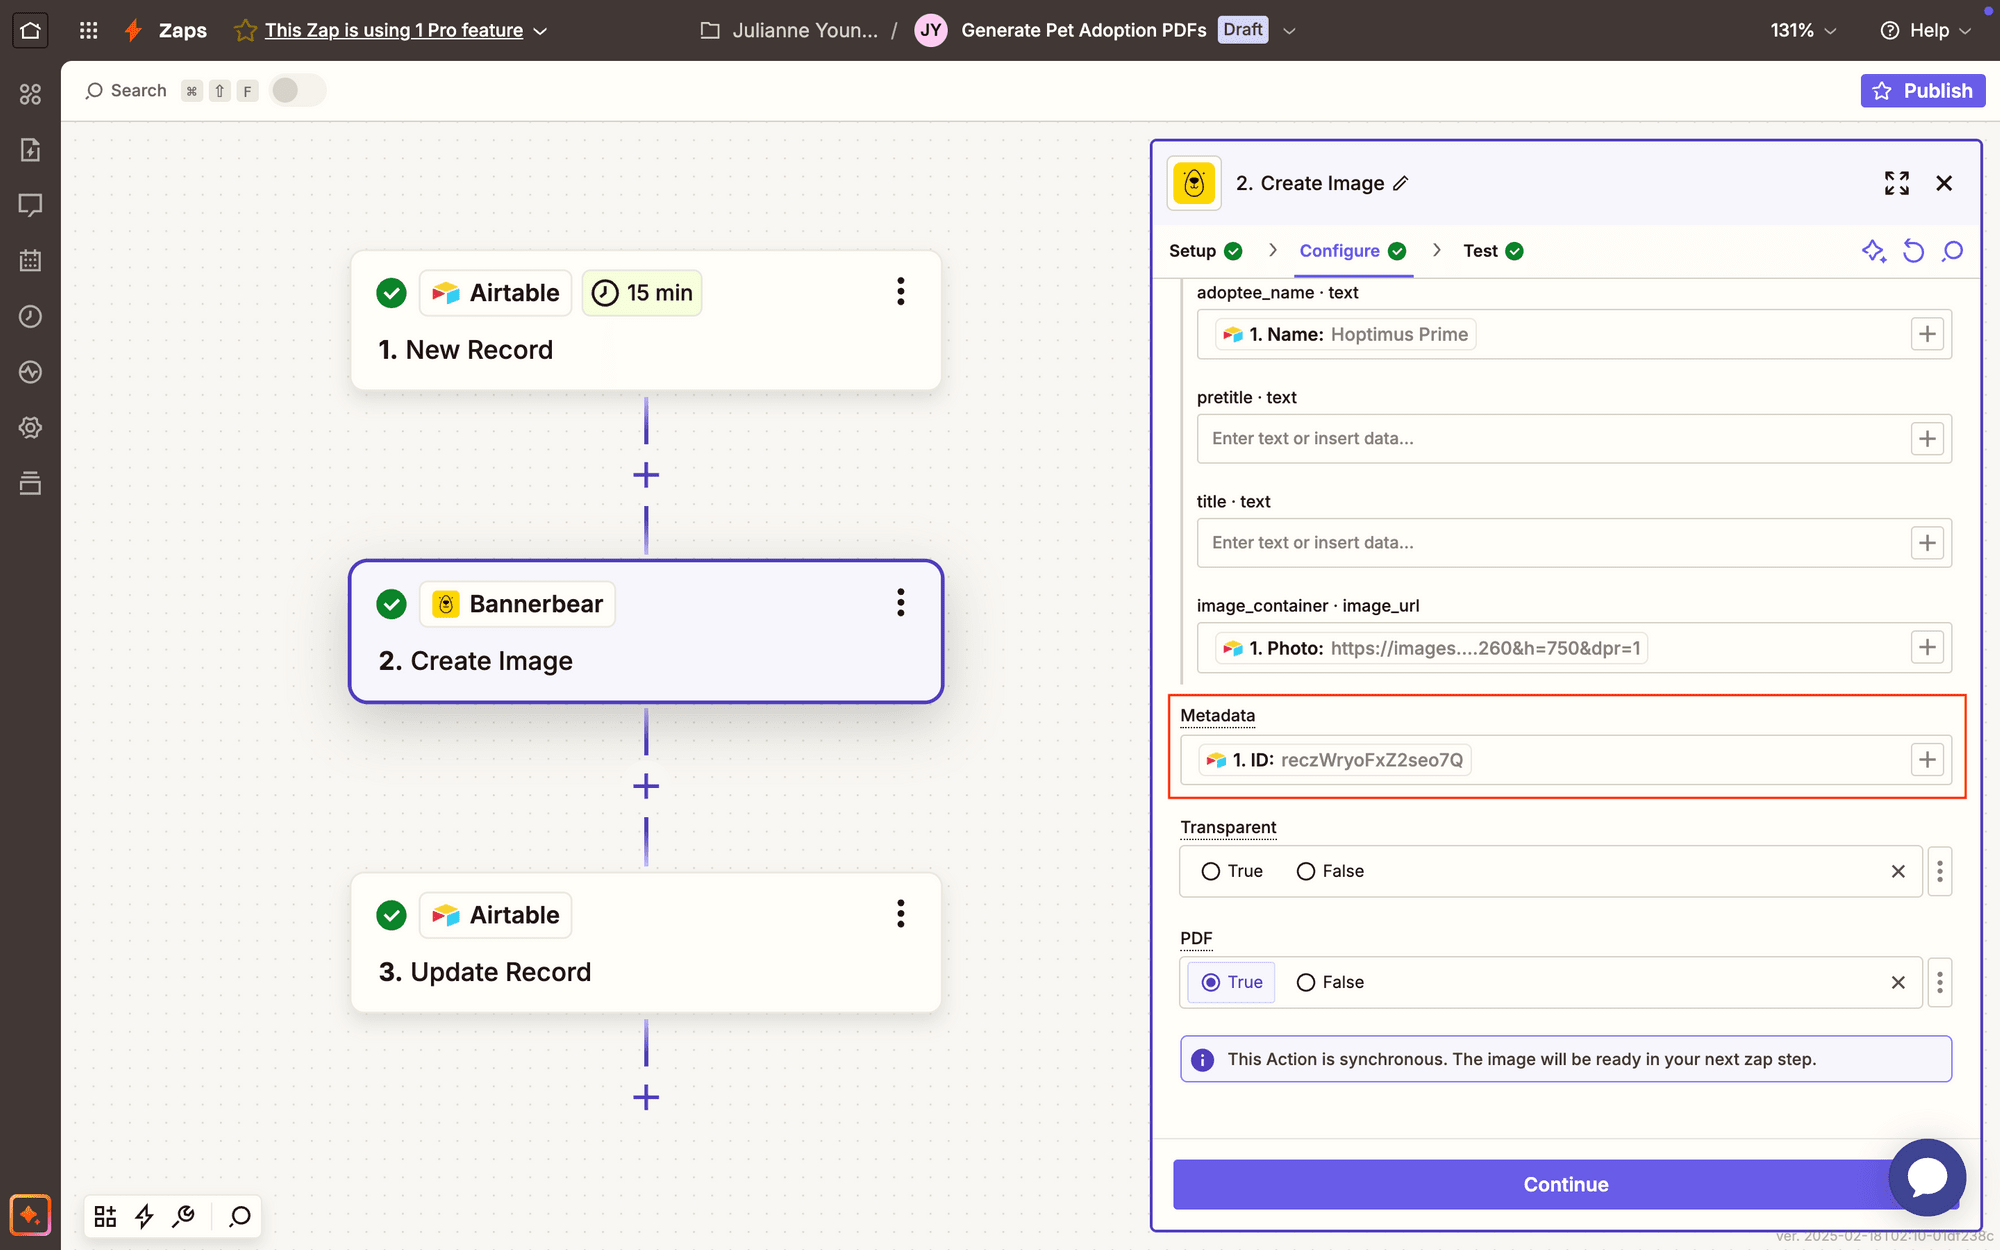
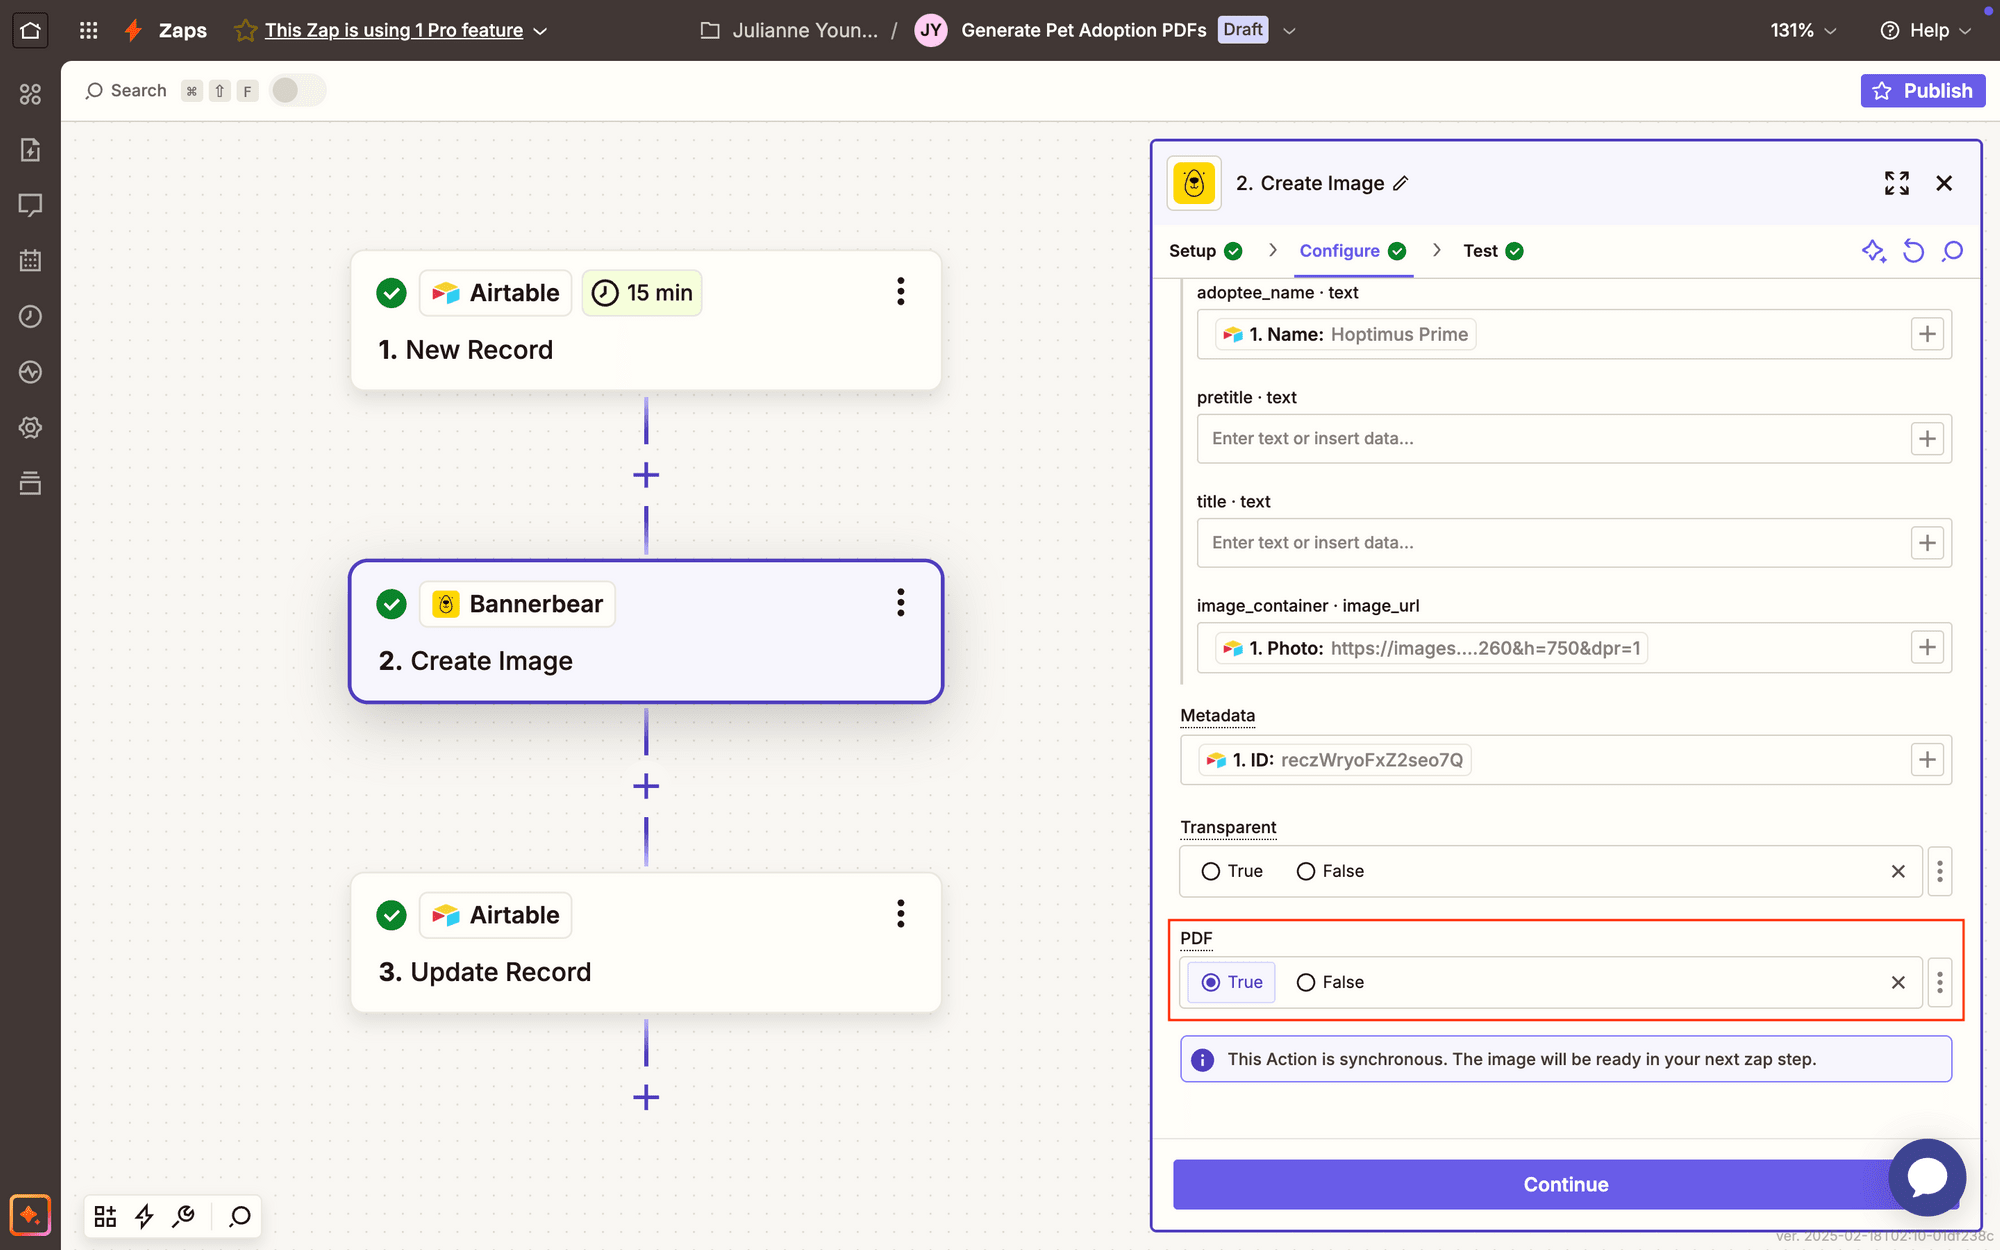
Toggle the PDF field to true.
Test the action to ensure Bannerbear generates an image according to your needs.
You can add other action events to complete your workflow.
Set Up Retrieval Step
Image generation occurs synchronously, meaning the image is ready to use in the next zap step.
Bear Tip 🐻: PDF generation and link retrieval must be within the same zap using this method. If you would prefer separate tasks, you might have to use a webhook.
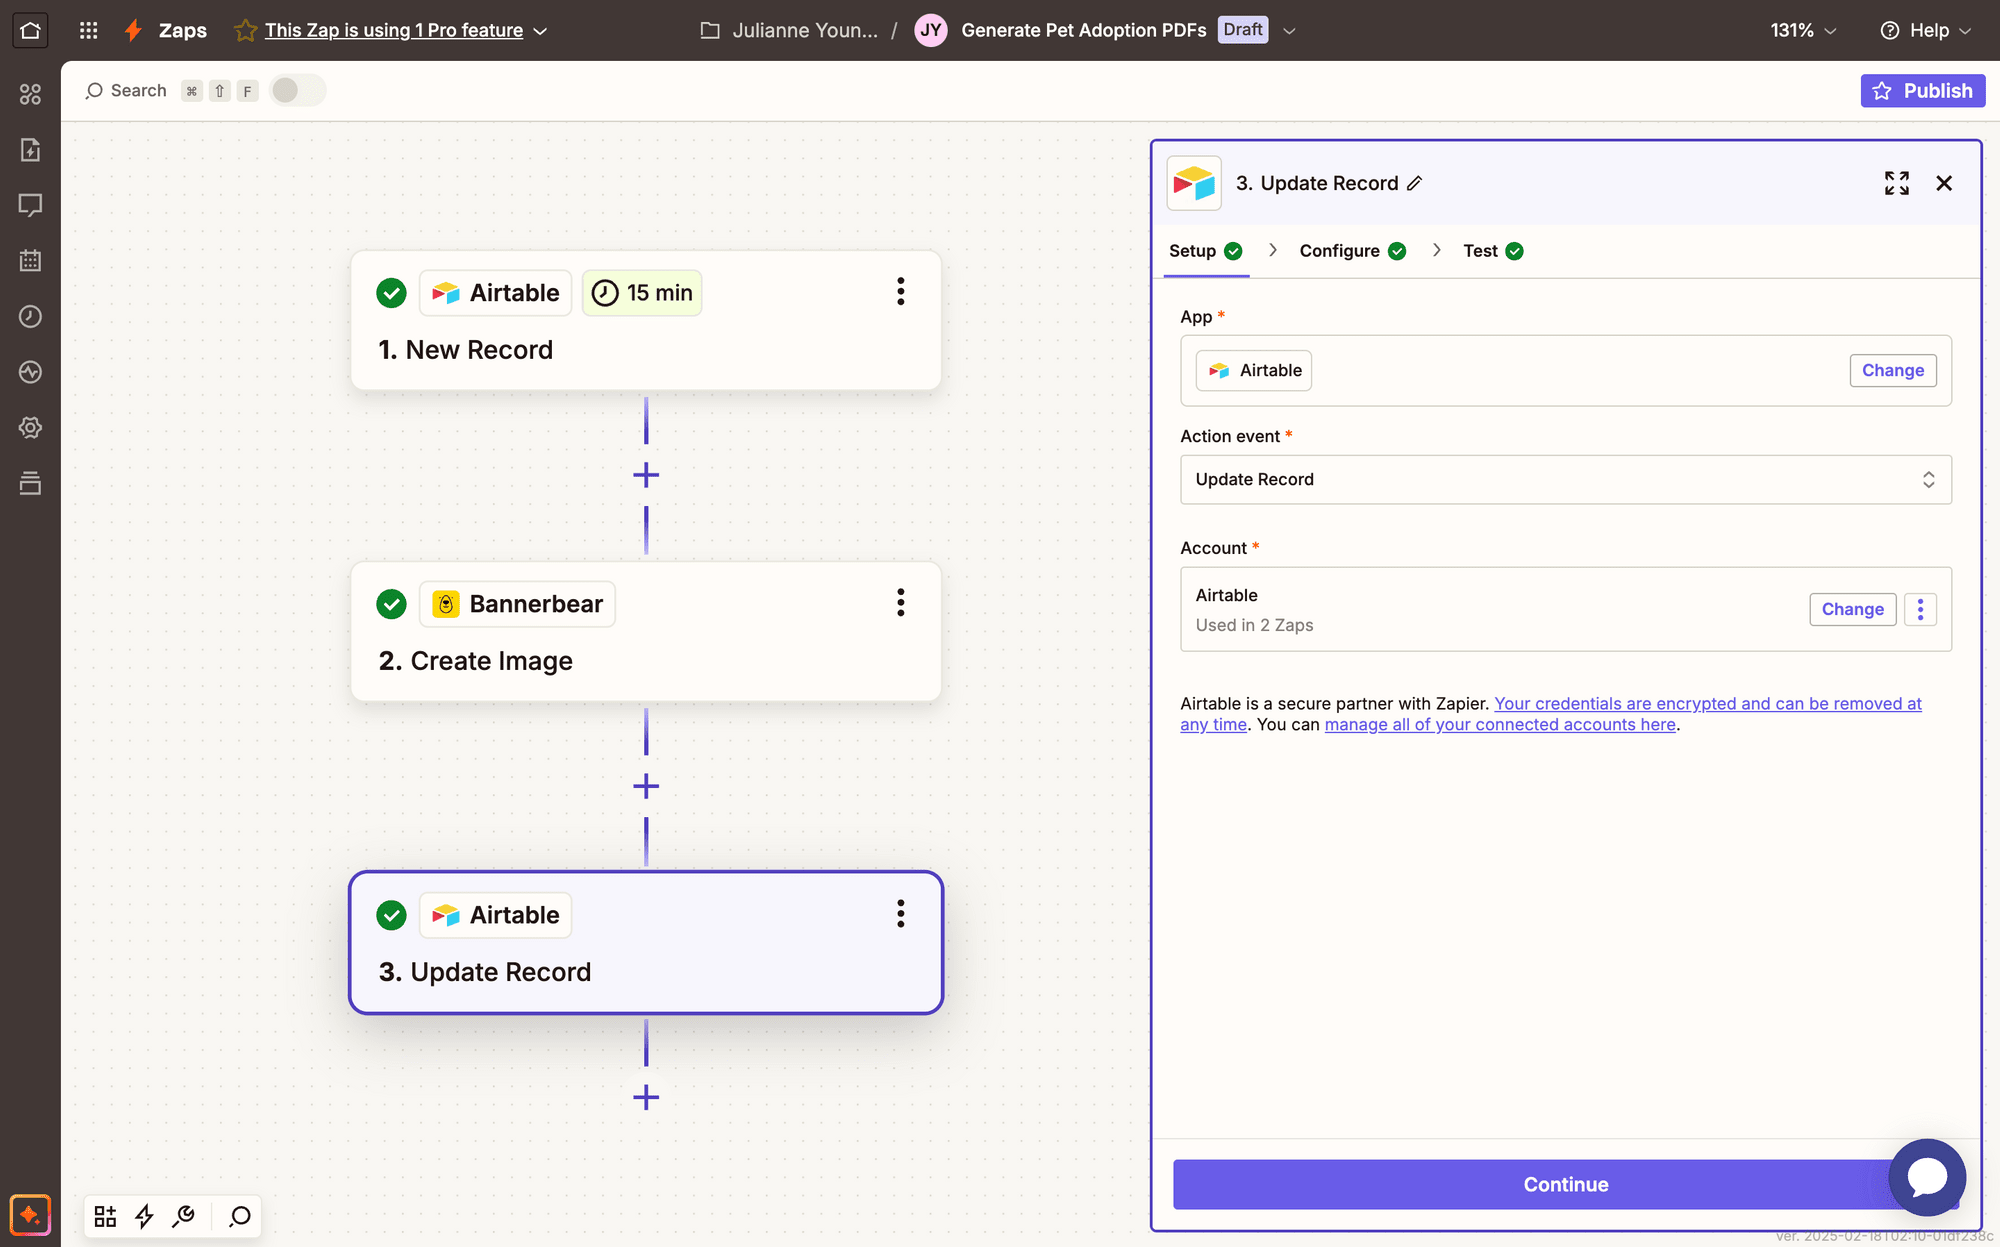
Add a new step to your zap, selecting Airtable as the app and Update Record as the event.
If you haven’t used Airtable in other steps of your zap, you might have to connect your account first.
Configure the account by selecting the right base and table, then insert the image’s metadata in the Record field.
Map the generated image’s Pdf Url to its corresponding Airtable field.
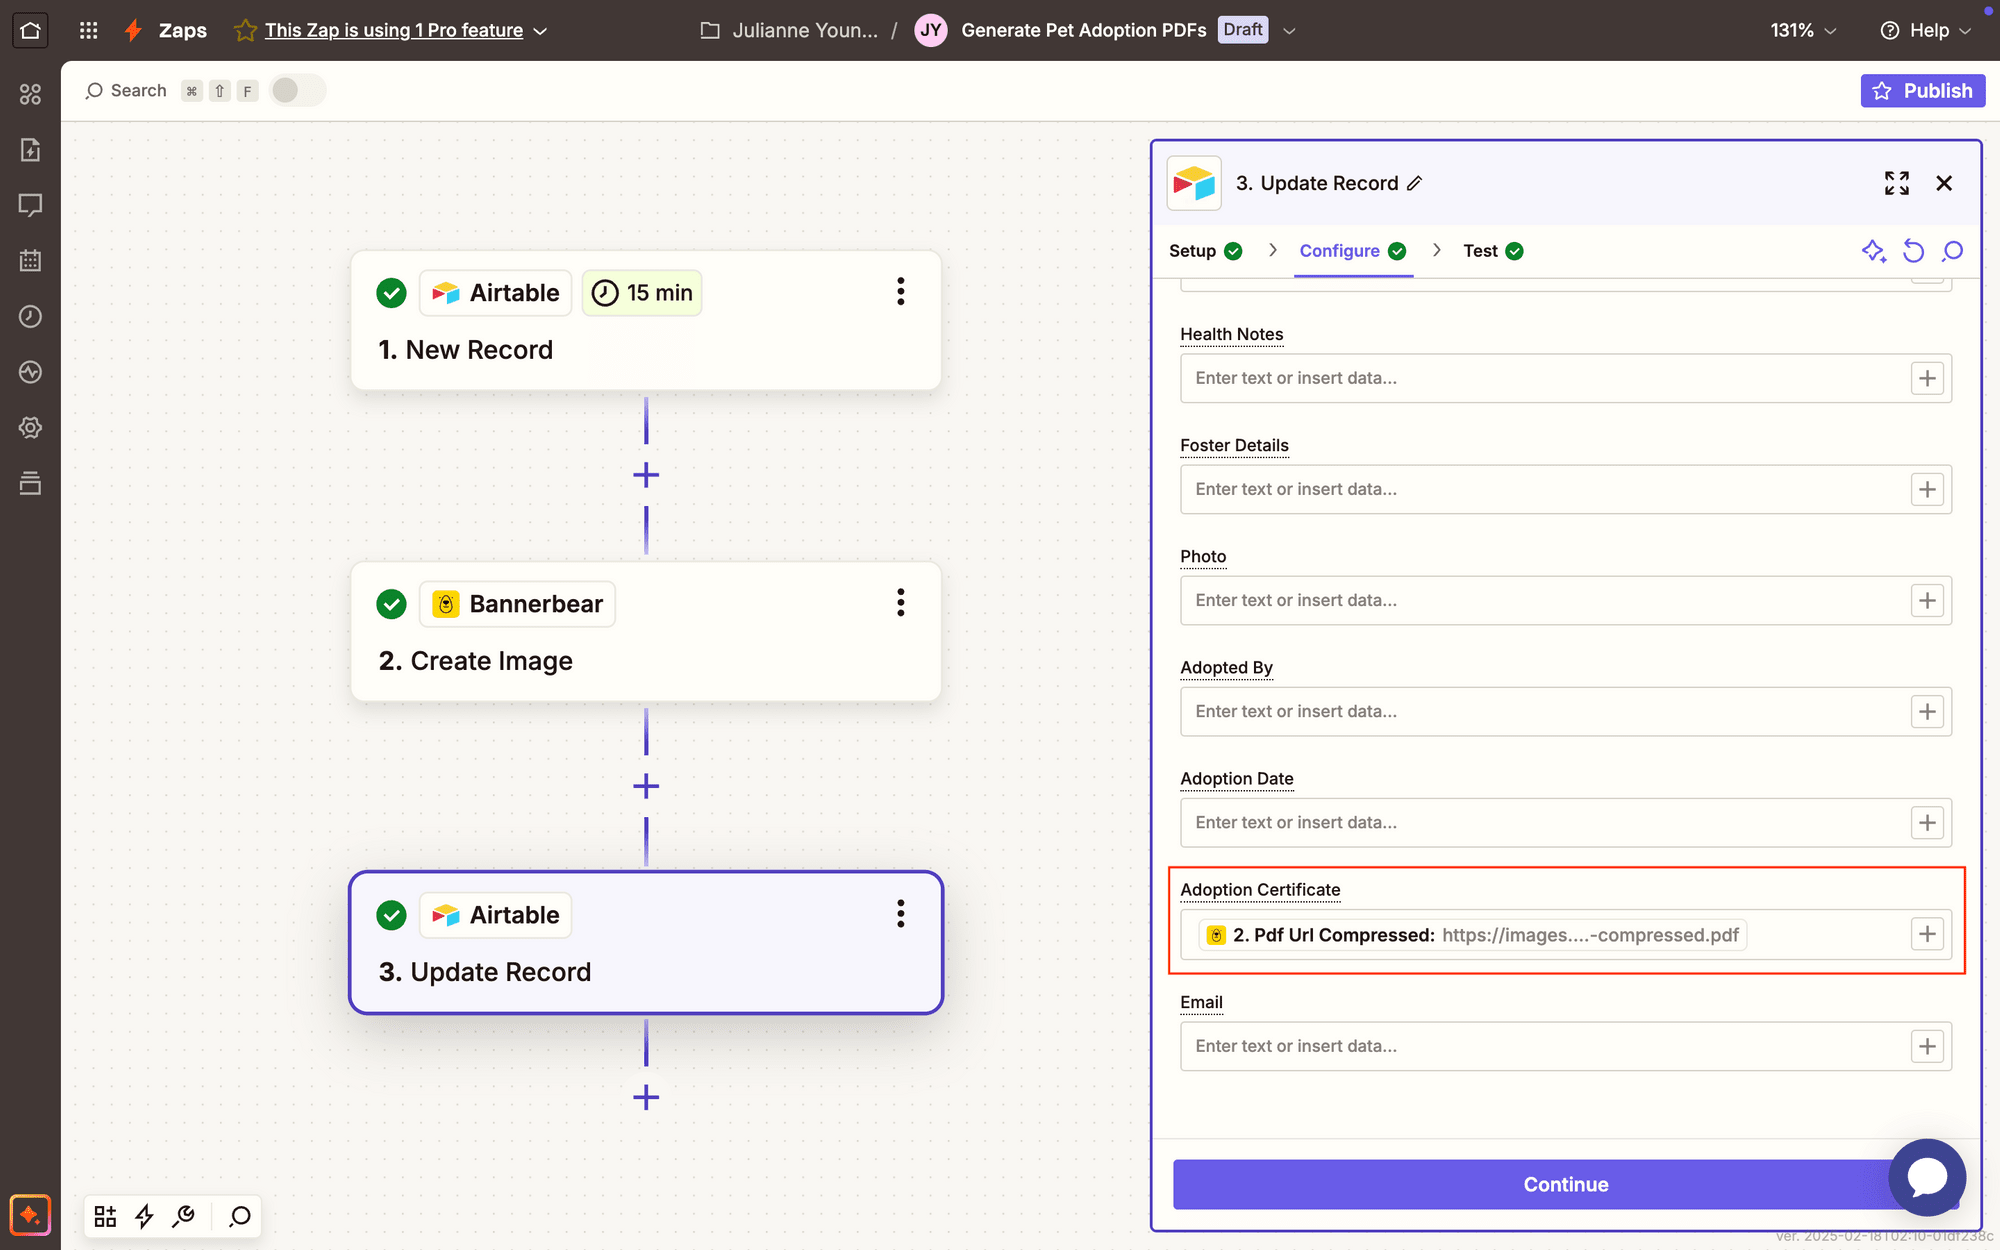
You can use either the compressed or non-compressed link, depending on your needs. The full resolution PDF will be higher quality, but the compressed version will often suffice for things like certificates and documents.
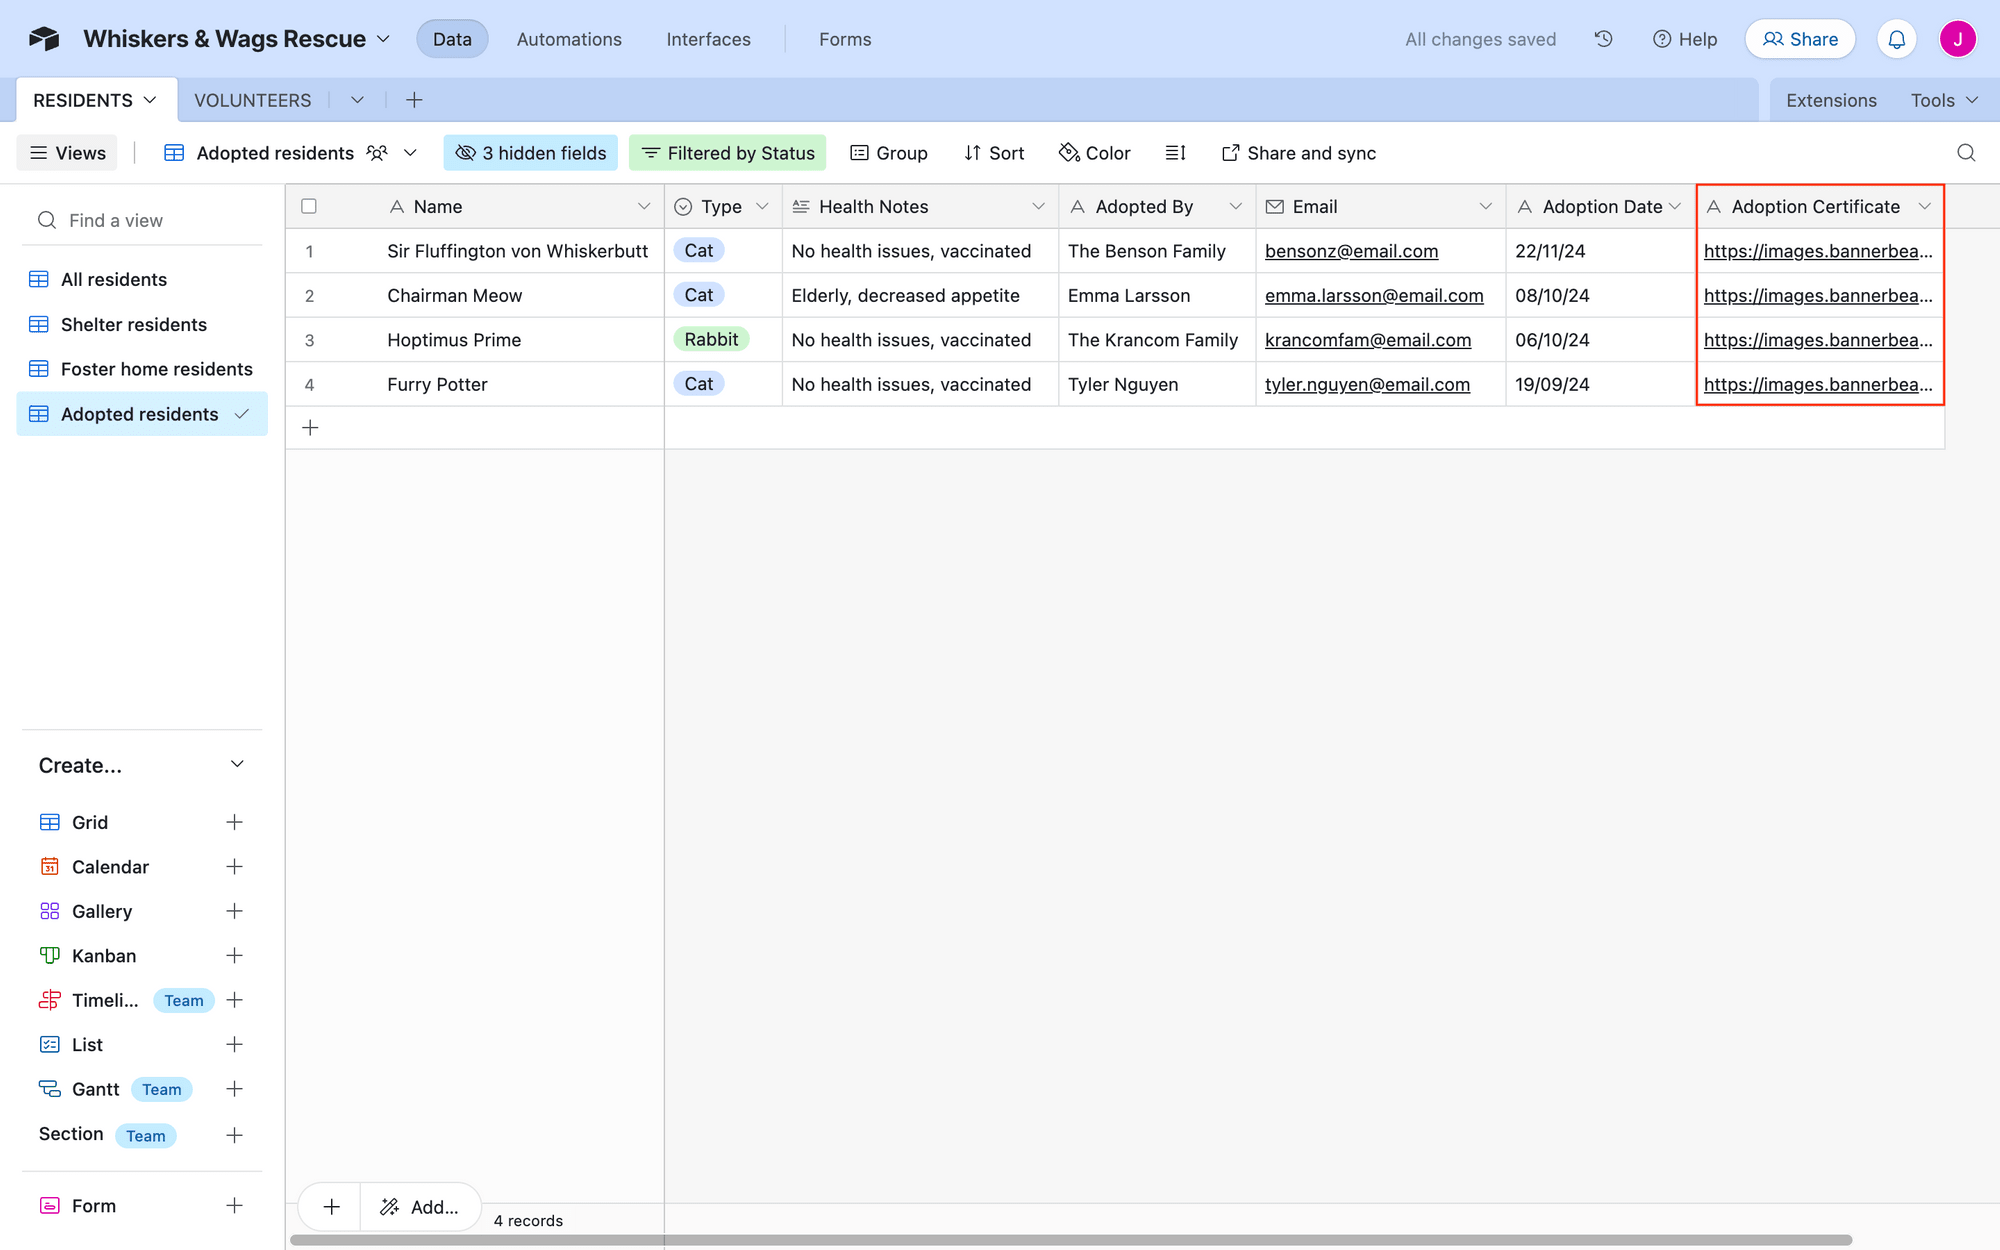
Test the action to ensure the link appears in your Airtable base.
And that’s it! Customize the rest of your workflow as needed, and publish.
Conclusion
Automating PDF generation and storage with Zapier, Bannerbear, and Airtable transforms what could be a tedious manual process into a seamless, efficient workflow. With these nocode tools, you can:
- Eliminate manual file management
- Ensure consistent, professional-looking documents
- Create a centralized hub for your team's critical files
- Save time and reduce human error
The key is to design your workflow thoughtfully, test each step, and customize the process to fit your specific needs. Whether you're generating certificates, reports, or social media posts, this method provides a versatile solution for PDF management.
Remember to monitor your bandwidth usage—especially if you're generating high volumes of PDFs—and always keep your API integrations secure. With a bit of initial setup, you'll have a robust system that works silently in the background, keeping your processes organized and productive.
