
How to Generate Dynamic Images with Bannerbear in PHP: A Beginner's Guide
Contents
Studies show that visual content can increase website traffic by up to 55%, and more than half of first impressions of a brand are based on visuals. Branded visuals are key to building brand recognition and trust. A well-designed website with cohesive branded visuals like customer reviews, testimonials, and promotional banners not only boosts engagement but also reinforces brand identity.
If you’re a developer looking to automate branded image creation, this guide is for you. In this tutorial, you'll learn how to use Bannerbear's PHP library to dynamically generate images by customizing them with your own images, text, and brand colors. With Bannerbear, you can automatically create branded visuals, such as customer review images like these…


…and seamlessly display them on your website or social media!
Why Generate Images Dynamically: Use Cases
Dynamic image generation simplifies and accelerates the creation of visual content. It helps save time, ensures consistency, and makes it easy to personalize content for different needs at any scale. Here are some examples where dynamic image generation can be particularly useful:
- Social media content - Social media platforms demand a continuous stream of visually appealing posts, which can be time-consuming and labor-intensive to create manually. Dynamic image generation automates this by pulling data from websites, databases, or other external sources to generate images, saving designers time and effort in creating social media content.
- E-commerce images - Dynamic image generation enables the automatic creation of website banners and product images that reflect the current pricing, discounts, and, promotions. This is especially useful during seasonal sales like Black Friday and Cyber Monday where a large volume of promotional images needs to be created for various products and discounts.
- Events materials - For event organizers or event management platforms, dynamic image generation simplifies the creation of materials such as tickets, banners, and schedules. It can incorporate unique attendee information, QR codes, and URLs to create these items at scale automatically.
- Link preview - Custom link preview images that showcase key information from the linked content—like titles, descriptions, and relevant graphics can significantly boost click-through rates on social media posts, email marketing campaigns, and messaging platforms. Dynamic image generation automates this process, eliminating the need for manual design for each link.
🐻 Bear Tip: When sharing links on the internet, each platform has its own name for the preview that shows up. Common names include Open Graph images, X/Twitter Cards, Unfurled links (on Slack), and link cards.
These examples highlight the benefits of dynamic image generation across various industries and applications, and Bannerbear offers a powerful solution to easily implement this.
What is Bannerbear
Bannerbear is a media generation tool that lets you automatically generate custom images, videos, and more using templates and external data. It offers APIs and libraries in various popular programming languages, including Nodes.js, Ruby, and PHP, making it easy to automate and integrate dynamic image generation into your projects.
At its core, Bannerbear works with design templates that serve as blueprints for creating images. The design template can include two types of objects:
- Static objects - Elements that remain constant in every generated image, such as a company logo.
- Dynamic objects - Elements that change based on your provided data, such as text or images.
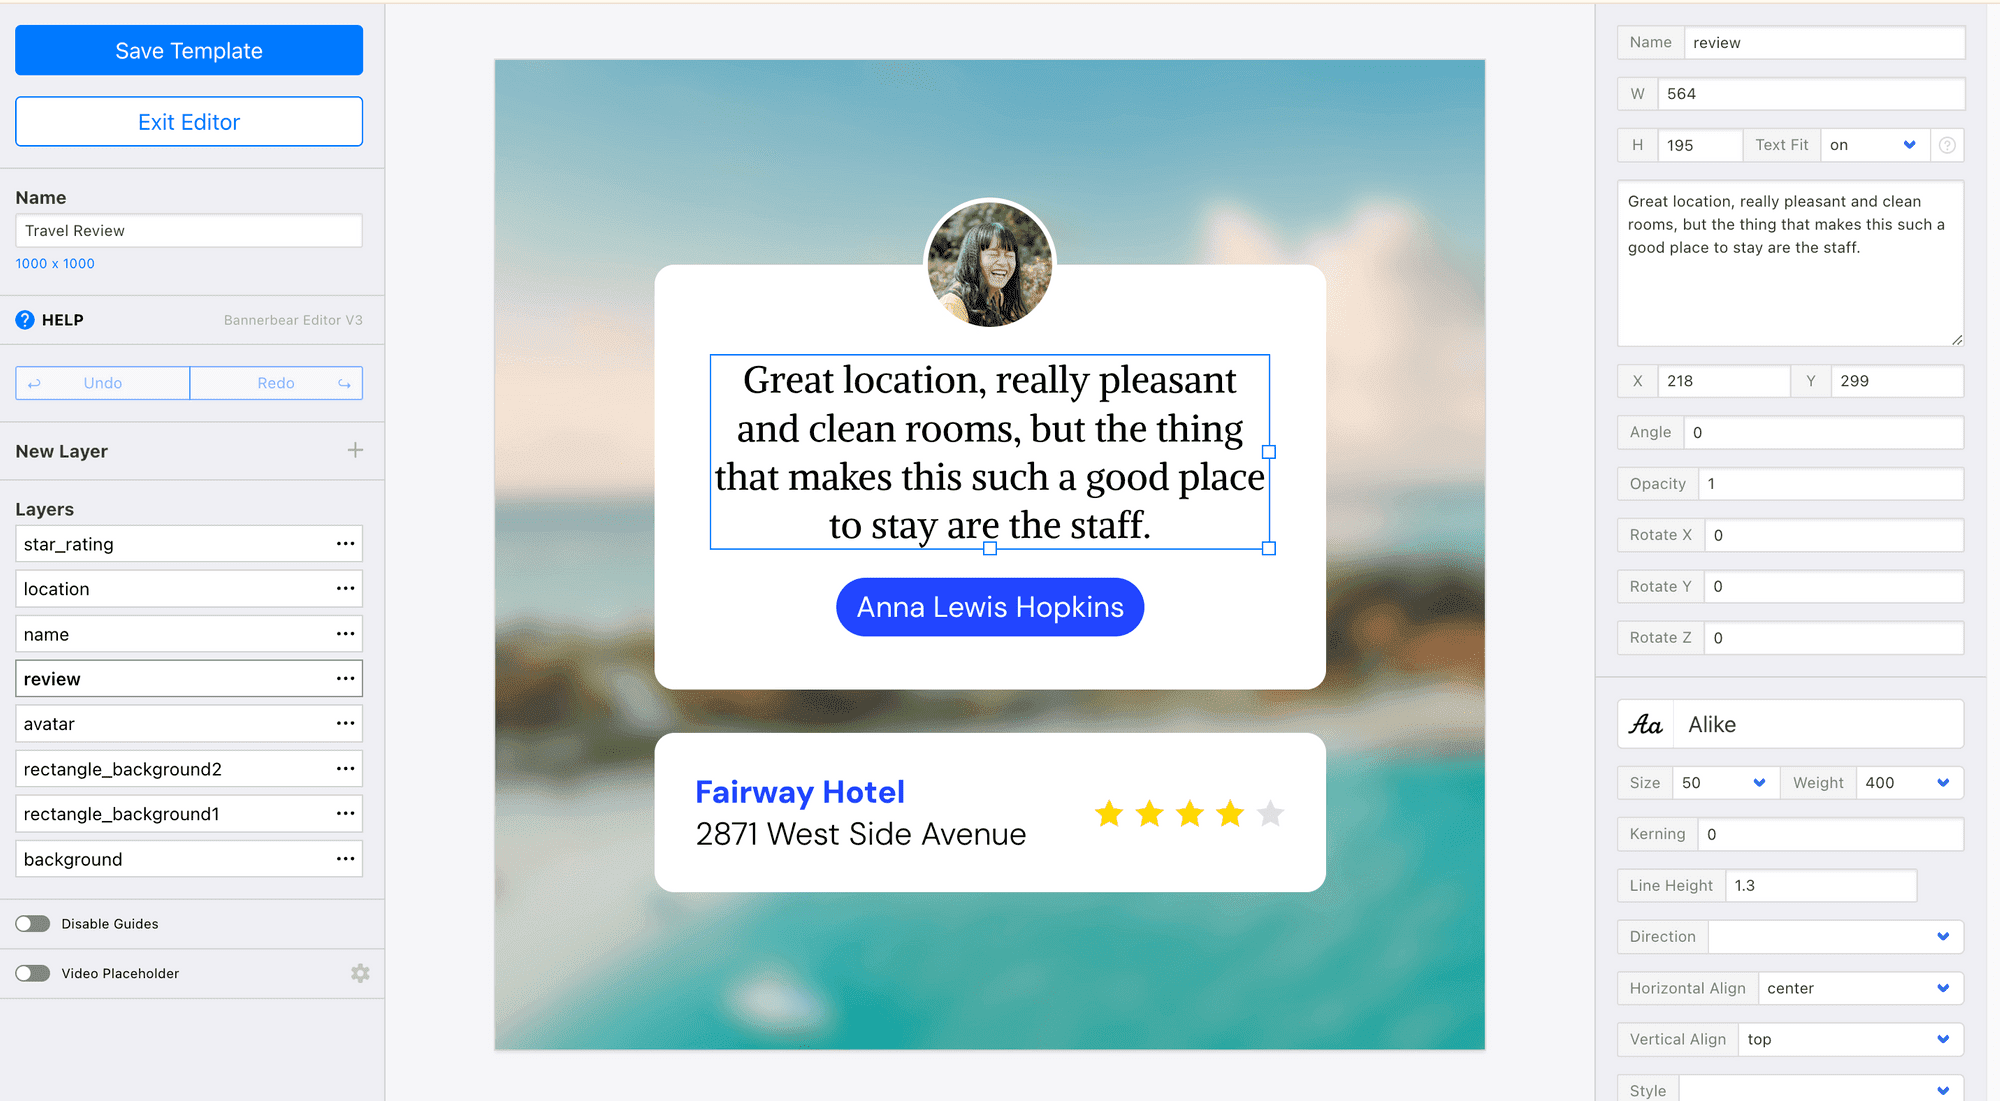
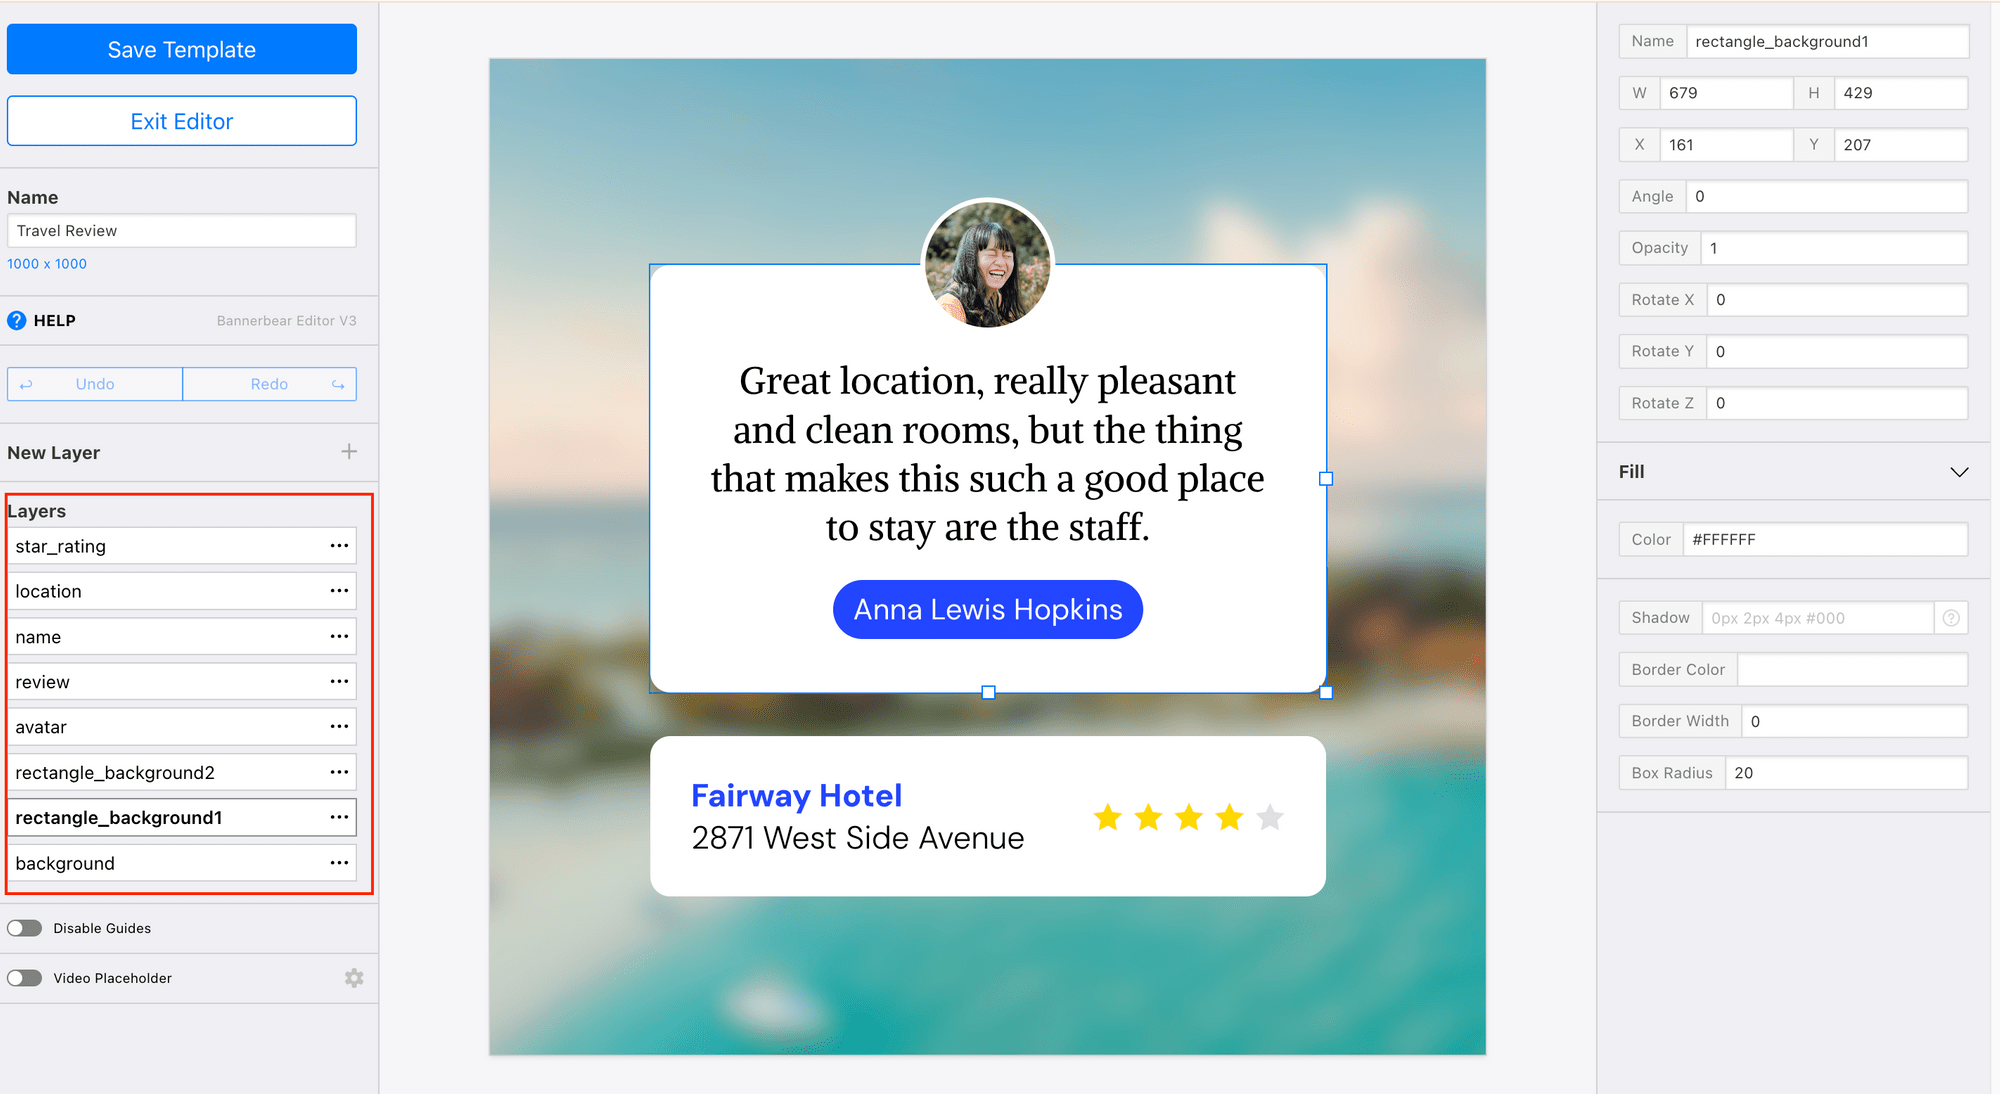
For example, you can create a design template for customer reviews, with placeholders for the review text, customer photo, star rating, and more:
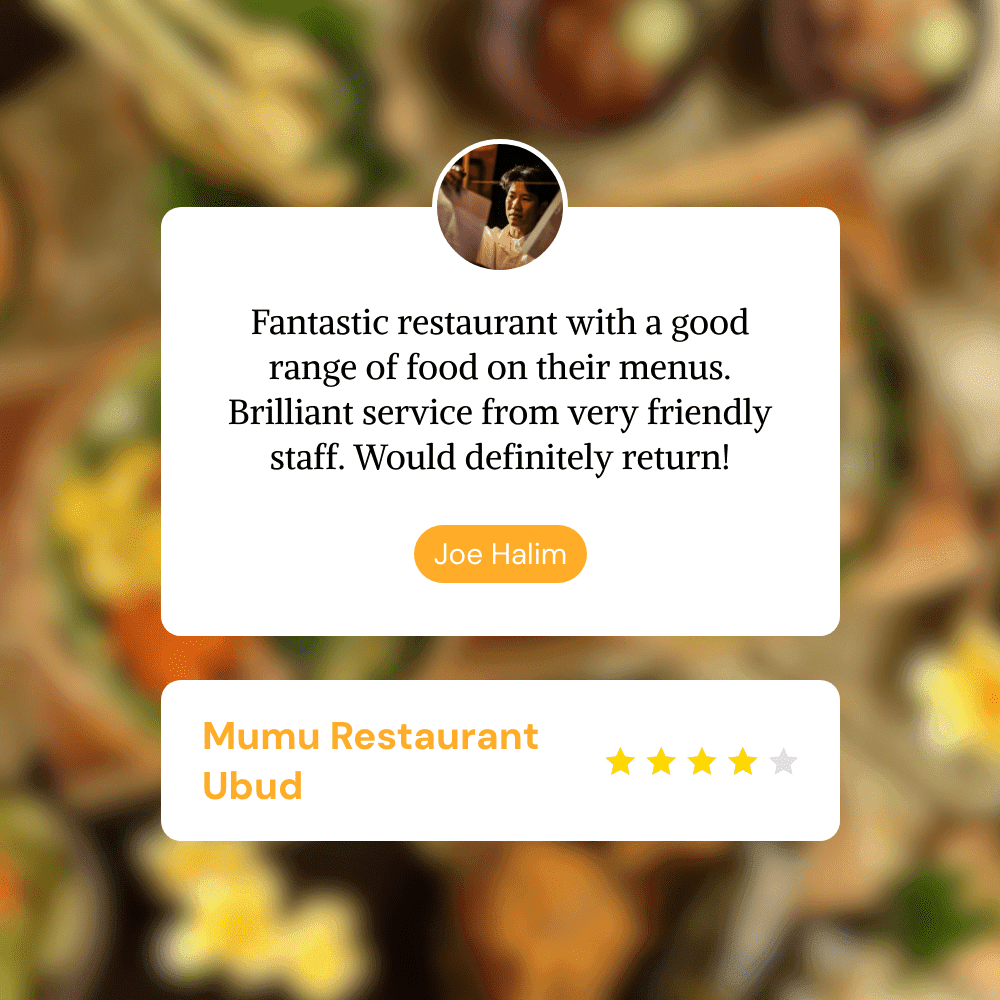
When different data is passed to the template using the API or library, it generates unique images tailored to the data. Here’s an example of how the same template can produce entirely different images based on the data provided:

Now that you have a better idea of how Bannerbear works, let’s get started with the setup!
Pre-requisites
Before we get started, let’s make sure you have the necessary tools set up:
- A Bannerbear account (sign up if you haven’t already)
- PHP 7.4 or higher installed on your system
- Composer (PHP dependency manager) installed
Once you’ve set these up, you’re ready to begin!
Creating a Bannerbear Design Template
After logging into your Bannerbear dashboard, set up a project and create a template within that project. This will give you a blank canvas where you can add layers of static and dynamic text, images, and other objects.
Alternatively, you can duplicate any template from the Template Library, including the one below (click on it to add it to your project), and customize it to meet your needs:

In the template above, we have the following modifiable dynamic objects:
- Text - review, name, location
- Image - background, avatar
- Special object - star_rating
🐻 Bear Tip: Each object has a unique name that you can use in your code to modify it later on the template. We'll go into more detail on this in the following section.
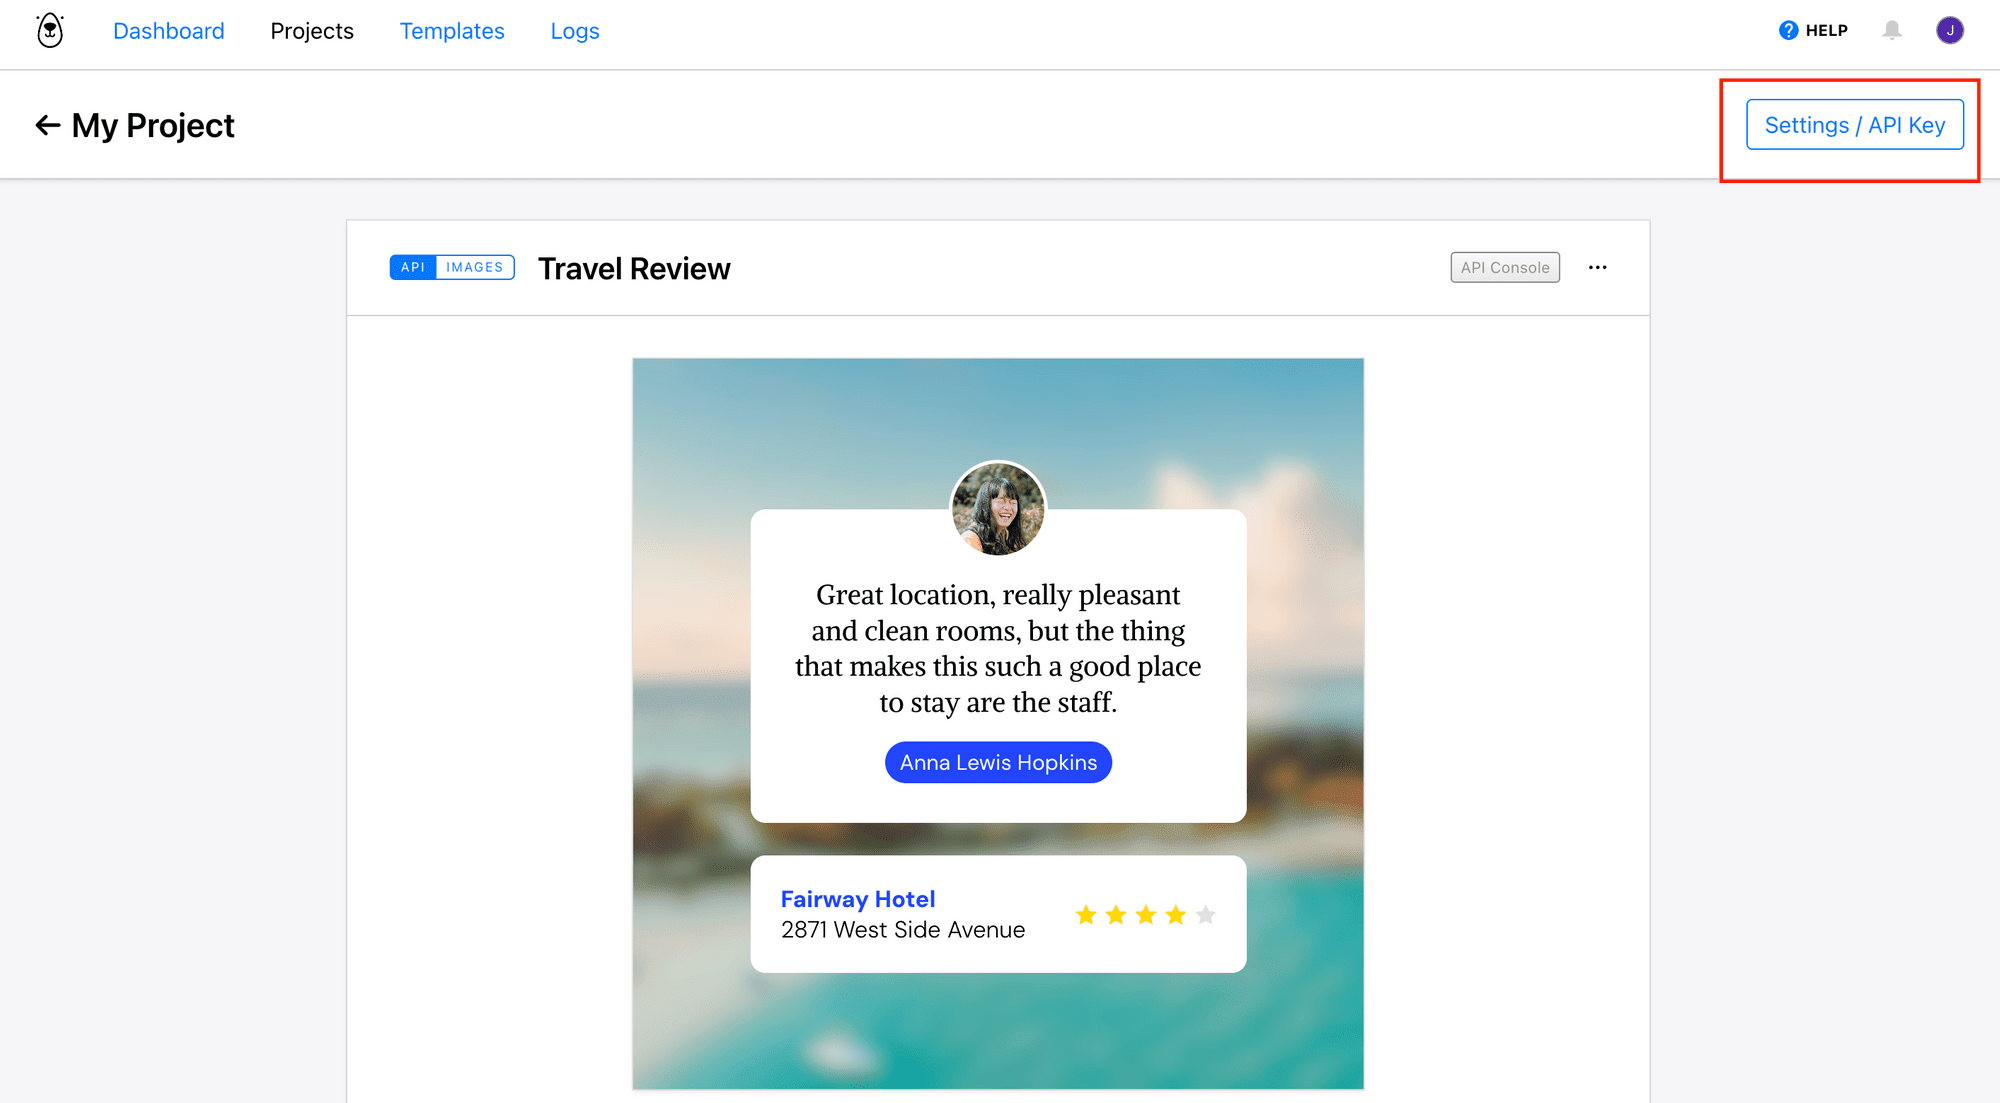
To access your Bannerbear project and the design template in your code, you need your project API key and template ID for authentication.
On your template’s main page, you should see “Settings/API Key” in the top right corner. Click on it to reveal your API key:
For the template ID, it can be found in the template option as shown in the screenshot below:
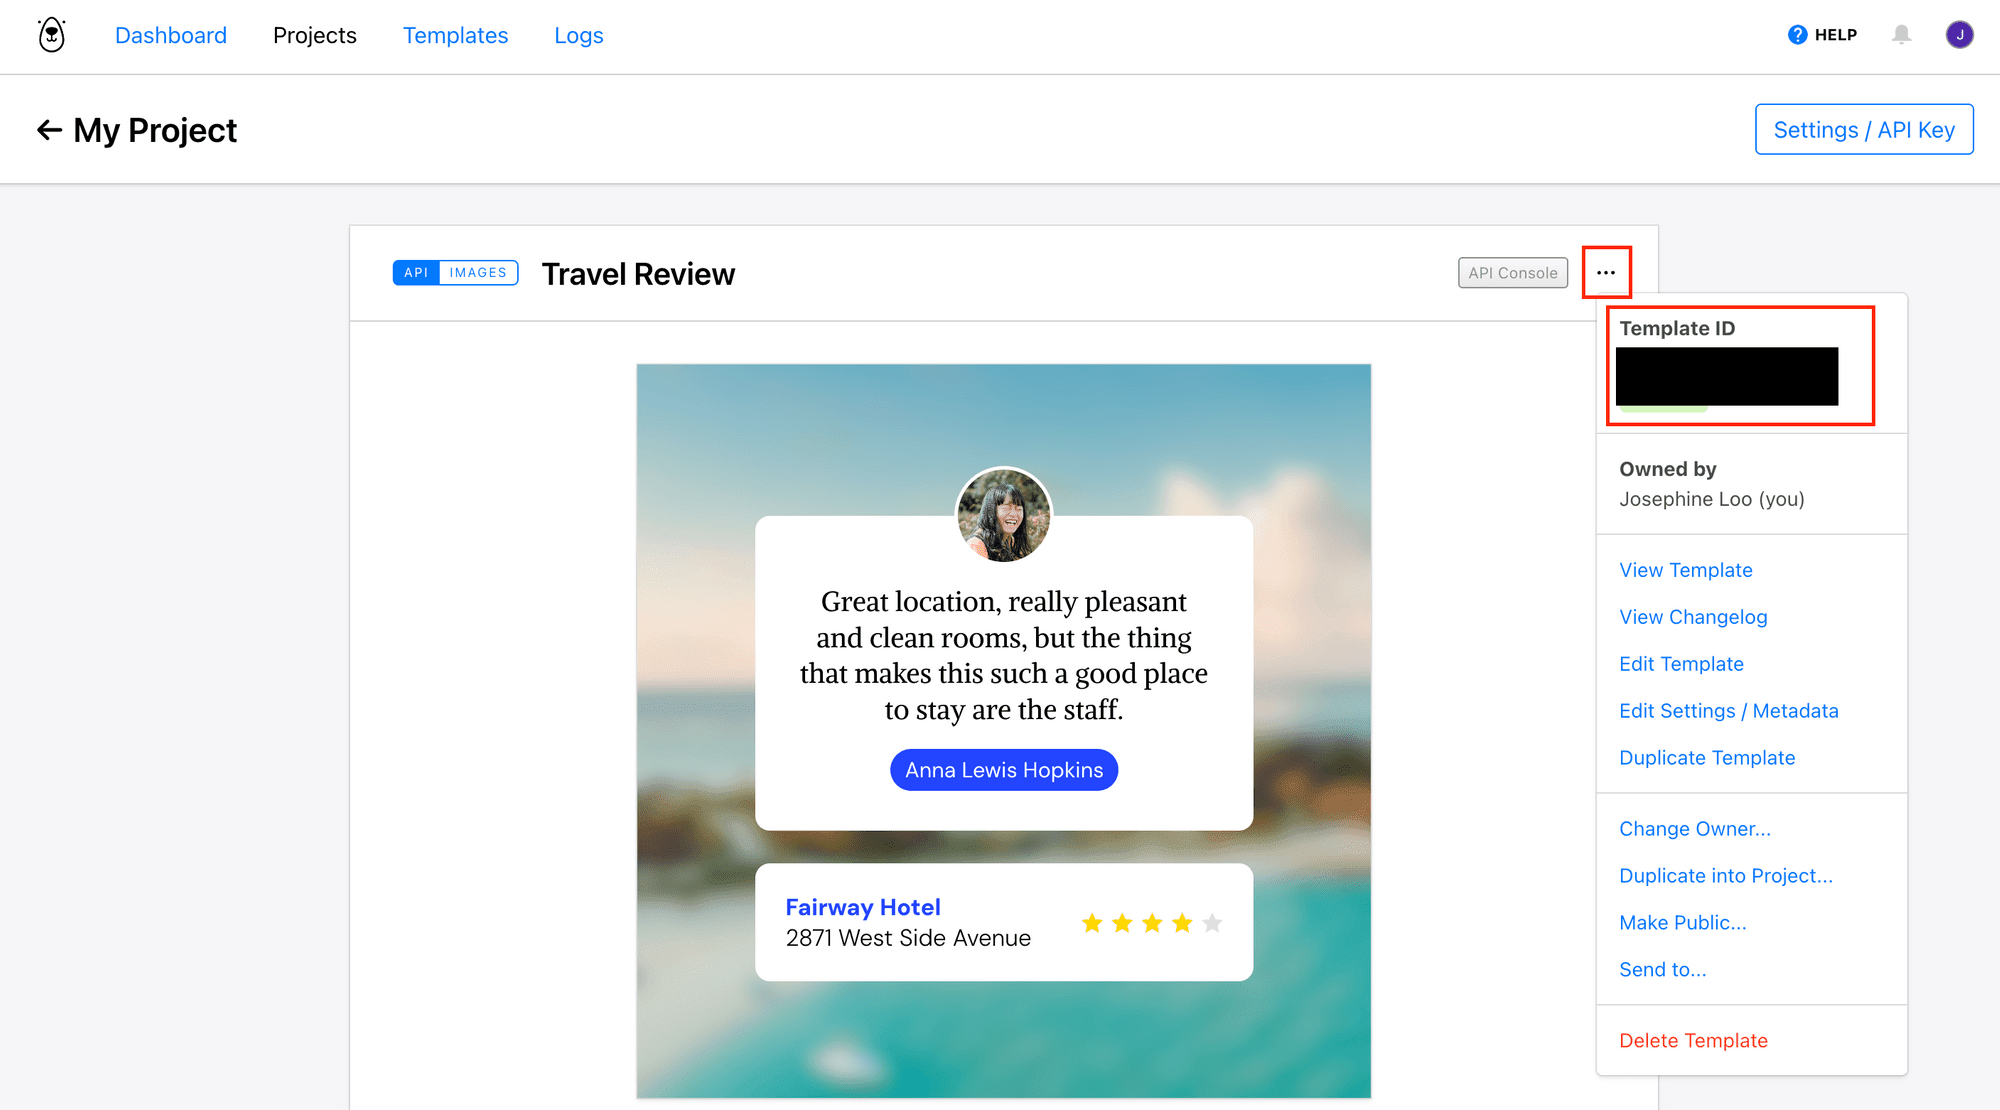
Make sure to save the API key and template ID for use in your code later.
Generating a Dynamic Image with Bannerbear in PHP
Step 1. Install the Bannerbear PHP Library
Start by installing the official Bannerbear PHP library using Composer. Run the following command in your terminal/command prompt:
composer require yongfook/bannerbear
This will add the library to your project, enabling you to interact with Bannerbear’s API easily.
🐻 Bear Tip: If your Composer is installed globally, run
php composer.phar yongfook/bannerbearfrom the same directory instead.
Step 2. Initialize the Bannerbear Client
Next, you’ll need to set up the Bannerbear client. Create a new PHP file (e.g., generate_image.php) and initialize the client as follows:
<?php

require_once('vendor/autoload.php');

$bb = new Bannerbear\BannerbearClient("your_api_key");

?>
Replace 'your_api_key' with the API key from your Bannerbear account dashboard. This key is required to authenticate your requests.
Step 3. Define Your Data
We need to prepare the data that will populate the design template. For example, let's create a customer review image with these details:
$data = [
    'modifications' => [
        [
            'name' => 'review',
            'text' => 'Their food and vibe are amazing! 5/5 stars!',
        ],
        [
            'name' => 'name',
            'text' => 'Michelle Lam',
            'background' => '#74A12E',
        ],
        [
            'name' => 'location',
            'text' => 'Mitasu Japanese',
            'color' => '#74A12E'
        ],
        [
            'name'=> 'avatar',
            'image_url' => 'https://images.pexels.com/photos/3808041/pexels-photo-3808041.jpeg?auto=compress&cs=tinysrgb&w=1260&h=750&dpr=2',
        ],
        [
            'name' => 'background',
            'image_url' => 'https://images.pexels.com/photos/343870/pexels-photo-343870.jpeg?auto=compress&cs=tinysrgb&w=1260&h=750&dpr=2'
        ],
        [
            'name' => 'star_rating',
            'rating' => 90
        ]
    ]
];
Here, name corresponds to the modifiable dynamic objects in your template, while the values are the content you want to insert.
Step 4. Generate the Image
Next, use the Bannerbear client to generate an image using your template and data, then print the URL of the generated image:
$image = $bb->create_image(
    "your_template_uid",
    $data,
    TRUE
  );

print_r($image['image_url']);
Replace 'your_template_uid' with the UID of your template.
🐻 Bear Tip: Check out the API documentation for more details on how to use the API.
Step 5. Run the Code
Let’s test the image generation by running the code. In the terminal/command prompt, run the command below:
php generate_image.php
Once the image is generated, a URL to the image will be printed. Here’s the generated image based on the data above:

This simple example demonstrates how to use the Bannerbear PHP library to generate images. You can modify the code to pull data from your own source to generate images dynamically based on the data, or even trigger the image generation based on user action. For example, whenever a new user signs up, a personalized welcome image can be automatically generated and sent to them.
Why Use Bannerbear for Dynamic Image Generation
Automating image creation with Bannerbear offers several advantages, including:
- Save time - Bannerbear’s API automates the image generation process, freeing you up to focus on other important tasks.
- Maintain brand consistency - Consistently apply your brand’s style across all generated media using templates.
- Enhance user engagement - Personalized images based on user actions or preferences increase the sense of exclusivity, leading to enhanced user experience and engagement.
- Easy integration - Bannerbear’s PHP library makes it easy to integrate dynamic image generation directly into your app.
This tutorial covered the basics, but there's so much more you can do with Bannerbear. For example, you can generate images from multiple templates using the same data in a single API call, get notifications when your image generation is complete, create dynamic images on-demand through URL parameters, and more. If you haven’t already, sign up for Bannerbear today and try them out yourself!
