
How to Generate Bannerbear Images with Make.com
Contents
Bannerbear is a powerful way to create dynamic, customizable images. However, getting started with a new tool can be a bit daunting. There are several ways to trigger image generation, including the API console, Forms, and Airtable. While all of these options are nocode-friendly, they’re more suitable for on-demand image creation. For use cases involving multiple apps and a completely hands-free trigger, workflow automation platforms are more helpful. These platforms allow you to streamline the image generation process and integrate it seamlessly with your existing workflows.
In this guide, we’ll walk you through the process of generating your first image using the popular nocode workflow automation platformMake. By the end, you'll have the knowledge and confidence to integrate visual content generation into your workflows.
Generating Your First Bannerbear Image with Make
Generating your first Bannerbear image withMake is easy when you know what to expect. If you’re familiar with the Make platform and the way Bannerbear’s APIs work, you can go from zero to image in minutes! Even if you don’t, this guide is here to help you out.
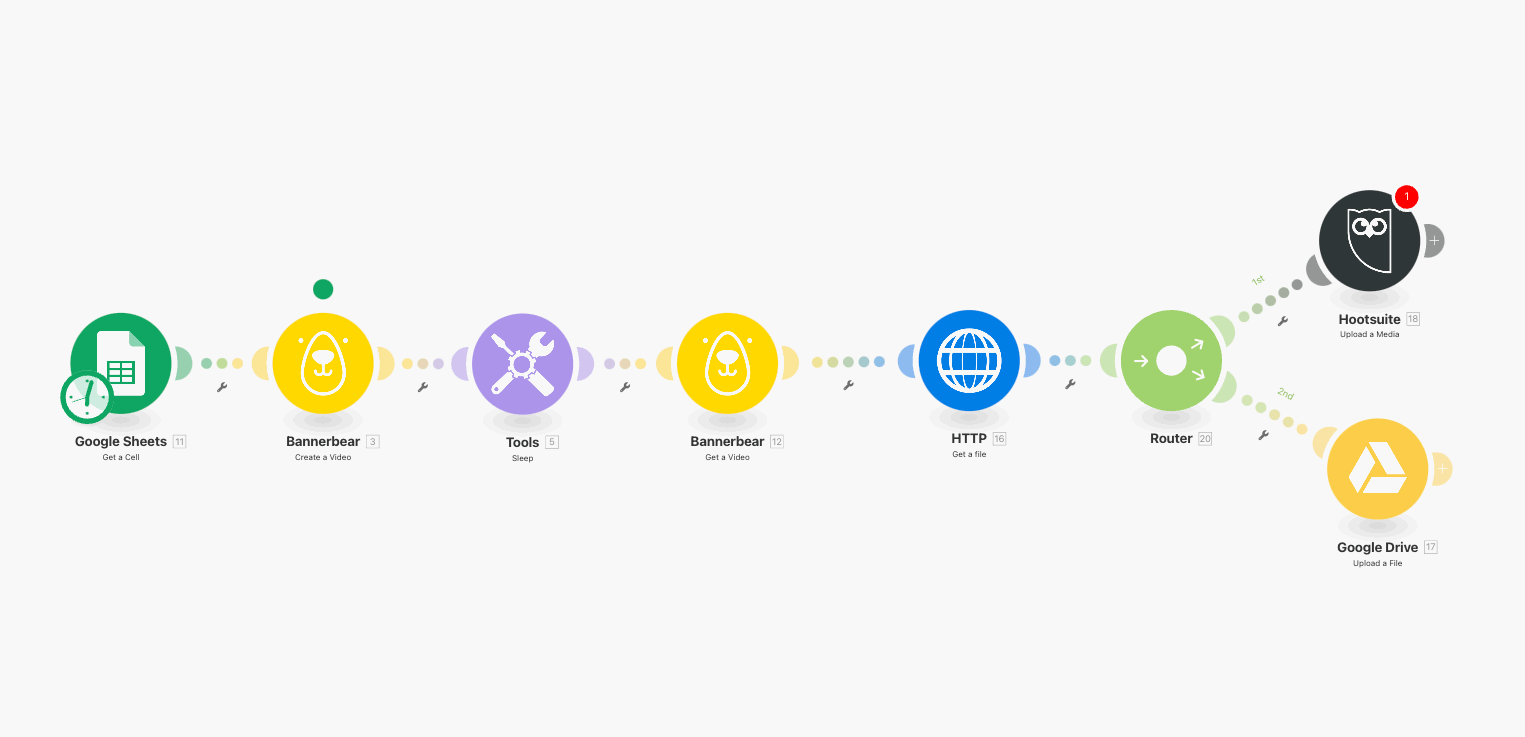
Make’s visual builder gives you an easy overview of connected apps, flow, data manipulation, and more. To make image generation a part of your workflow, you essentially need a data source module and an image generation module. Each time the scenario is run, data will be produced or retrieved. Later in the process, Bannerbear generates an image. The workflow can be as simple or complex as you want.
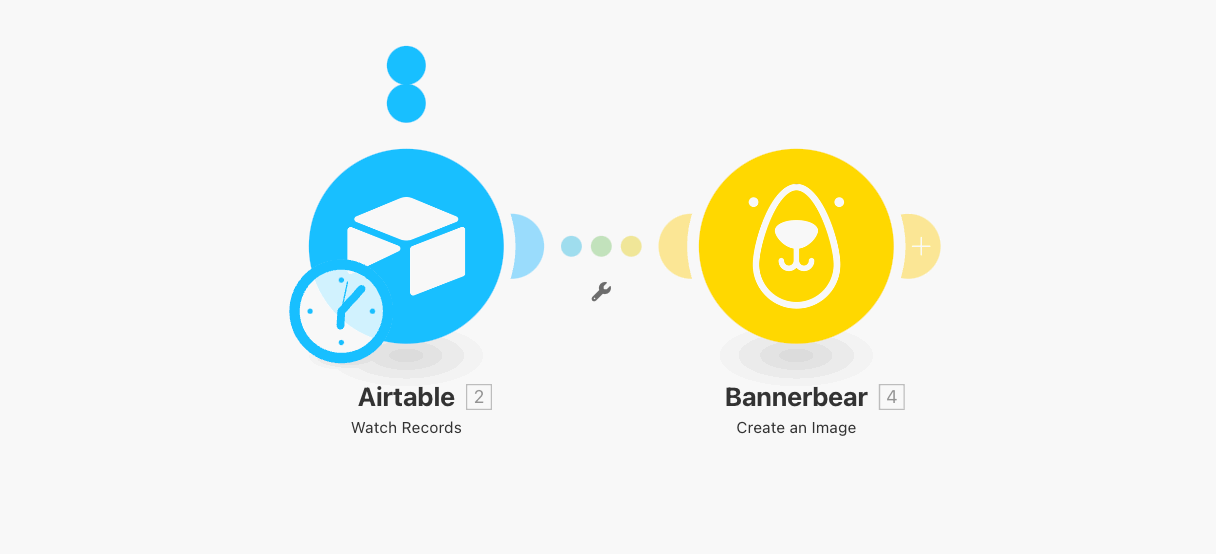
This tutorial will use Airtable as the trigger and data source, then generate an image with Bannerbear. Here’s what you’ll need to do:
Step 1. Create a New Scenario
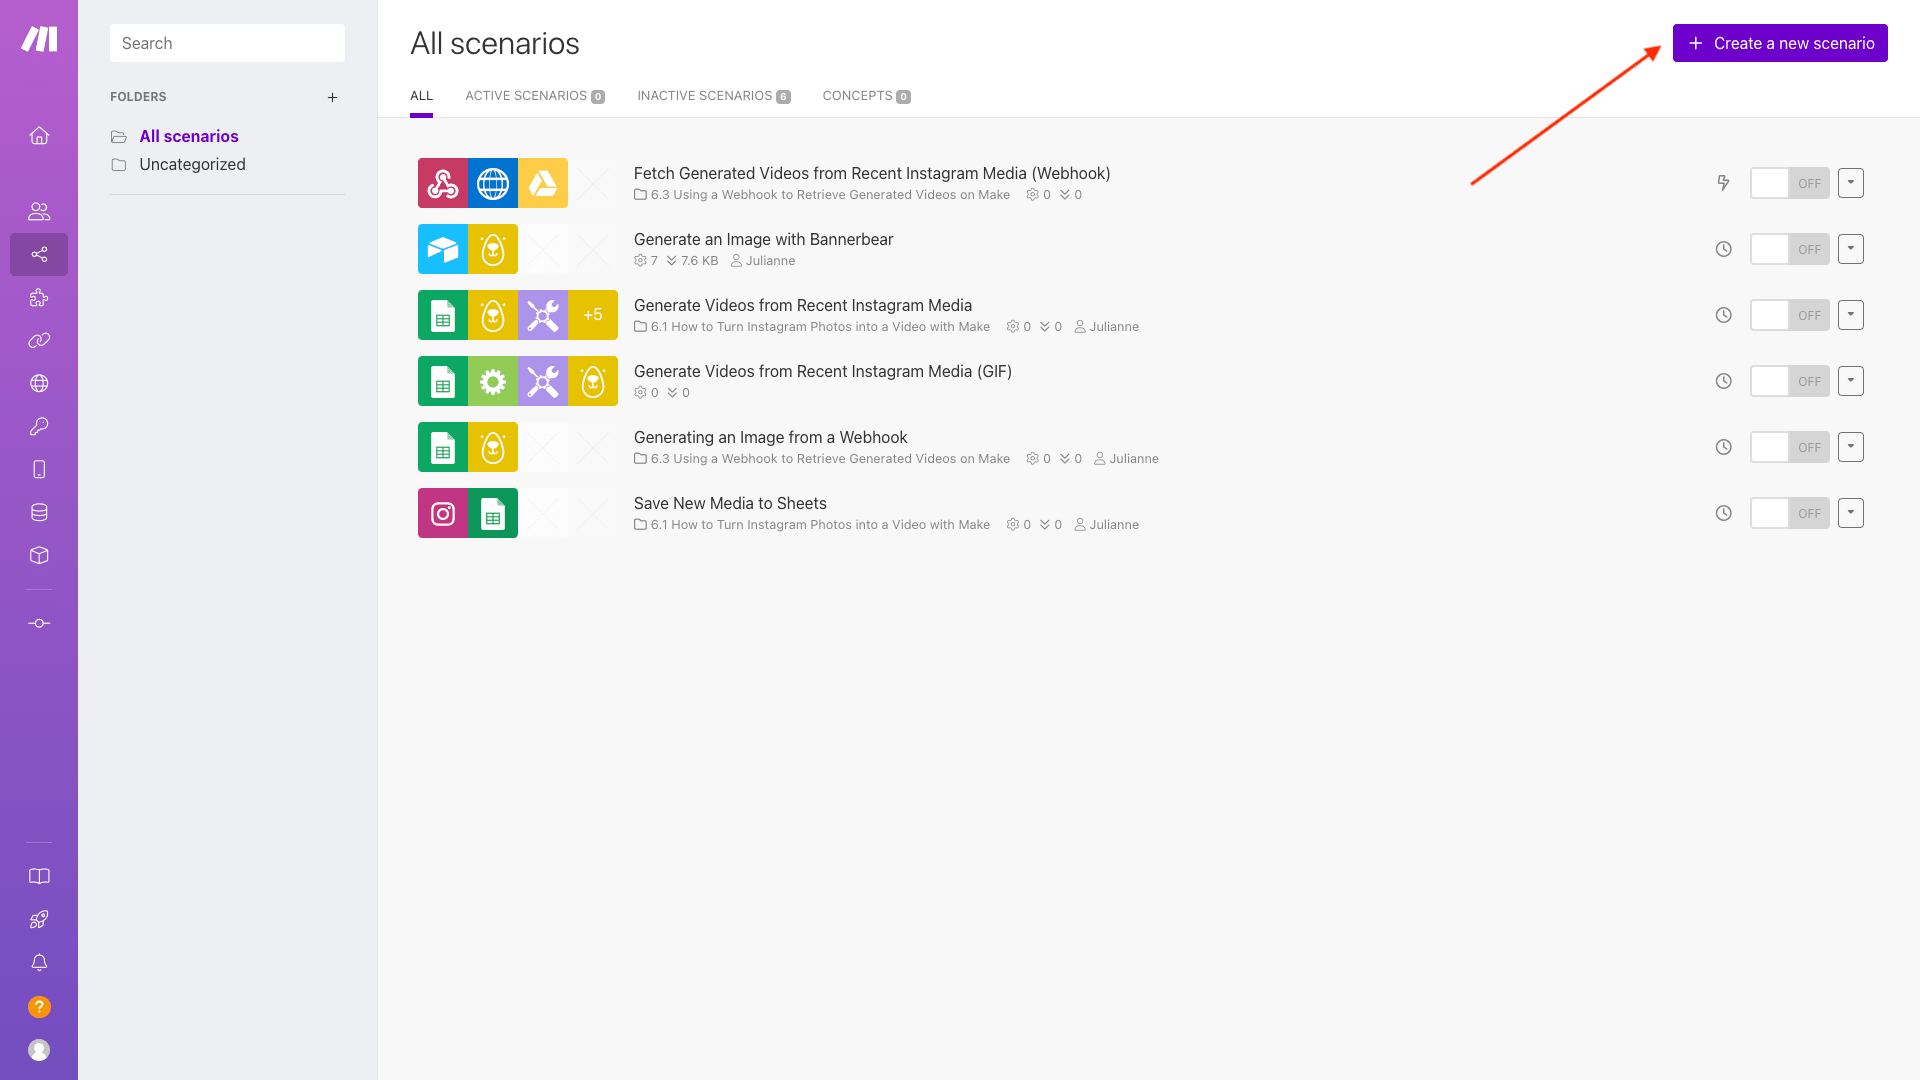
Before you can start generating images, you’ll need to create scenario. Log into your Make account, then navigate to the Scenarios tab. Click + Create a new scenario.
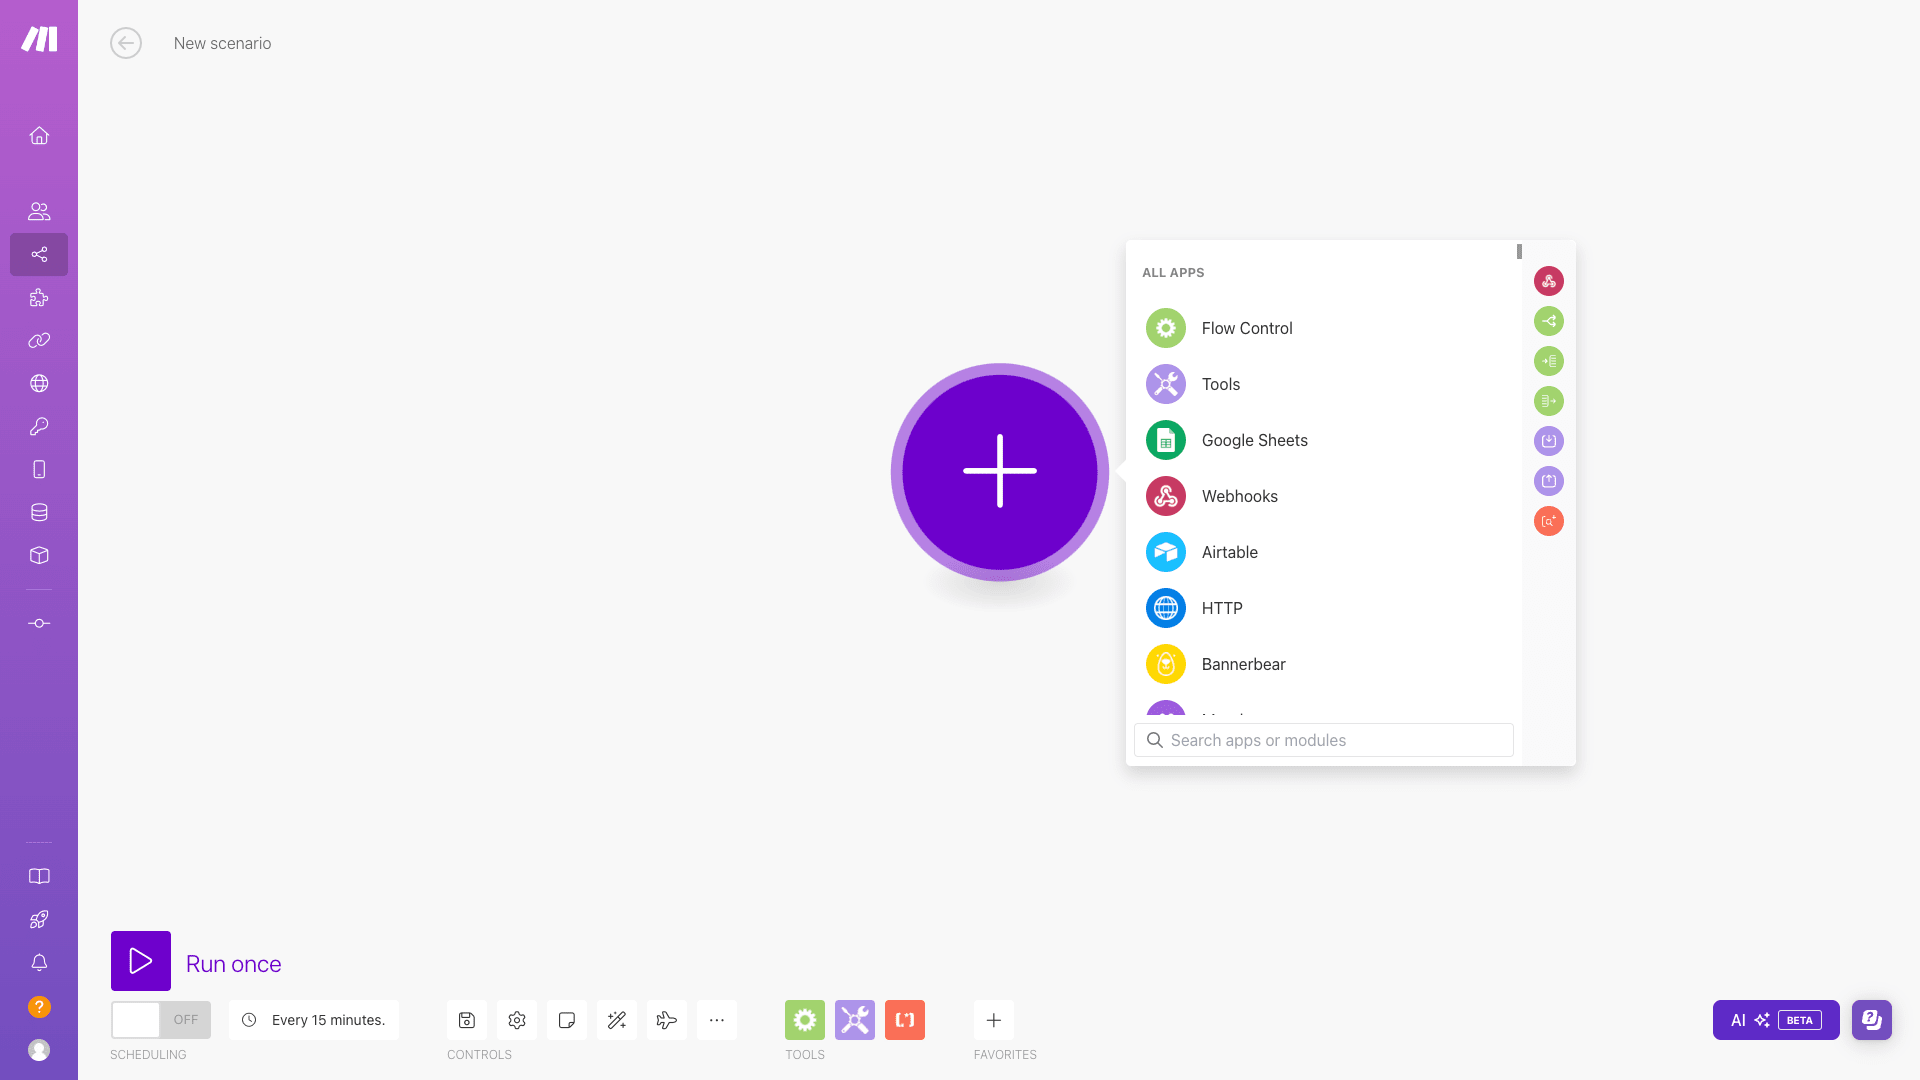
You should now be on the visual workflow builder page, where you can add new modules, set up the actions, add filters, and control your flow.
Step 2. Add a Data Source Module
Make scenarios are triggered on a schedule, and you can edit the frequency on the editor page. That means your first module can be any app—but if you're generating dynamic images, this most likely means you'll need a data source that feeds new input to Bannerbear.
The first module in this example will be Airtable. We’ll be monitoring a view for new records, and when they’re added, the rest of the process will be kicked off.
Click the + button, and insert Airtable. If you haven’t connected the app yet, you’ll be prompted to do so using OAuth or a Personal Access Token.
Select the Watch Records action, then select the base, table, trigger field, and view for the trigger you want to use.

Keep in mind that any Airtable bases monitored with this action will need a Created Time or Last Modified Time field to act as a trigger.
Step 3. Create a Connection to Bannerbear
The module to create a new Bannerbear image can come at any point in the scenario after the source data has been acquired.
Click the + button to add a new module, and insert Bannerbear. Select the Create An Image action.
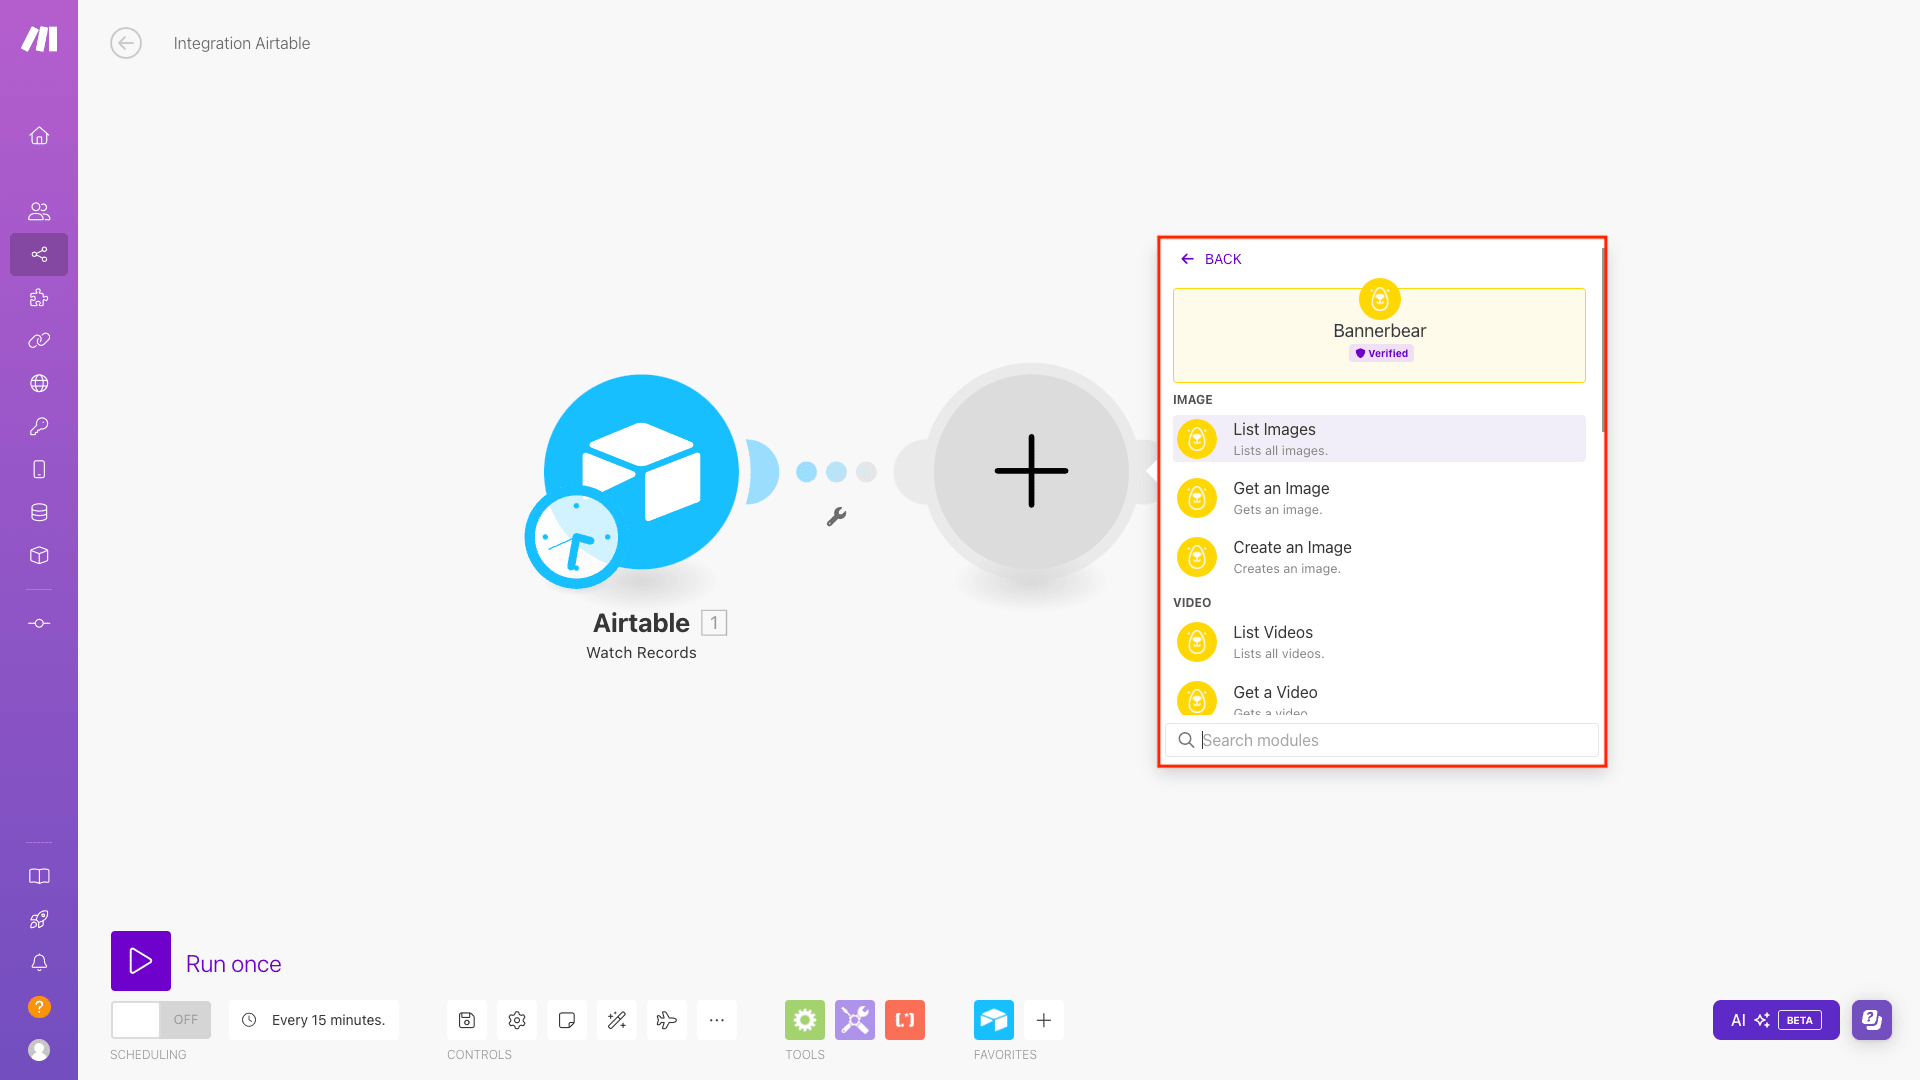
You’ll now have to add a connection to your project. Click Add. Insert the API key found on the Settings / API Key page of the corresponding project on the Bannerbear app. You can also name the connection to make it easier to identify later on.

Bear Tip 🐻: Image actions you can access in Make include List Images , Get An Image , and Create An Image. There also other API endpoints for videos, collections, GIFs, movies, and more!
Step 4. Select Your Template
Now, you can start setting up the module. Each project contains one or more templates. If you’ve successfully connected it, you should now be able to click on the Template IUD dropdown menu and select your template from the list.

Step 5. Insert Modifications
Bannerbear lets you modify your image APIs in many ways—beyond text or image content, you can also change colors, backgrounds, font types, alignment, and more. You’ll see all of these options listed under Modifications.
To modify a field, click an Item and insert the layer’s name. This can be found by referring to your Bannerbear template.

Map any dynamic modifications such as text or image links to their corresponding template fields.

Repeat this step for as many items as needed.
Bear Tip 🐻: Using identical labels for corresponding items on Airtable and your template will make it easier to map the fields to each other when setting up modifications.
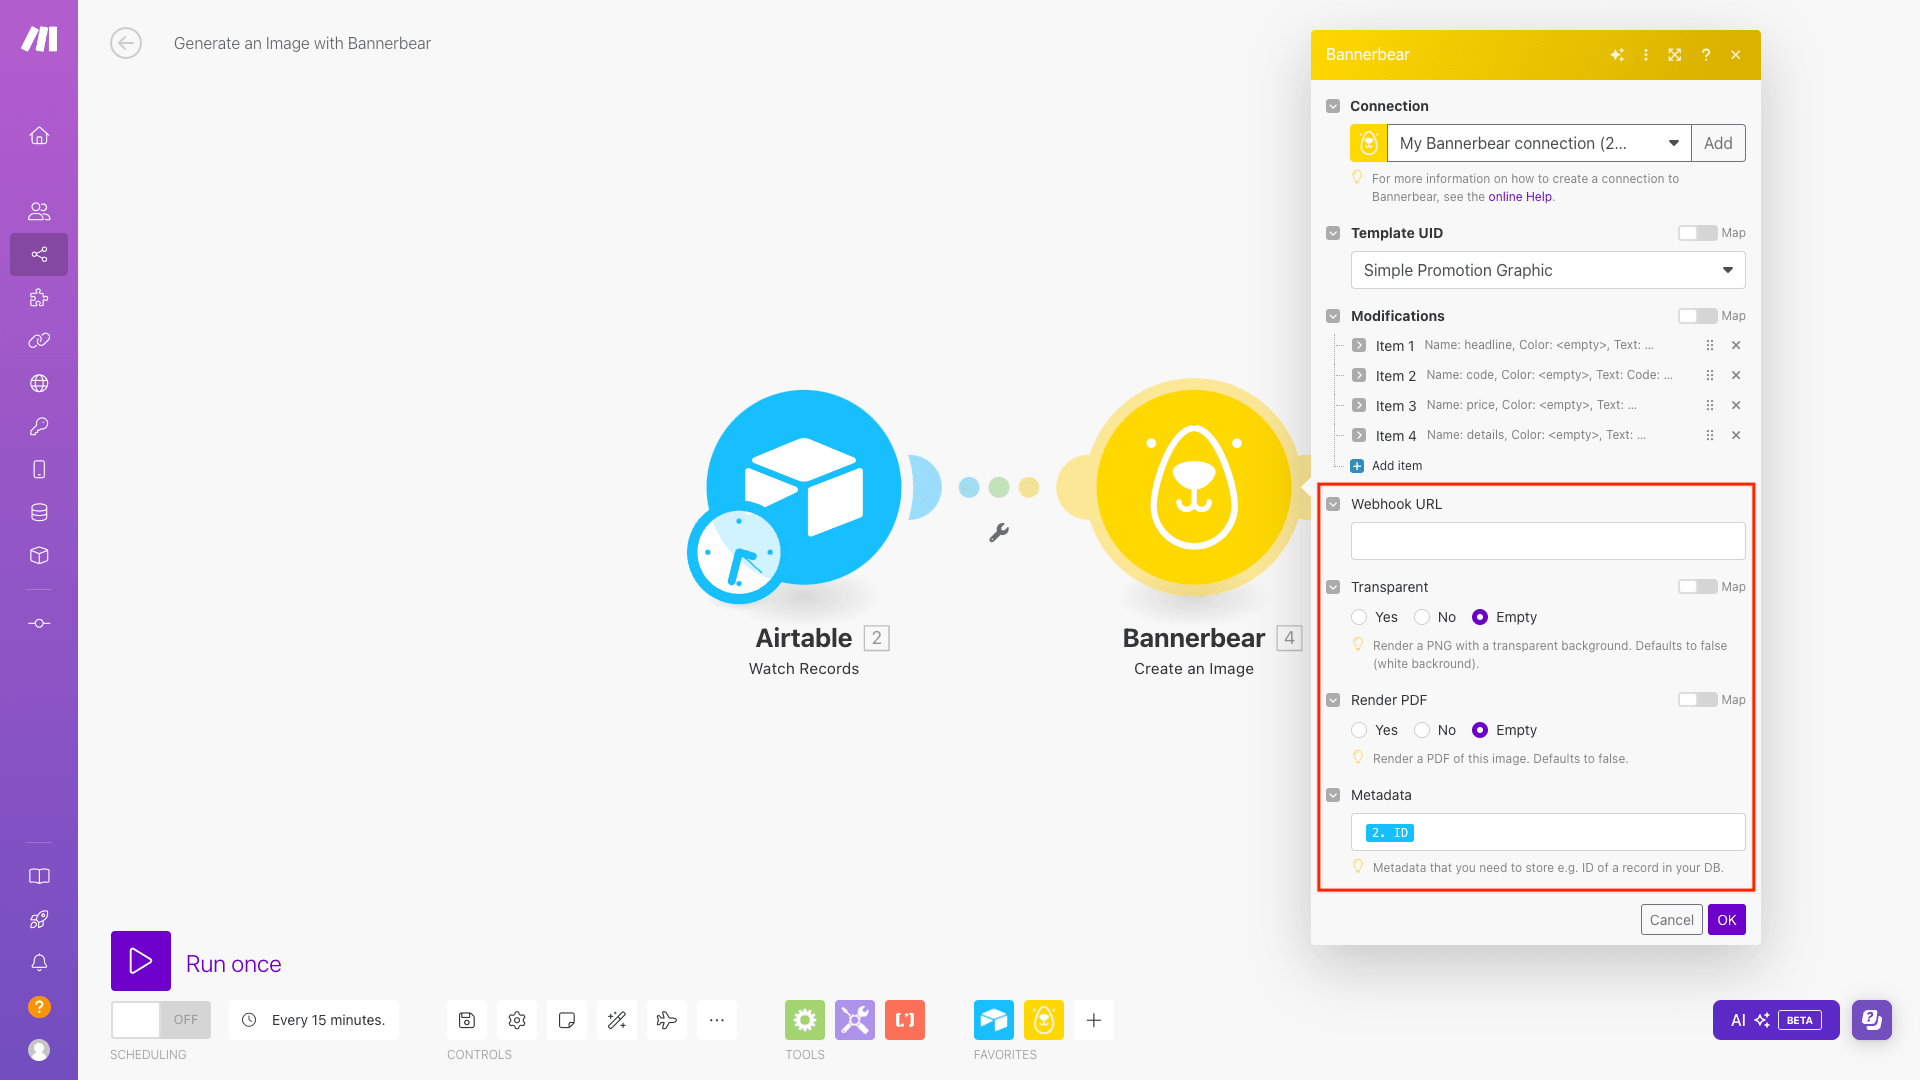
Step 6. Change Any Other Settings
Your image generation step is almost complete! All that’s left is to change any other settings you might need for your use case, such as:
- Adding a webhook URL
- Toggling a transparent background
- Rendering a PDF
- Saving metadata with the generated image
You can also rename your scenario, make changes to the schedule, and adjust the entire scenario settings.
Once you’re all done, click OK.
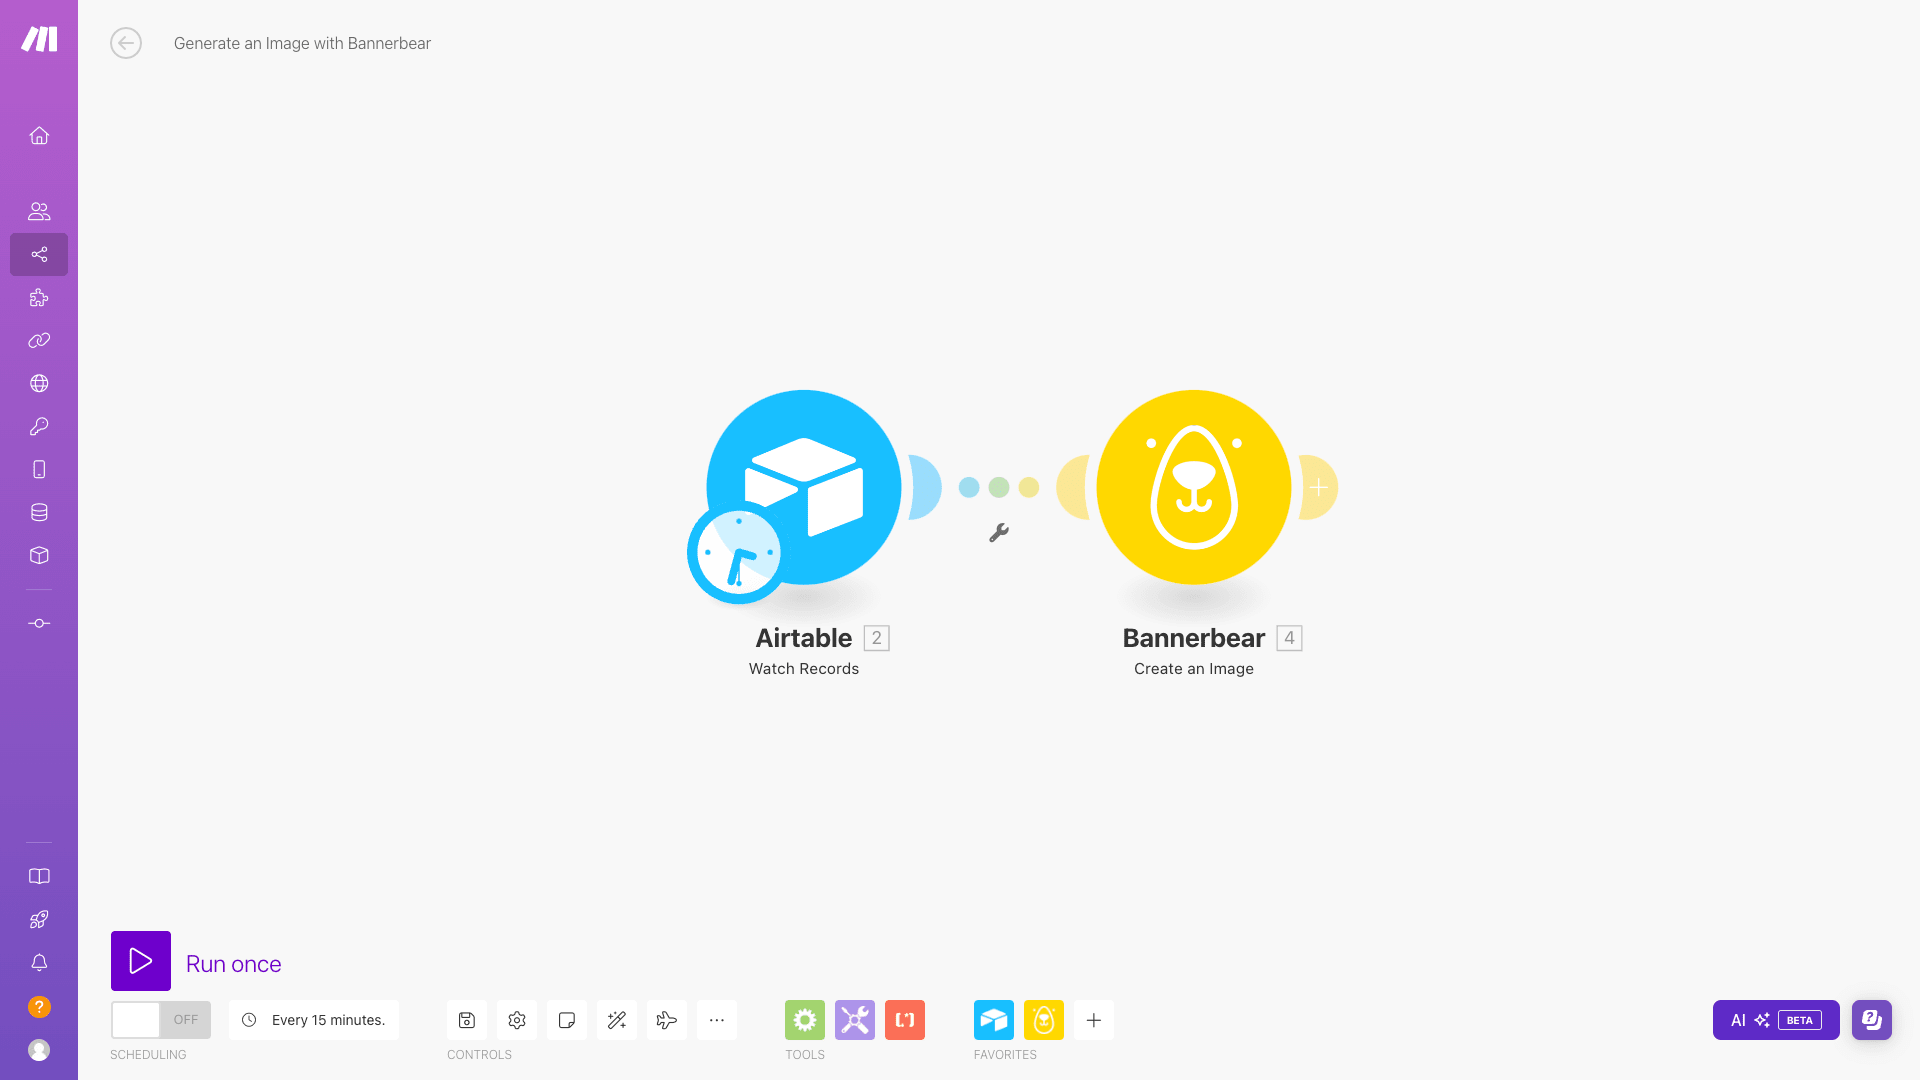
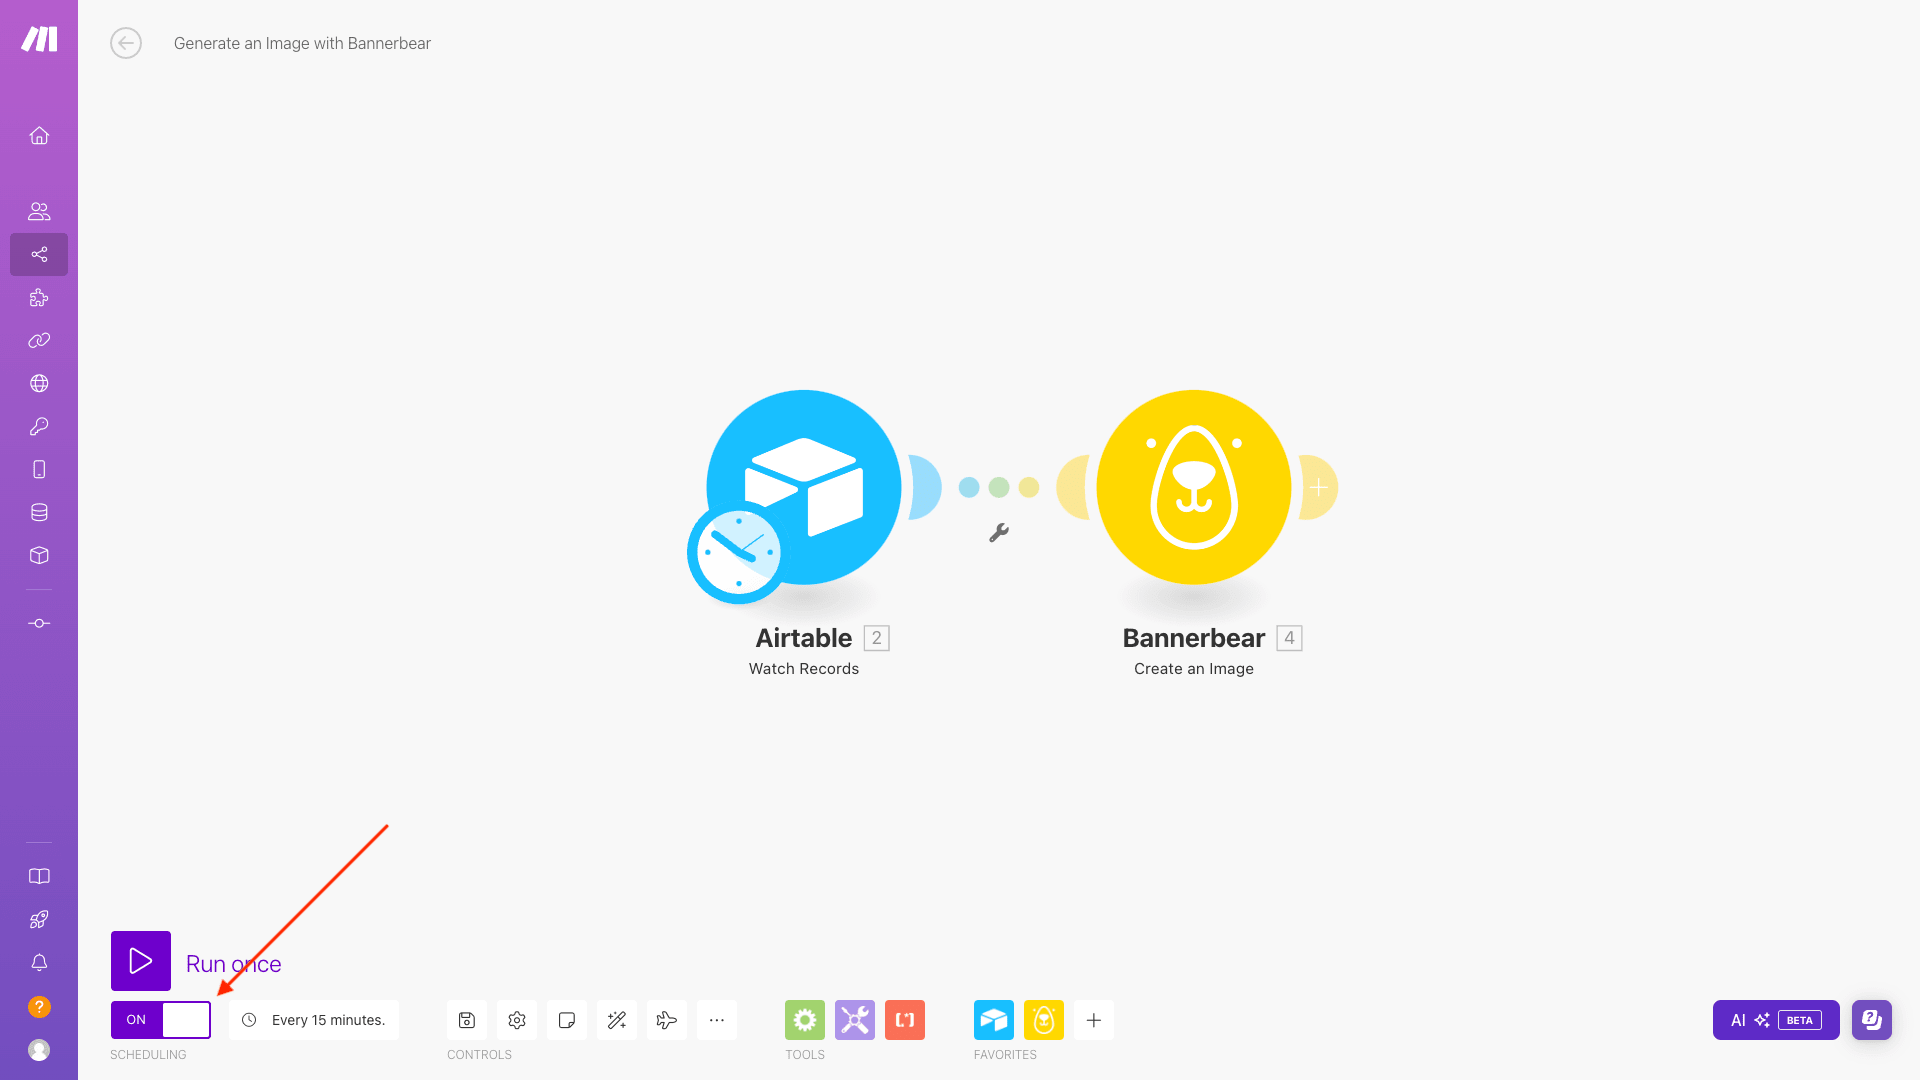
At this point, you should be able to see your full scenario.
Click Run Once to test it. A successful scenario run will show in the log on the bottom right corner.
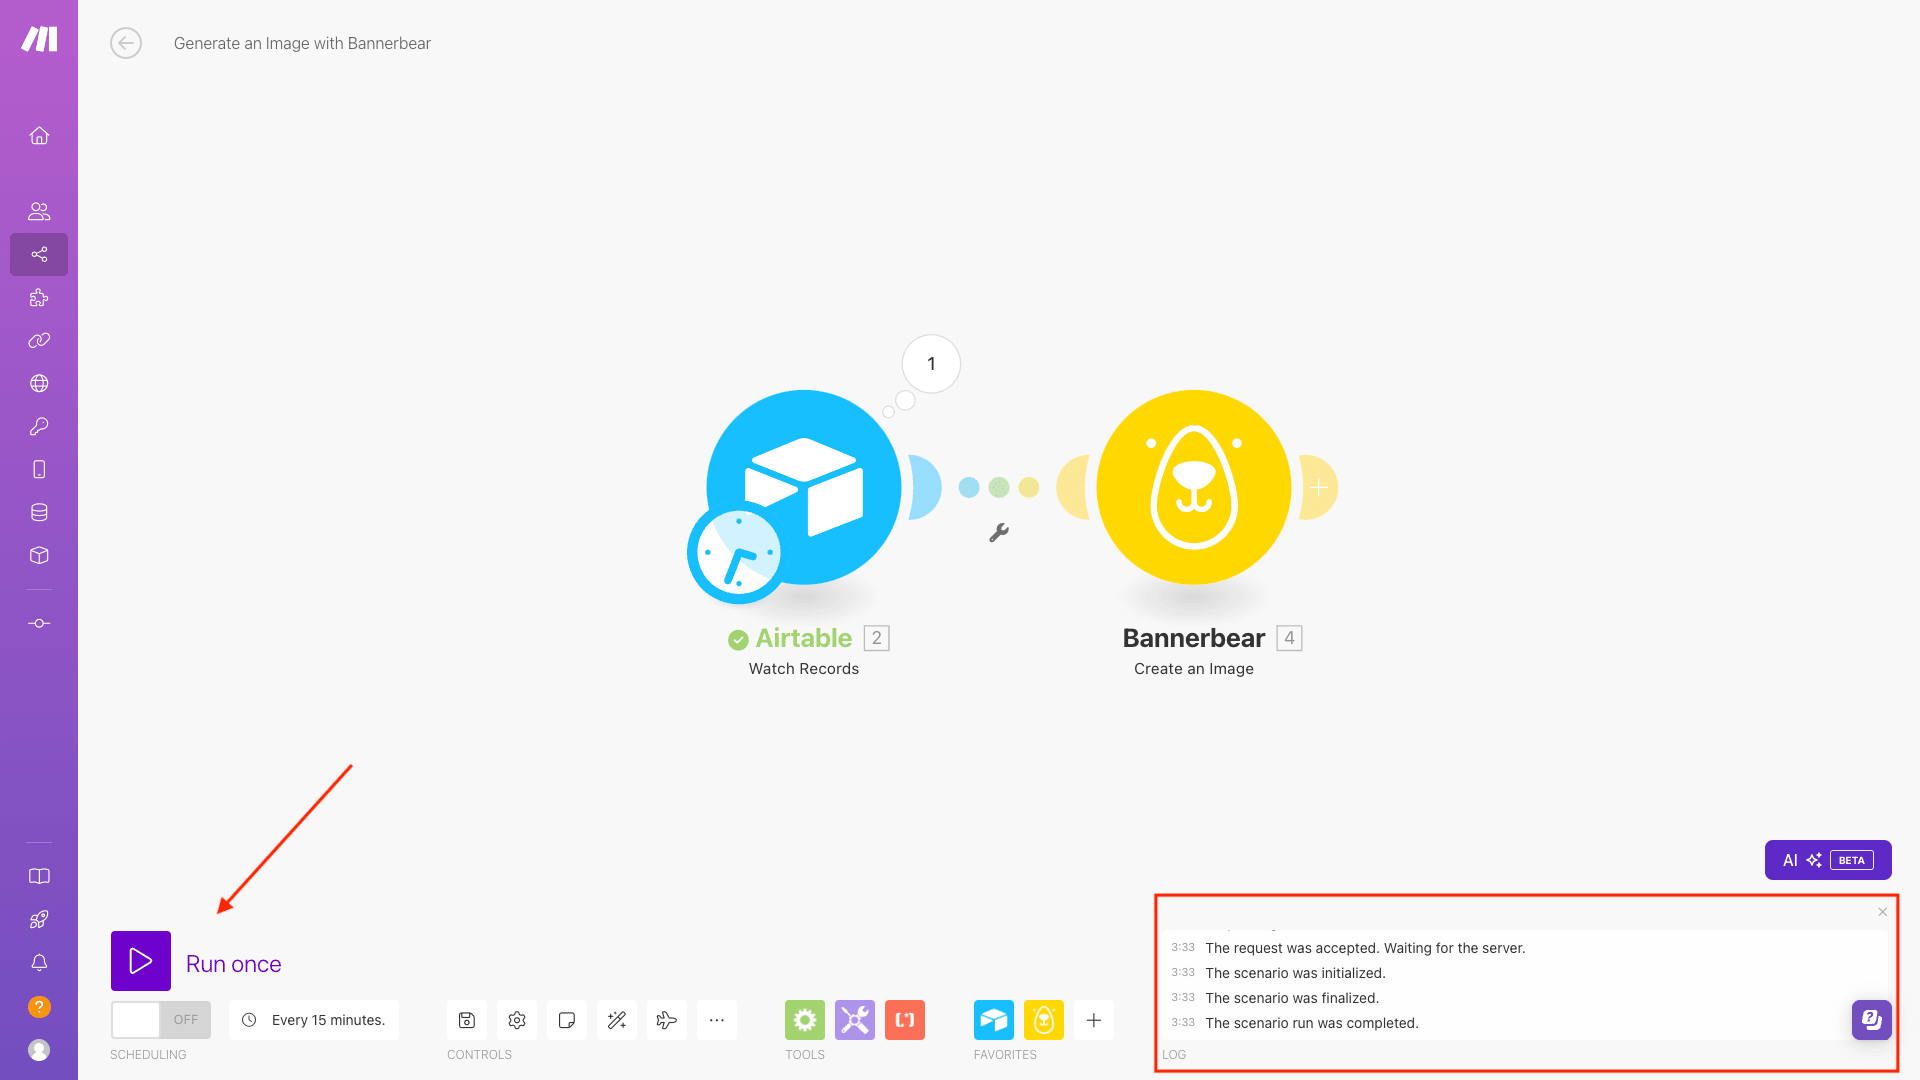
If you’re happy with your automation, toggle the Scheduling to take it live!
Automatic Image Generation with Make
Integrating Bannerbear image generation into your Make scenarios is a powerful way to automate visual content creation. By setting up a simple trigger and connecting your data sources, you can generate customized images on-demand or on a schedule. This allows you to seamlessly incorporate dynamic visuals into your applications, marketing materials, and more without the hassle of manual image editing. Give it a go for yourself!
