
How to Generate and Save Images On-demand in Airtable
Contents
In today's fast-paced digital environment, the ability to create images quickly and precisely has become a critical skill for businesses and creators alike. Digital tools are evolving, and the gap between technical capability and creative expression is narrowing in response. The most effective approach often combines technological efficiency with human creativity, particularly for on-demand use cases that require greater control.
While full automation works well for predictable design tasks, this article explores a flexible method that combines Bannerbear’s capabilities with Airtable. We'll show you how to enable the Scripting extension, which allows you to generate and save images directly in your database with a single button click.
Why Generate Images On-Demand?
PNG (Portable Network Graphics) and JPG (Joint Photographic Experts Group) are versatile, widely supported file formats that compress graphic details down to make them easy to store and use. Since they’re compact, they’re ideal for many automation use cases where storage is less of an issue.
Even so, there are situations where on-demand image generation is preferred, such as when:
- Human judgment of context is helpful
- Data or design needs to be very precise
- Graphics are used as they are created
- Data is sporadically changing
Creating images as needed allows you to maintain greater control over graphic production and adjust your approach as you go.
What You Will Create
Generating images with a button within your Airtable base allows you to control image creation while enjoying the efficiency of automatic generation and storage.
The tools you will need to set up the workflow are:
- Airtable : To store data and attached files
- Bannerbear : To design templates and generate images
Bear Tip 🐻: You will need a paid Airtable plan to access Extensions.
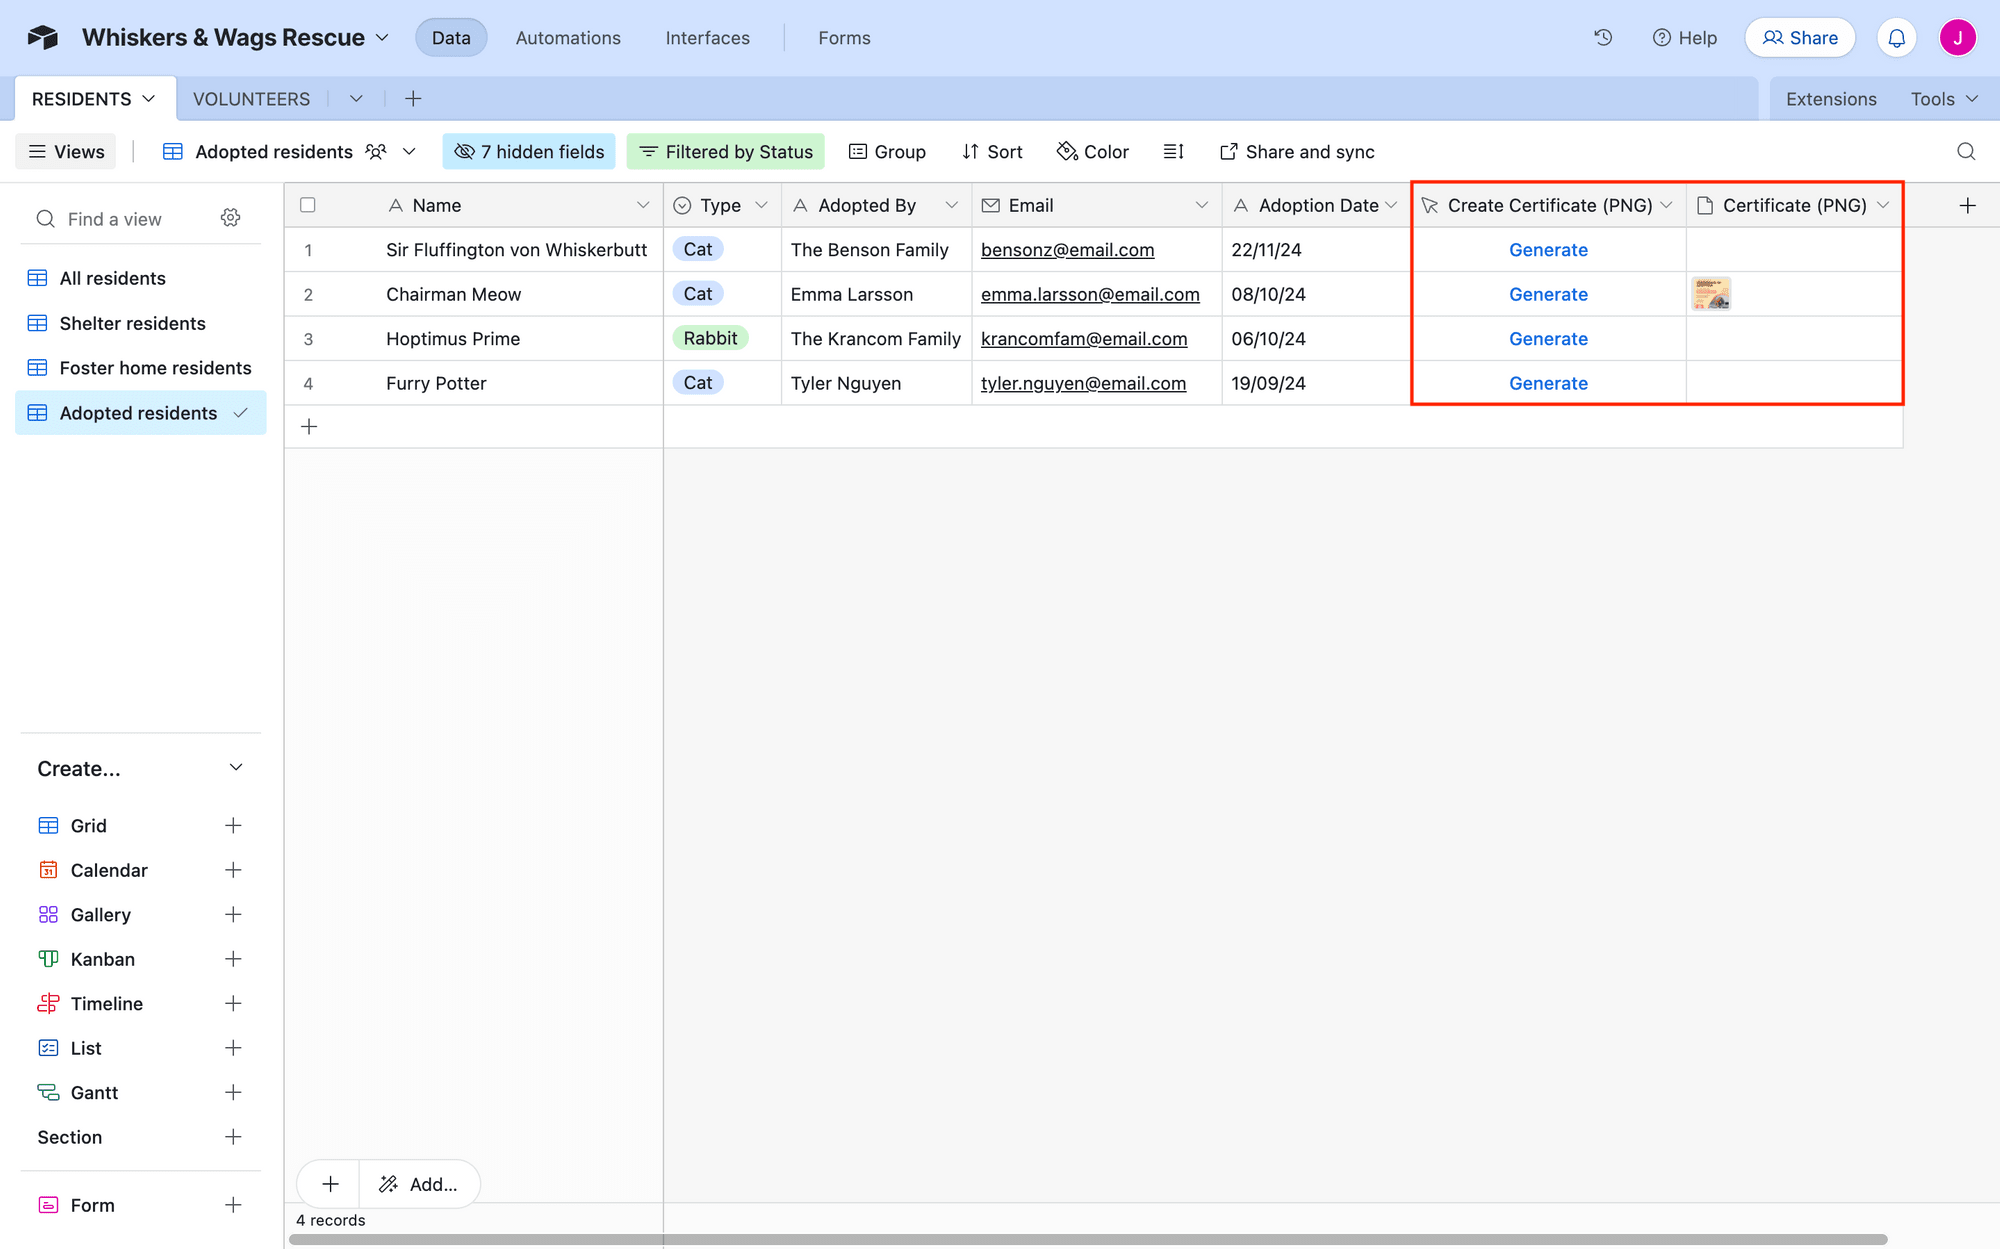
By the end of the tutorial, you should have an Airtable base with buttons that can be clicked to generate and store images.

Let’s get started!
How to Set Up a Button to Generate Images in Airtable
The Scripting extension enables you to generate Bannerbear images directly within Airtable, eliminating the need to switch between apps. With a single button click, you can instantly create an image that’s stored and ready to use.
We'll configure your Airtable base, then use the Scripting extension to integrate Bannerbear and create a streamlined button-triggered workflow.
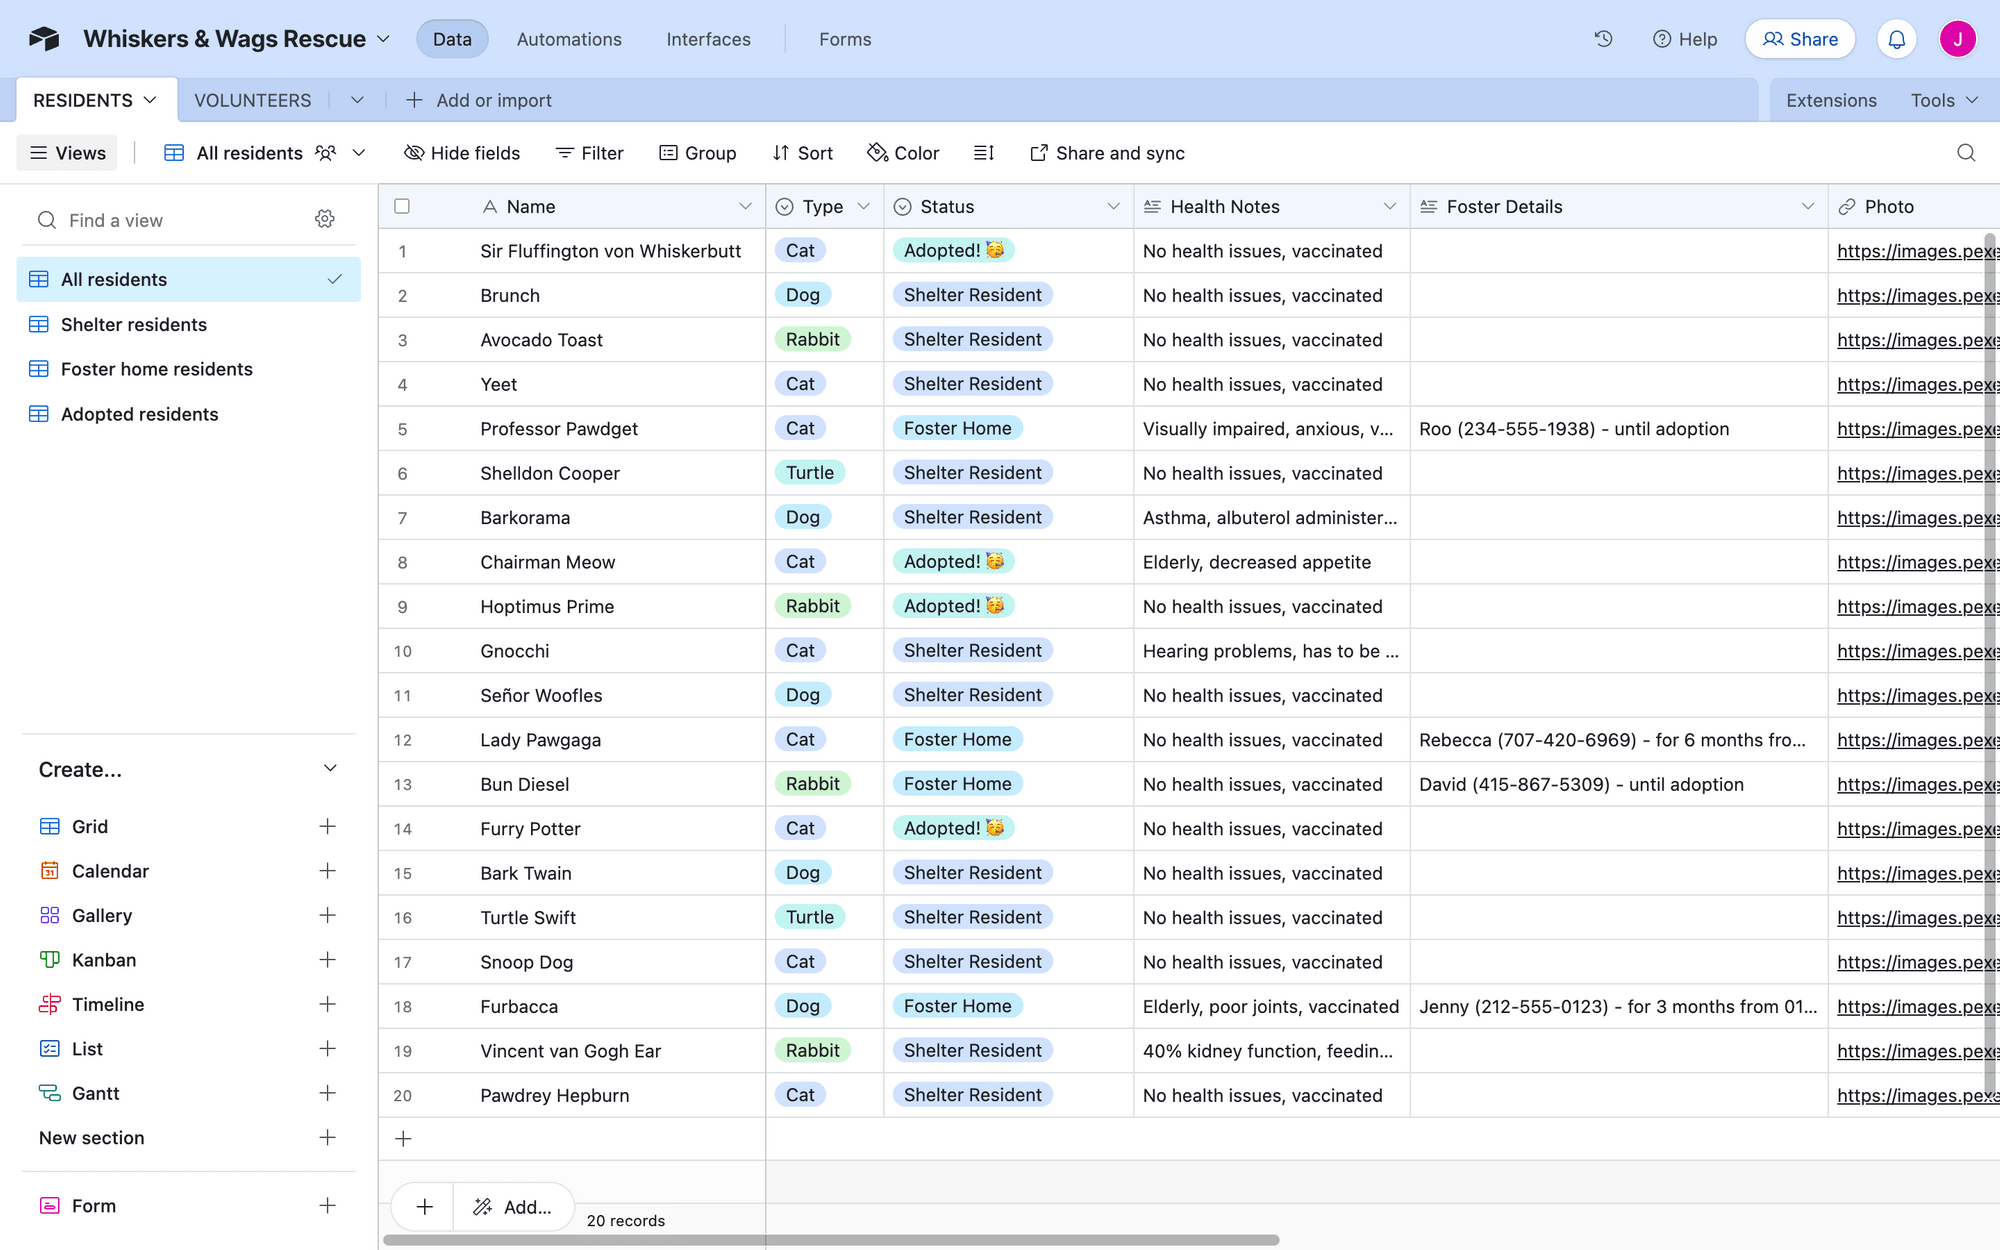
Step 1. Prepare Your Airtable Base
First, you’ll need an Airtable base with data that you want to include in your generated images. This might be text, links, or even emojis!
Bear Tip 🐻: Images can be dynamically inserted into your templates too! Use direct links as modifications in your API call.
You’ll need an attachment type field in your table to store created images.
Add multiple fields if you’ll be generating multiple images, or storing multiple formats.
Step 2. Add a Scripting Extension
Extensions add more functionality to your Airtable base and allow you take advantage of other apps’ features. Scripting is an Airtable-built extension that allows you to write custom JavaScript code, giving your base features beyond the basics. With it, you can build in features like advanced data manipulation and custom report generation.
To add a new extension to your base, you’ll need a paid Airtable plan.
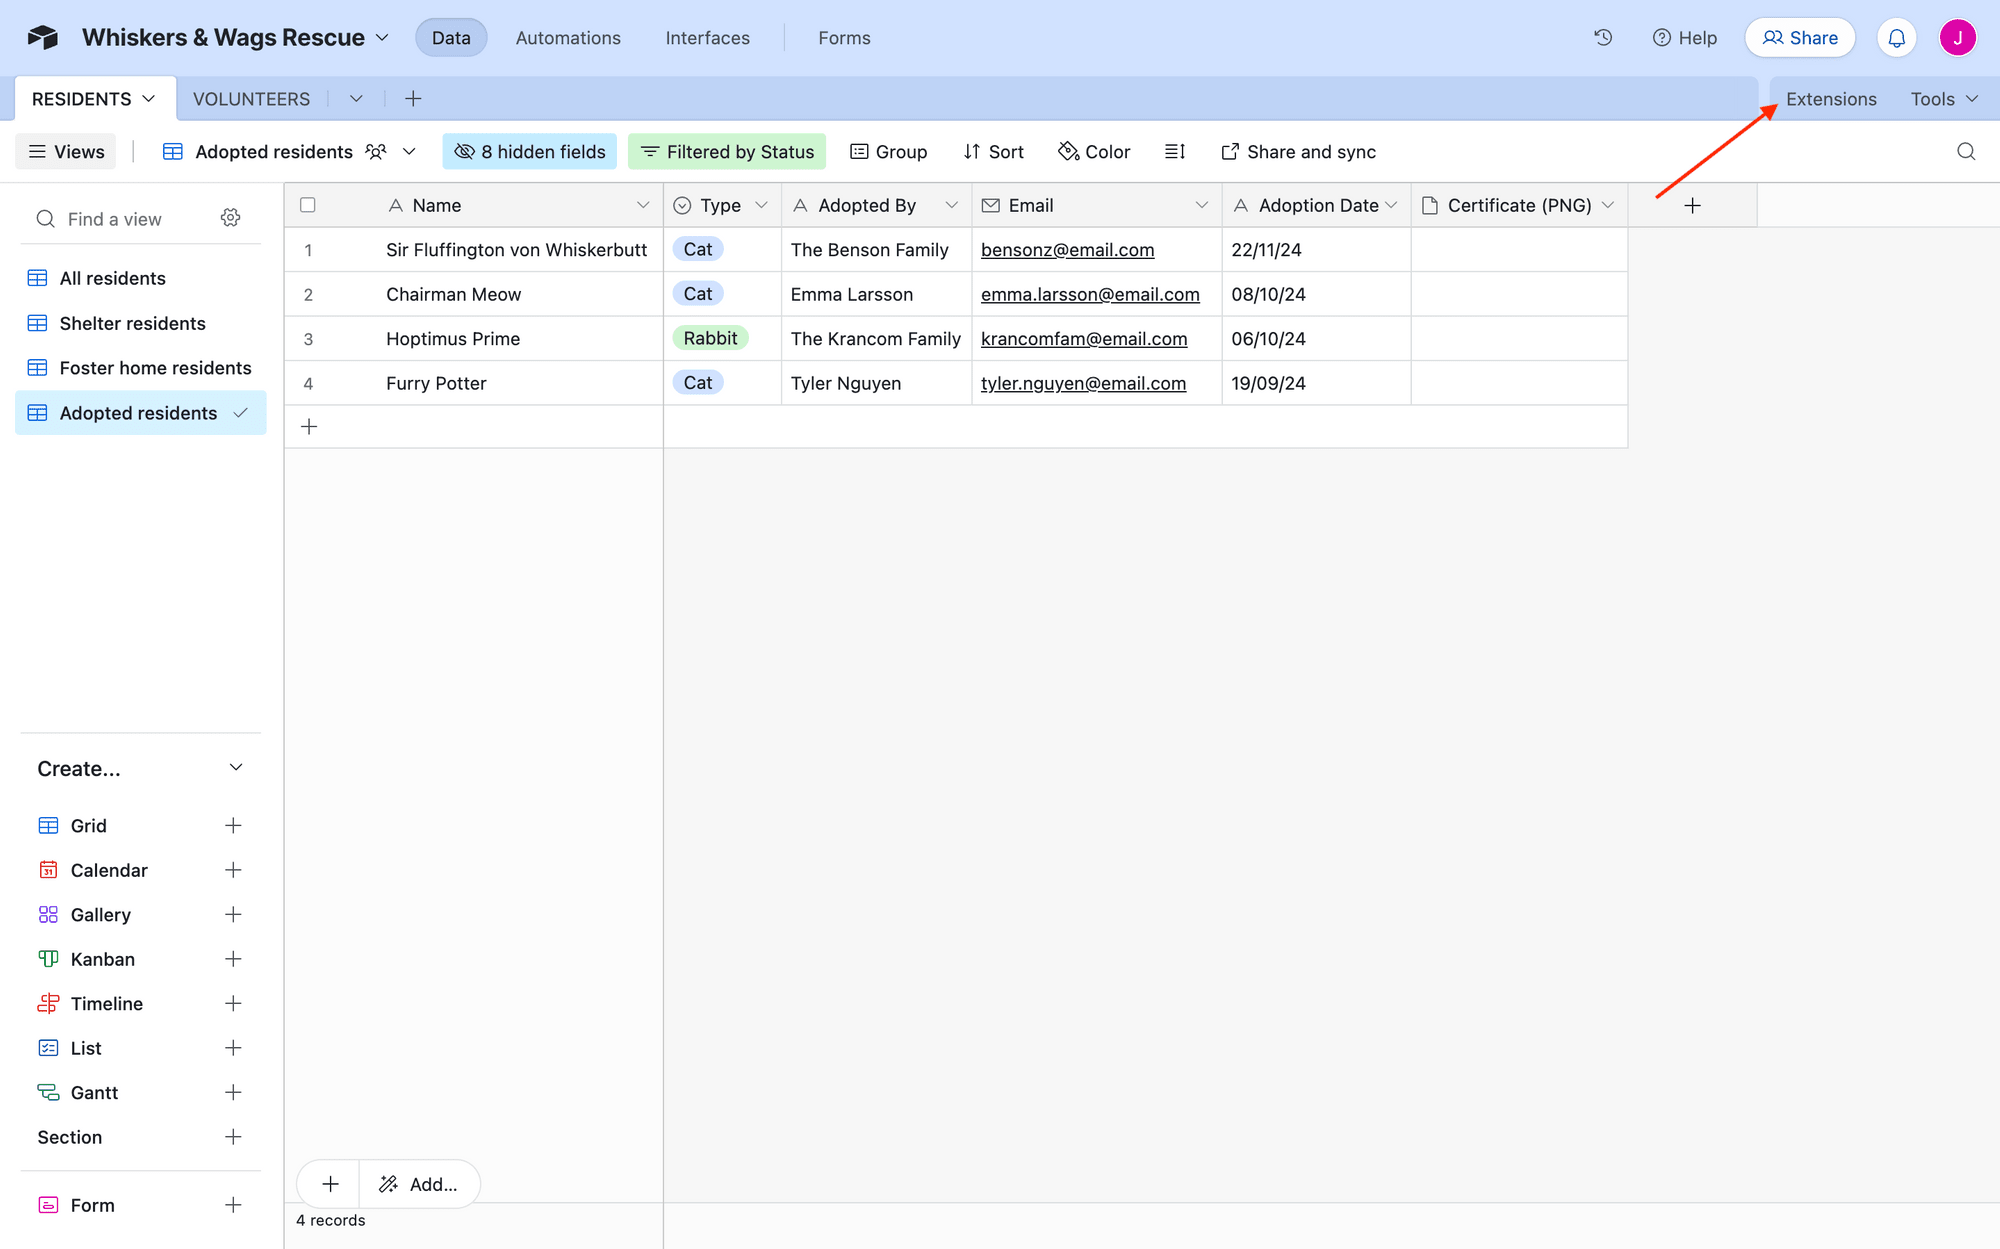
Click the Extensions tab on the right side of your table. This will reveal a dashboard where you can add new extensions, enable and disable them, and assign them to different dashboards.
Click Add an extension.

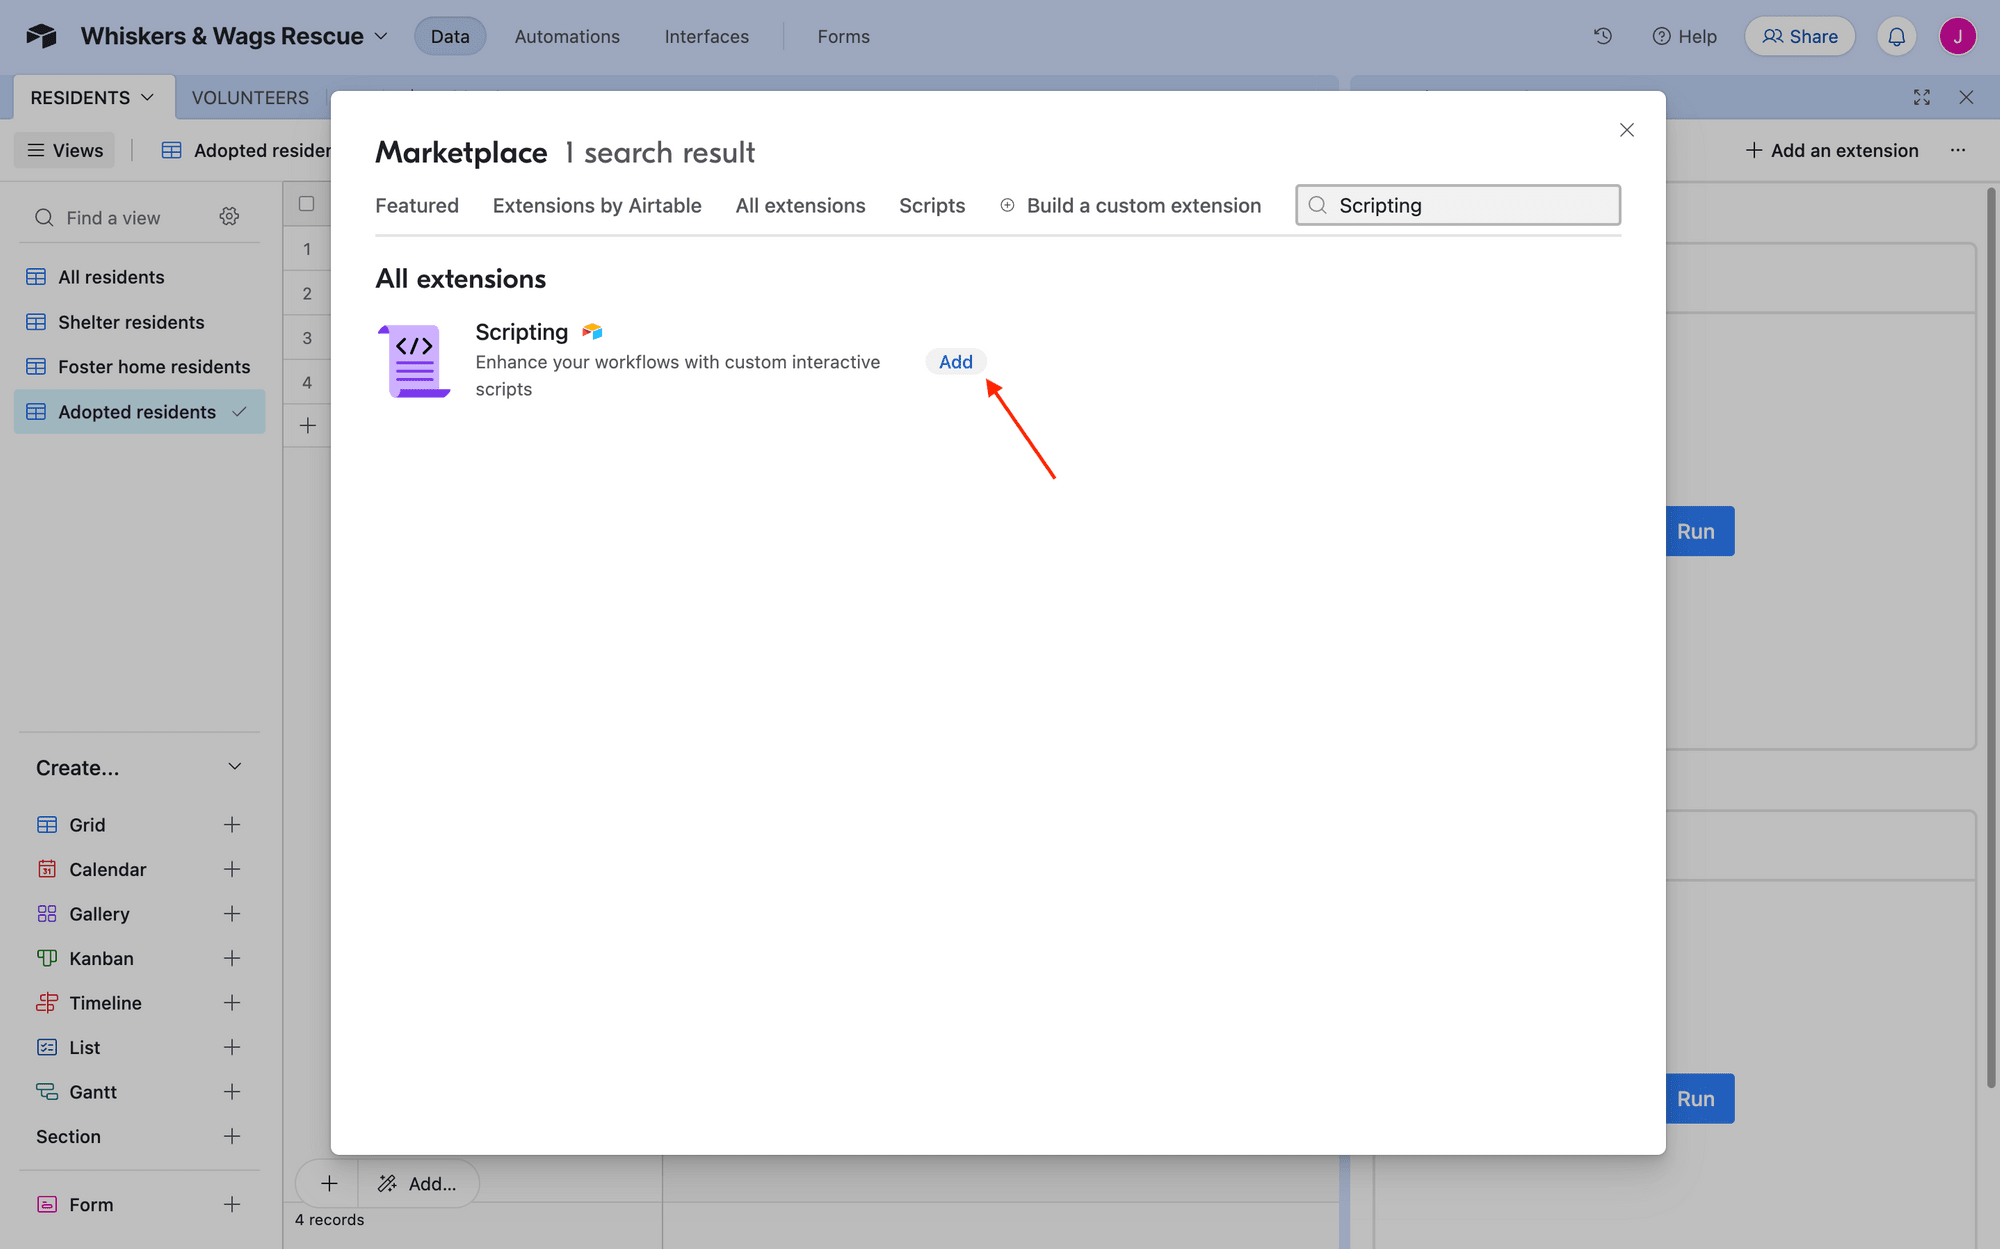
Conduct a search for the Scripting extension, then click Add.
Once the extension loads onto your base, you should be on a page where you can edit and test scripts.
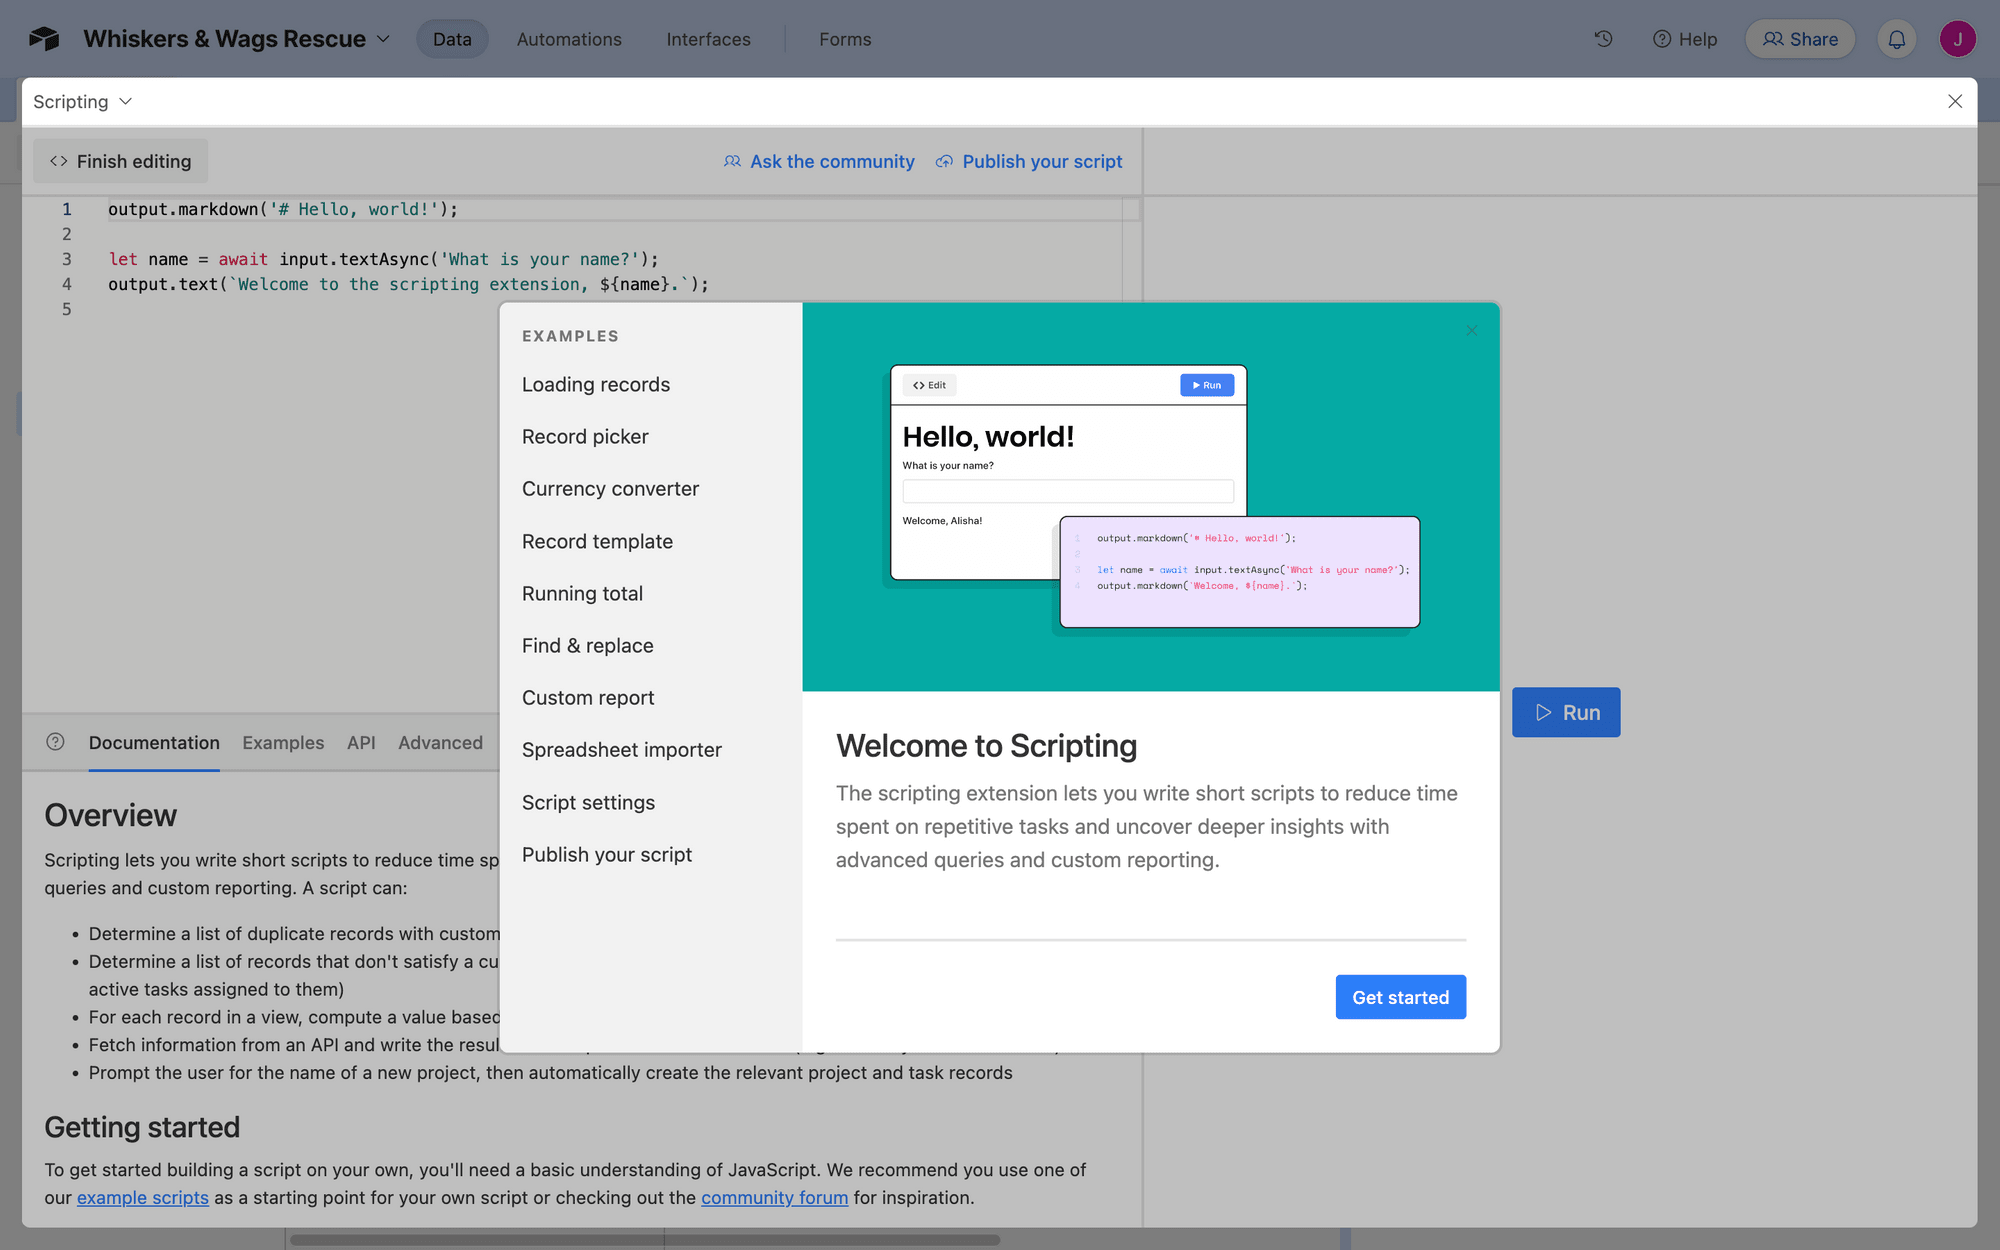
Click Get started , and start editing from scratch.
Step 3. Customize Your Code
The script added to the base will send a request for image generation containing your modifications to Bannerbear, then fetch the results to upload them to the attachment field.
Insert the following code into the editor:
const API_KEY = '{YOUR_API_KEY}'
let table = base.getTable("{YOUR_TABLE_NAME}")
let record = await input.recordAsync('Pick a record', table)

var data = {
  "template": '{YOUR_TEMPLATE_UID}',
  "modifications": [
    {
      "name": "image_container",
      "image_url": record.getCellValue('Photo')
    },
    {
      "name": "title",
      "text": "Certificate of Adoption",
      "color": null,
      "background": null
    },
    {
      "name": "pretitle",
      "text": "This hereby certifies that",
      "color": null,
      "background": null
    },
    {
      "name": "adoptee_name",
      "text": record.getCellValue('Name'),
      "color": null,
      "background": null
    },
    {
      "name": "paragraph",
      "text": "has been adopted by *" + record.getCellValue('Adopted By') + "* into a lifetime of happiness and cuddles.",
      "color": null,
      "background": null
    },
    {
      "name": "date_title",
      "text": "Adoption Date",
      "color": null,
      "background": null
    },
    {
      "name": "date",
      "text": record.getCellValue('Adoption Date'),
      "color": null,
      "background": null
    },
    {
      "name": "logo_text",
      "text": "Whiskers & Wags",
      "color": null,
      "background": null
    }
  ],
}

let response = await fetch('https://sync.api.bannerbear.com/v2/images', {
  method: 'POST',
  body: JSON.stringify(data),
  headers: {
    'Content-Type' : 'application/json',
    'Authorization' : `Bearer ${API_KEY}`
  }
})

let respJSON = await response.json()

console.log (respJSON)

await table.updateRecordAsync(record.id, {
  "{YOUR_OUTPUT_FIELD}": [{url:respJSON.pdf_url}],
});
Change the following placeholder text with your own details:
- YOUR_API_KEY - Found on the project’s Settings / API Key page
- YOUR_TABLE_NAME - According to your Airtable project
- YOUR_TEMPLATE_UID - Found by clicking the meatball menu on your template page
- YOUR_OUTPUT_FIELD - According to your Airtable project
You will also have to replace the modifications section to align with your template. One easy way to do this is to return to your Bannerbear app and go to your template page. Scroll down to the API Console , then copy and paste the entire modifications section into your script.

You can then modify each layer with replacement text, background colors, links, fonts, and whatever you need.
If you need help modifying the request, refer to Bannerbear’s API reference.
Bear Tip 🐻: Use
record.getCellValue('{FIELD_NAME}')to refer different fields and dynamically update them per record.
Testing the script should reveal the output log of a successful image generation run.
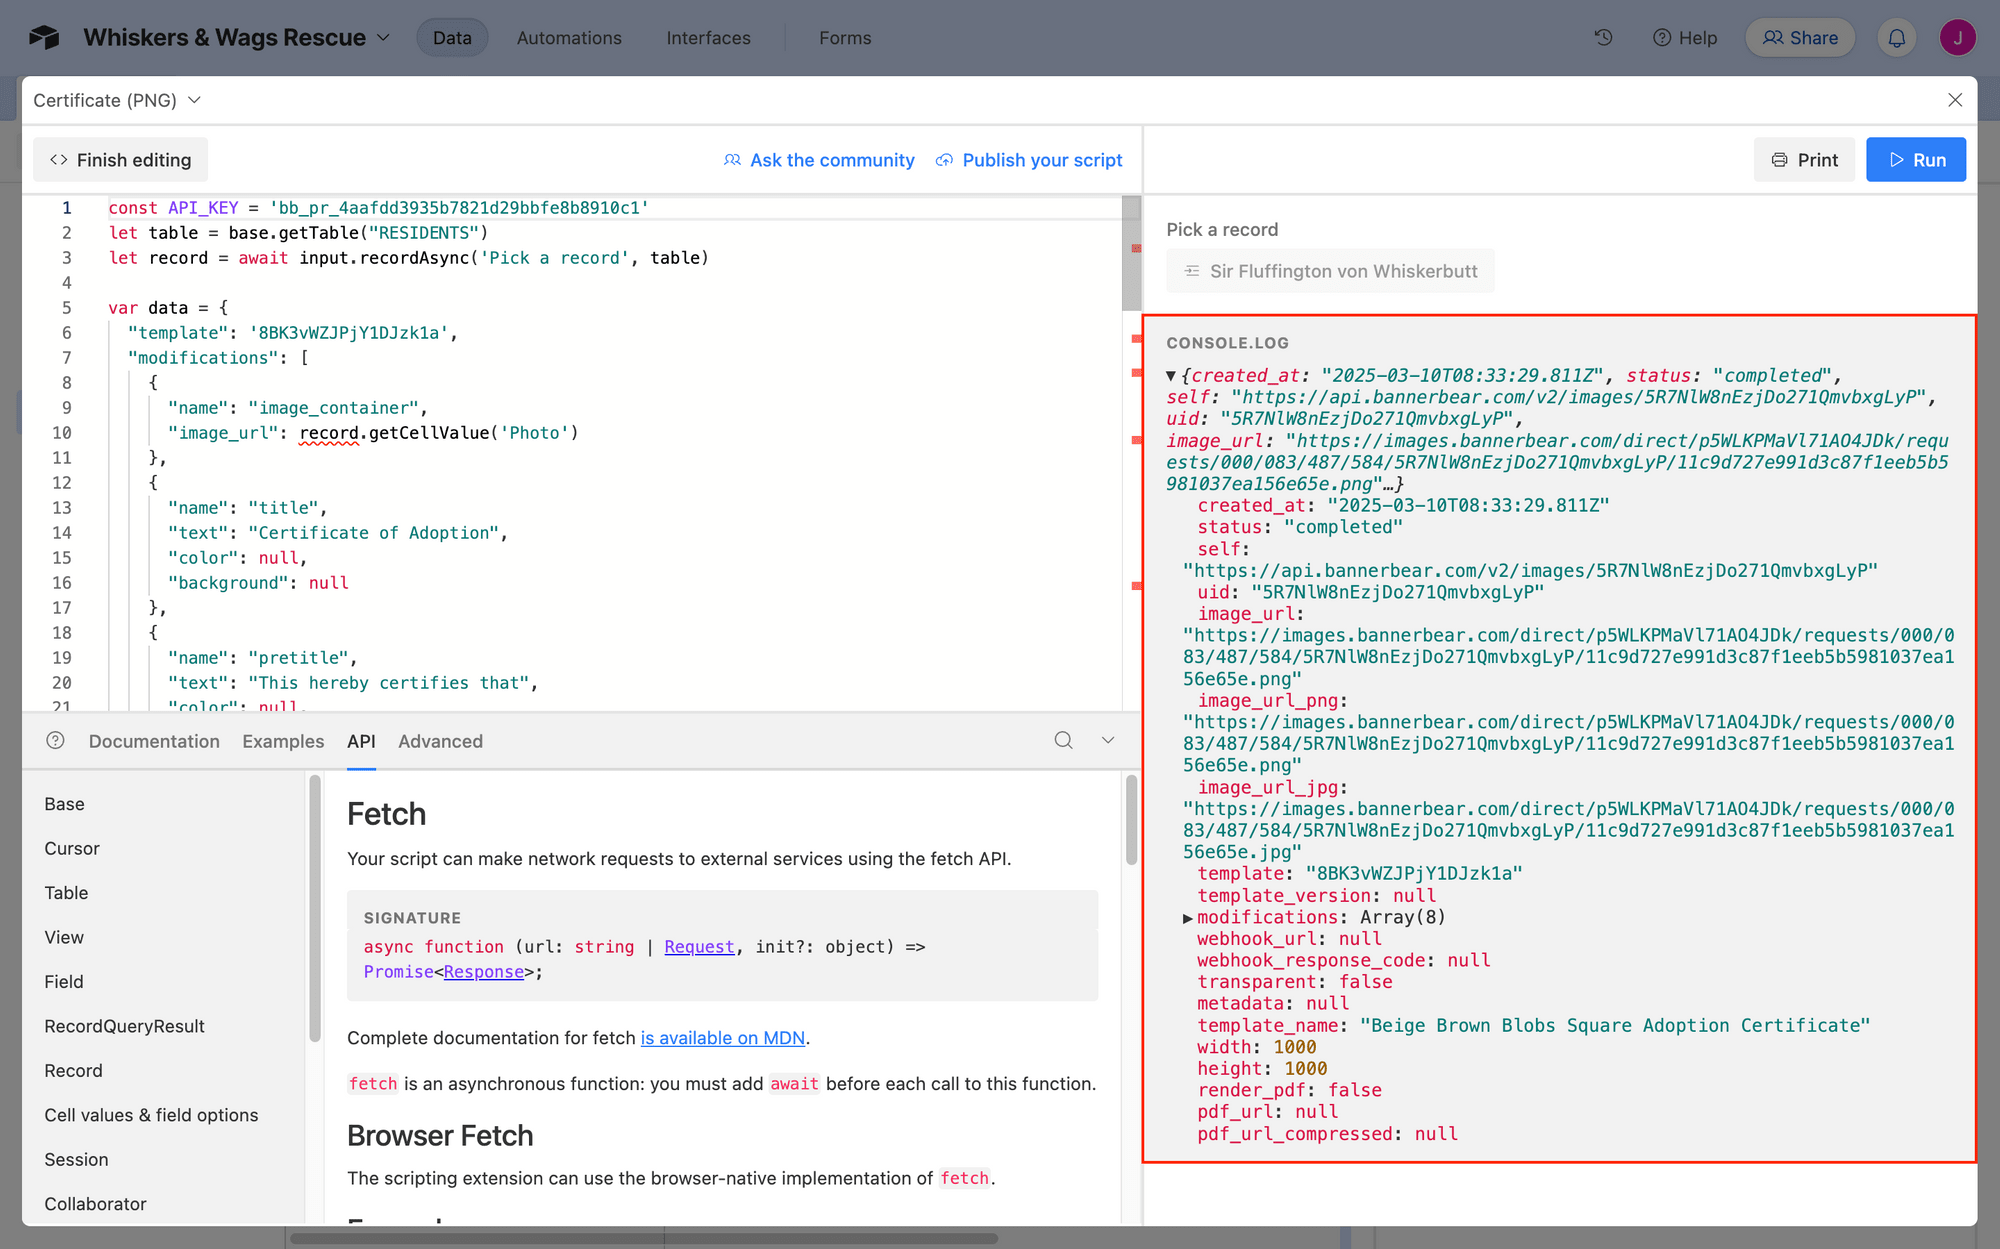
You should see output links to your newly created images.
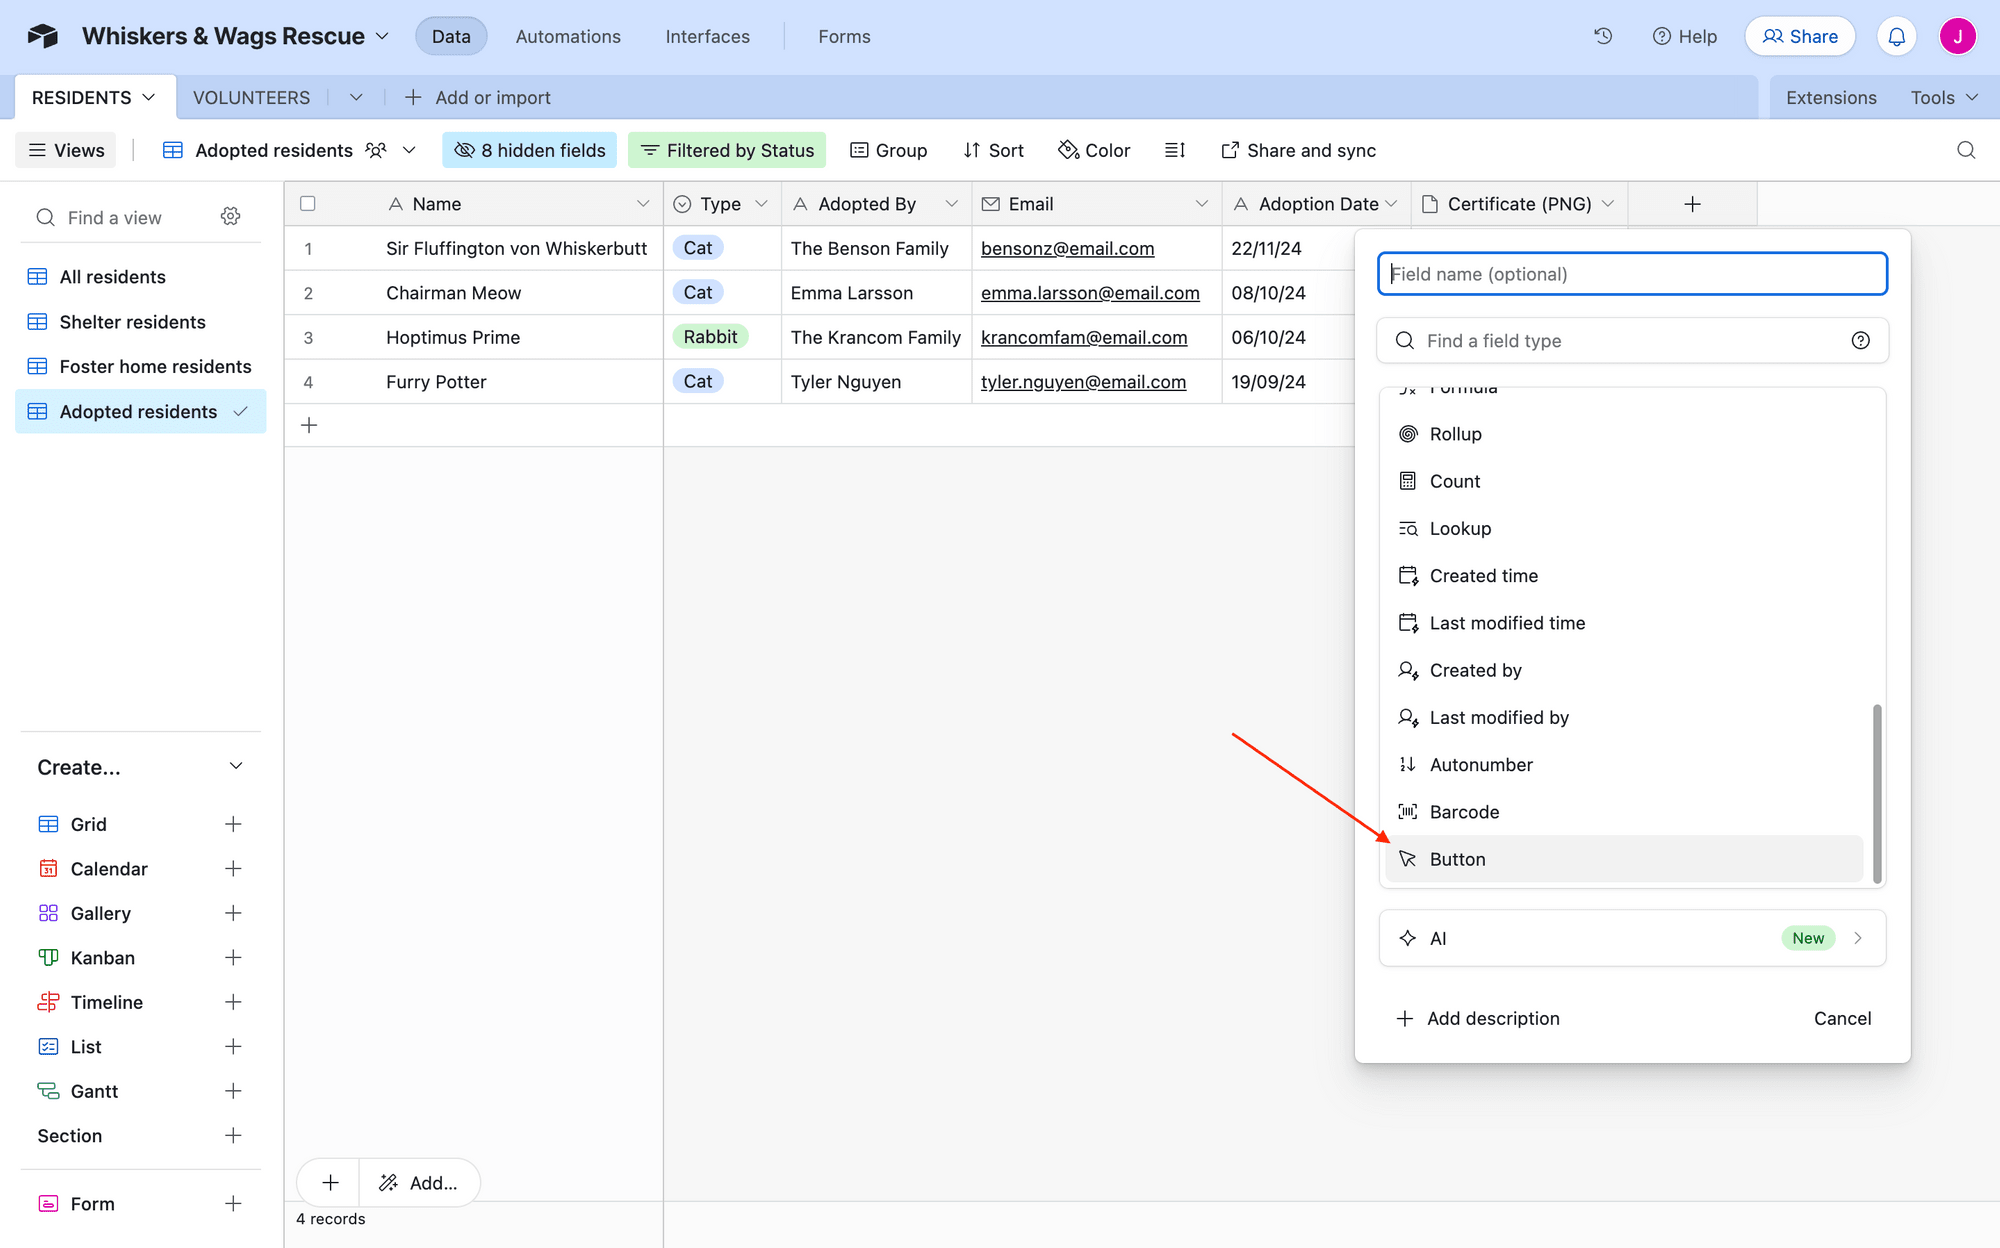
Step 4. Create a Button
If your script is working correctly, all that’s left to do is to link it to a button that launches it when clicked. From your Airtable base, add a new button field.
Customize the name, label, and style according to your preferences. Choose Run script as the action, and select the dashboard and extension you were previously working on.
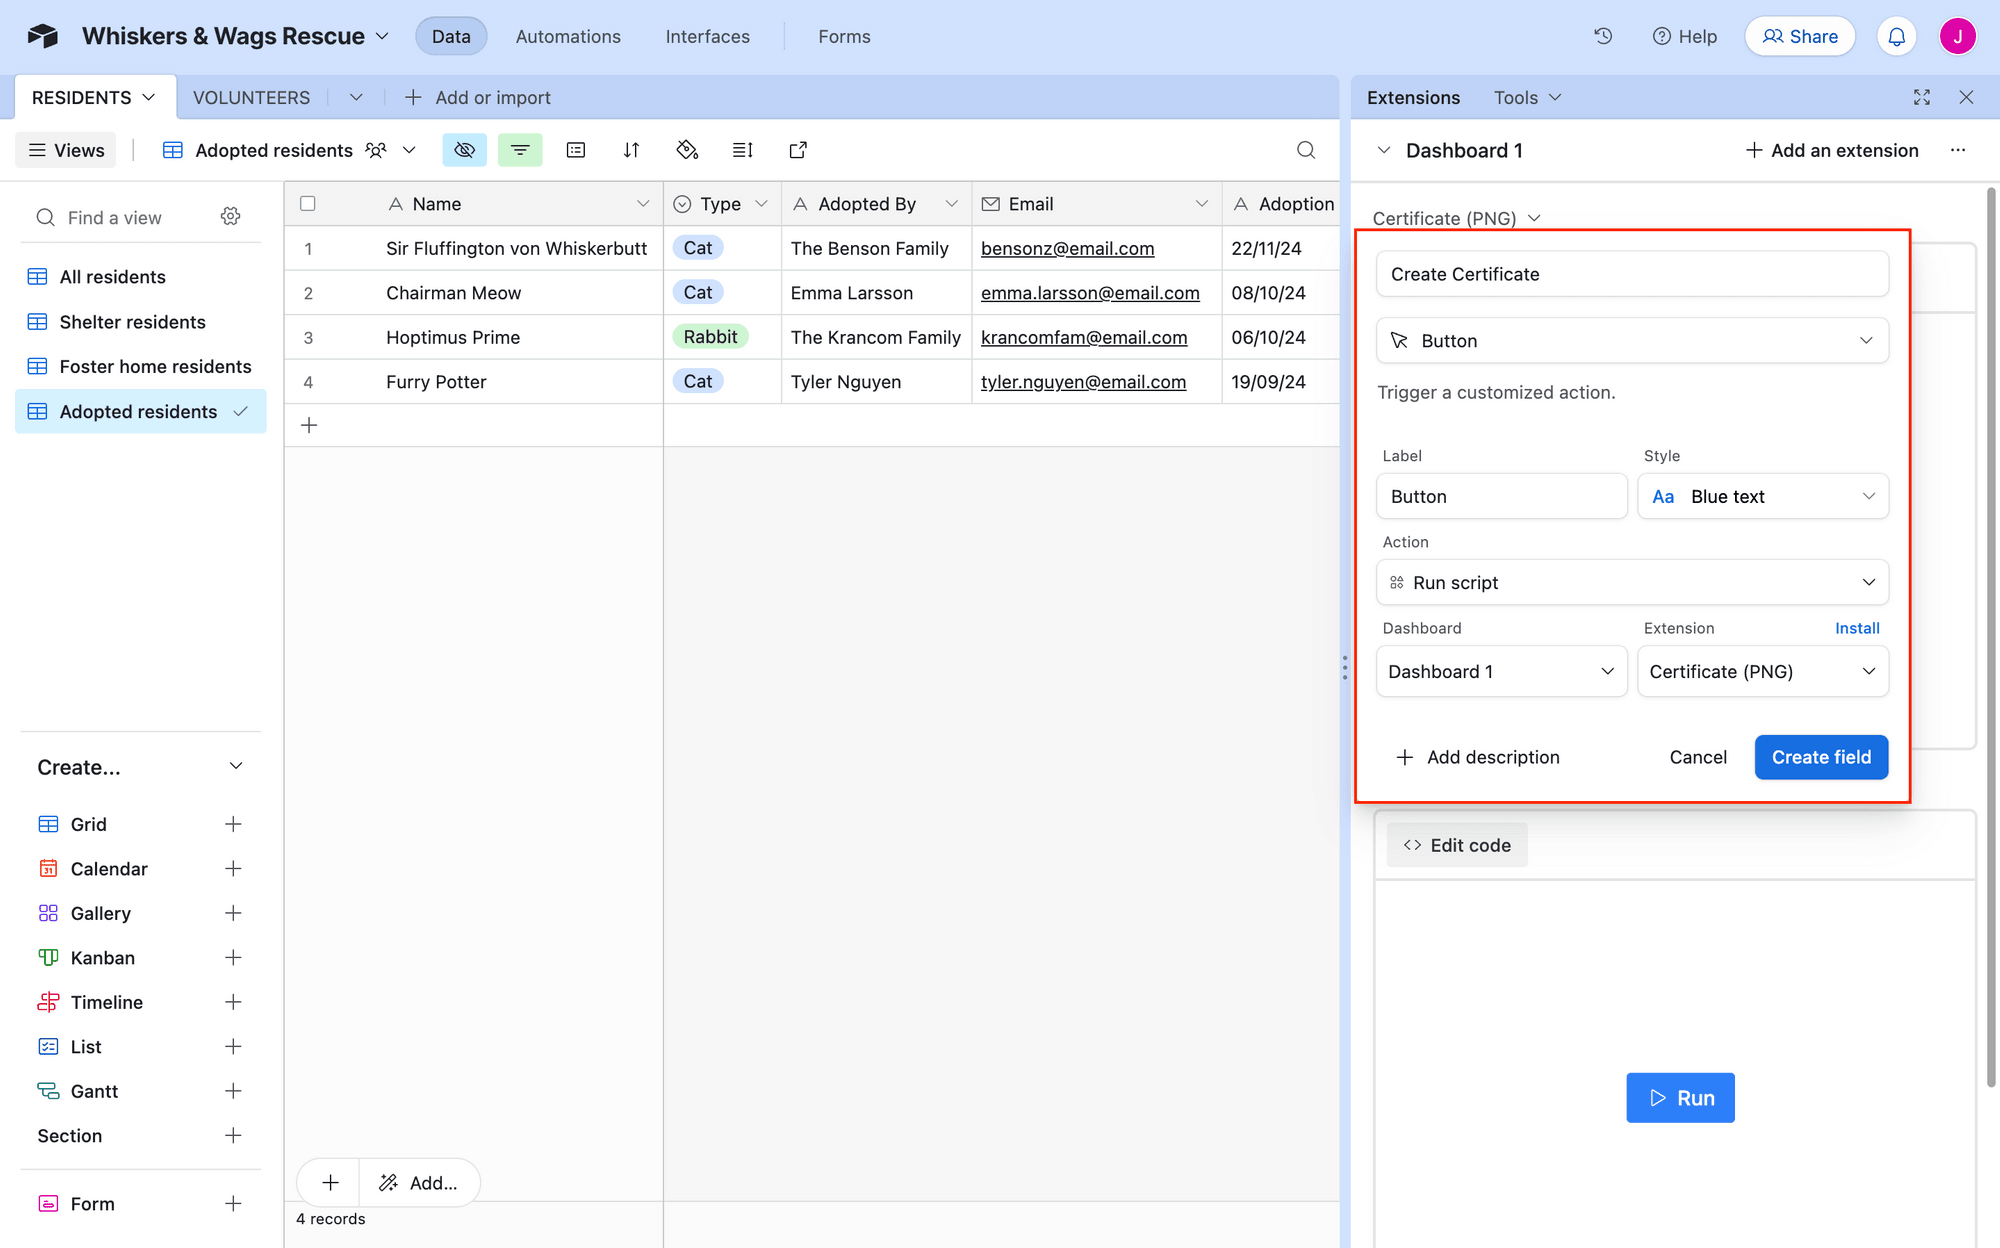
Click Create field when done.
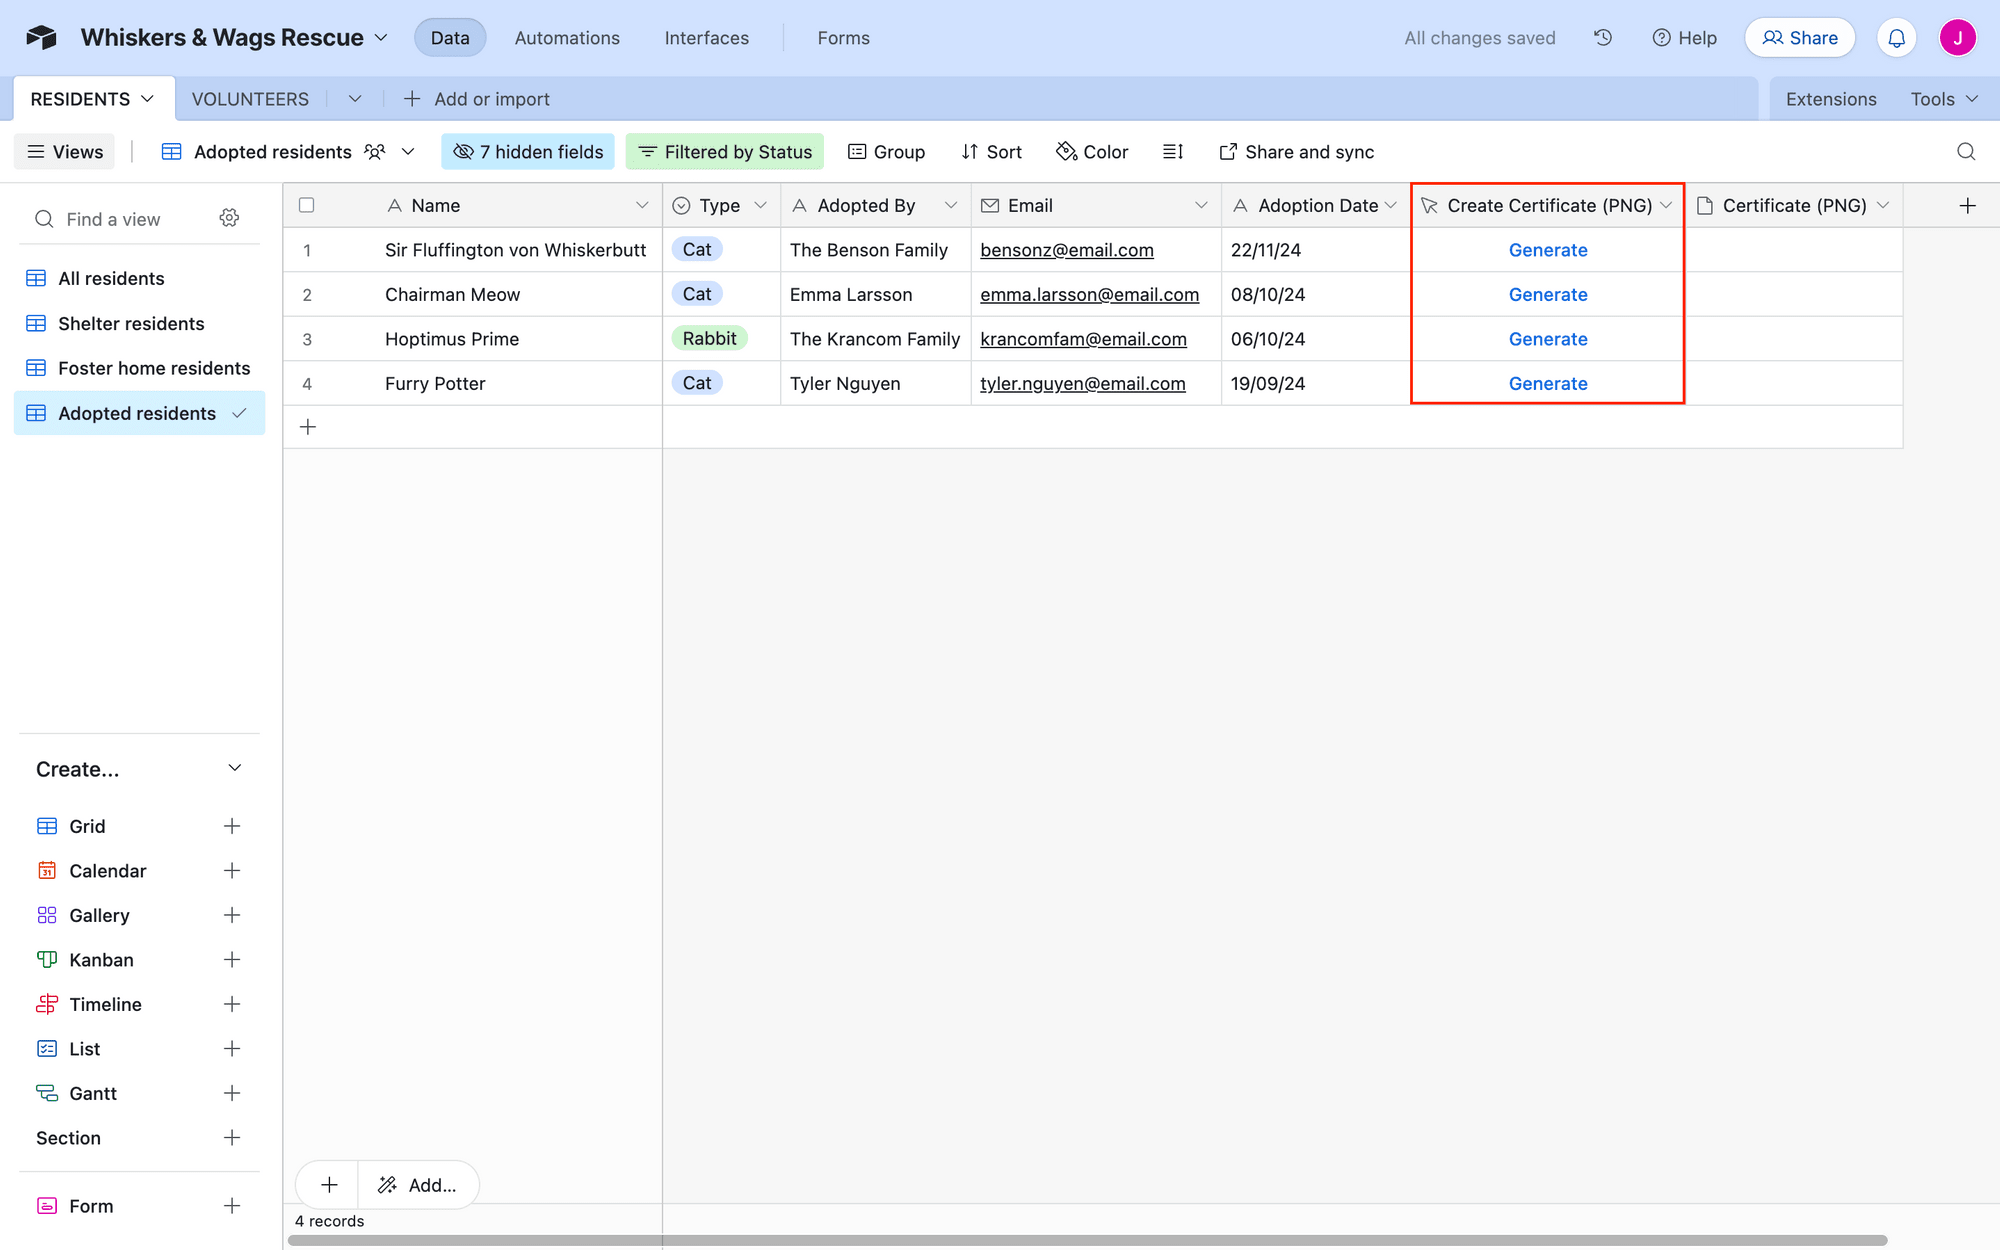
Step 4. Test the Process
The final step is to test and make sure your button is generating images according to your needs. Make sure you have a record of sample data, then click Generate.
The extensions tab should open up to run your script, then upload the image into your output field.
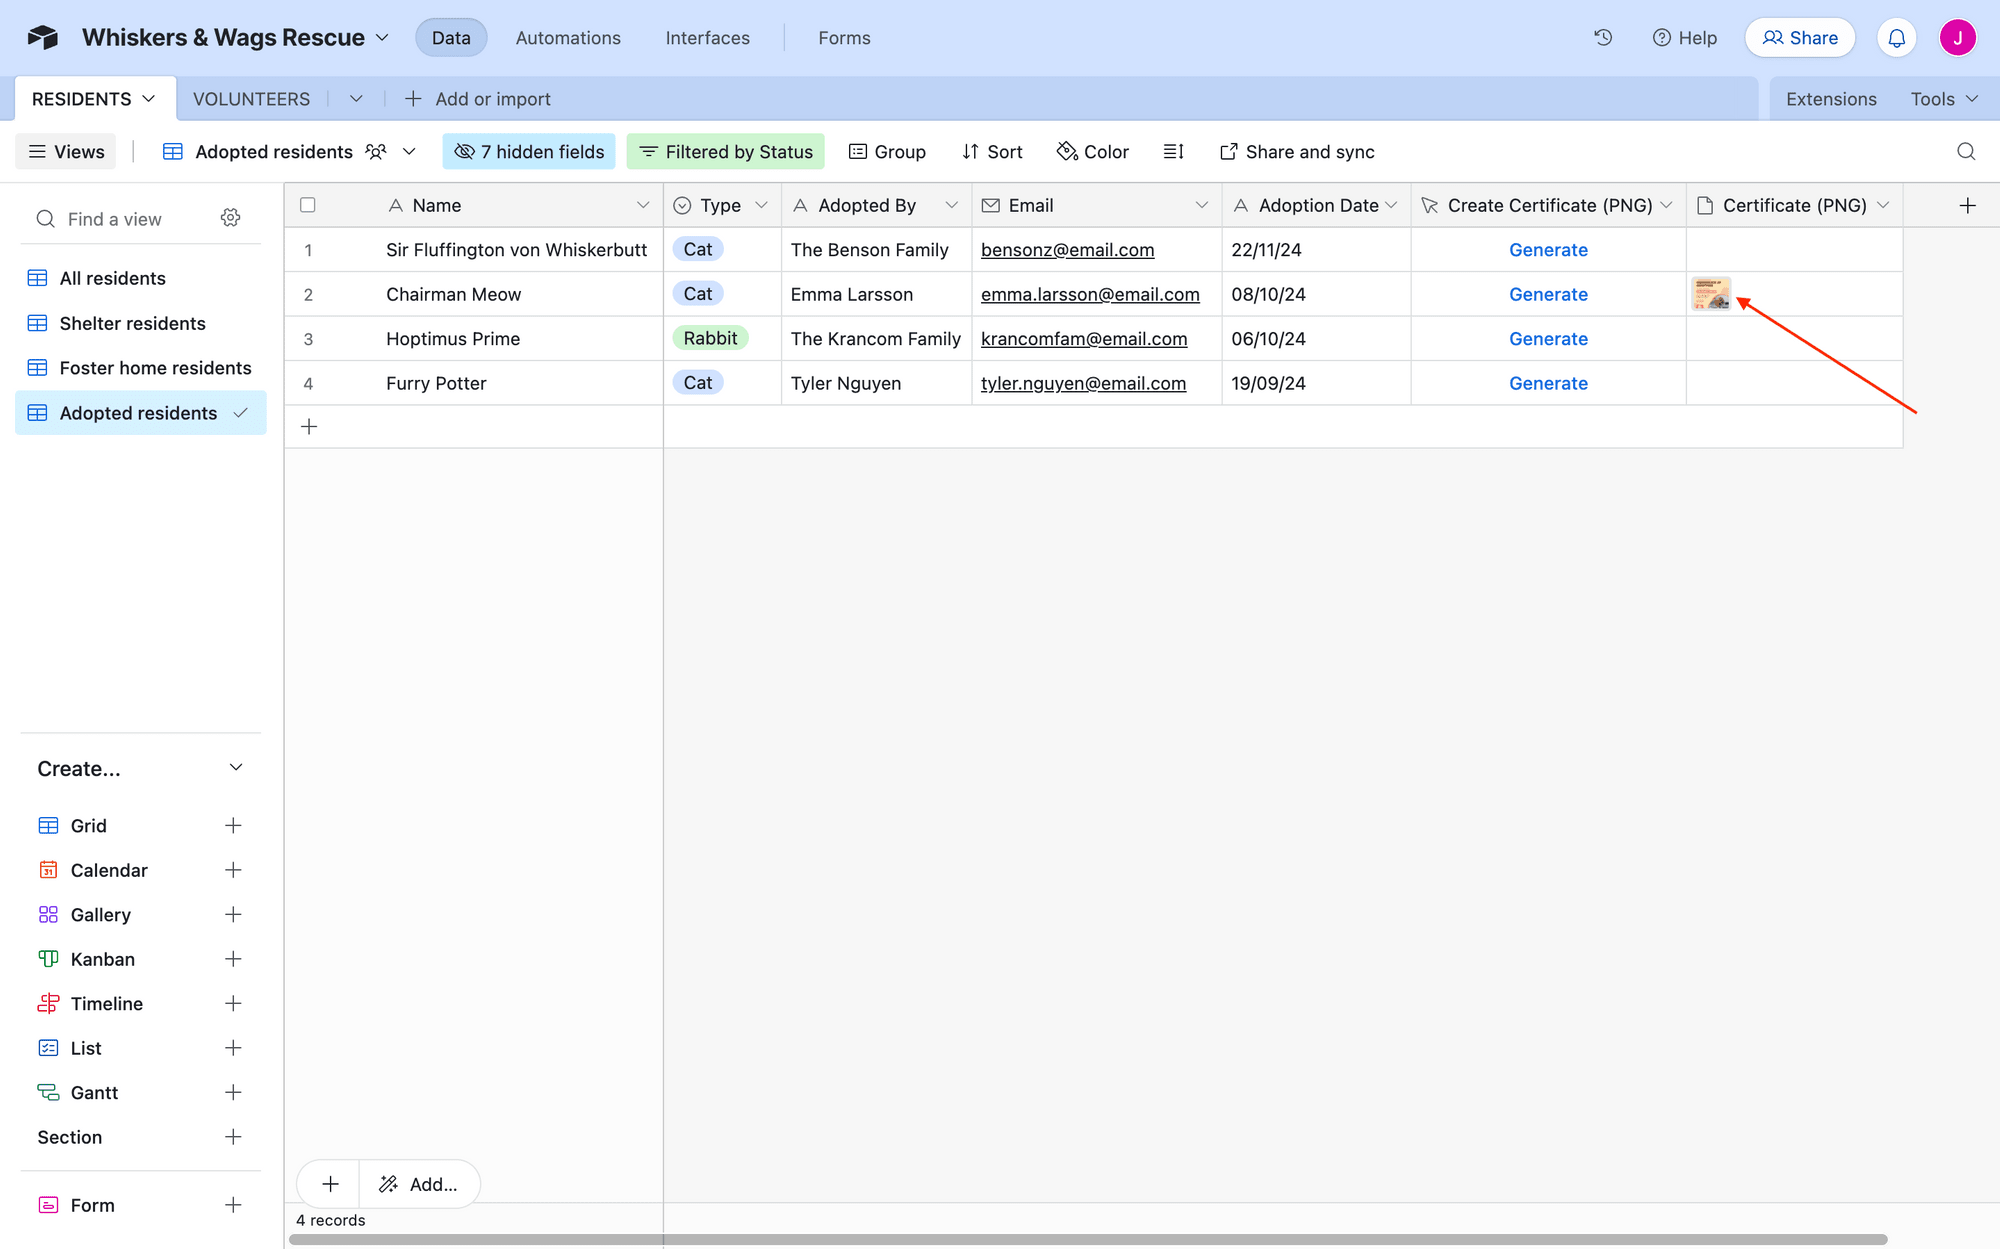
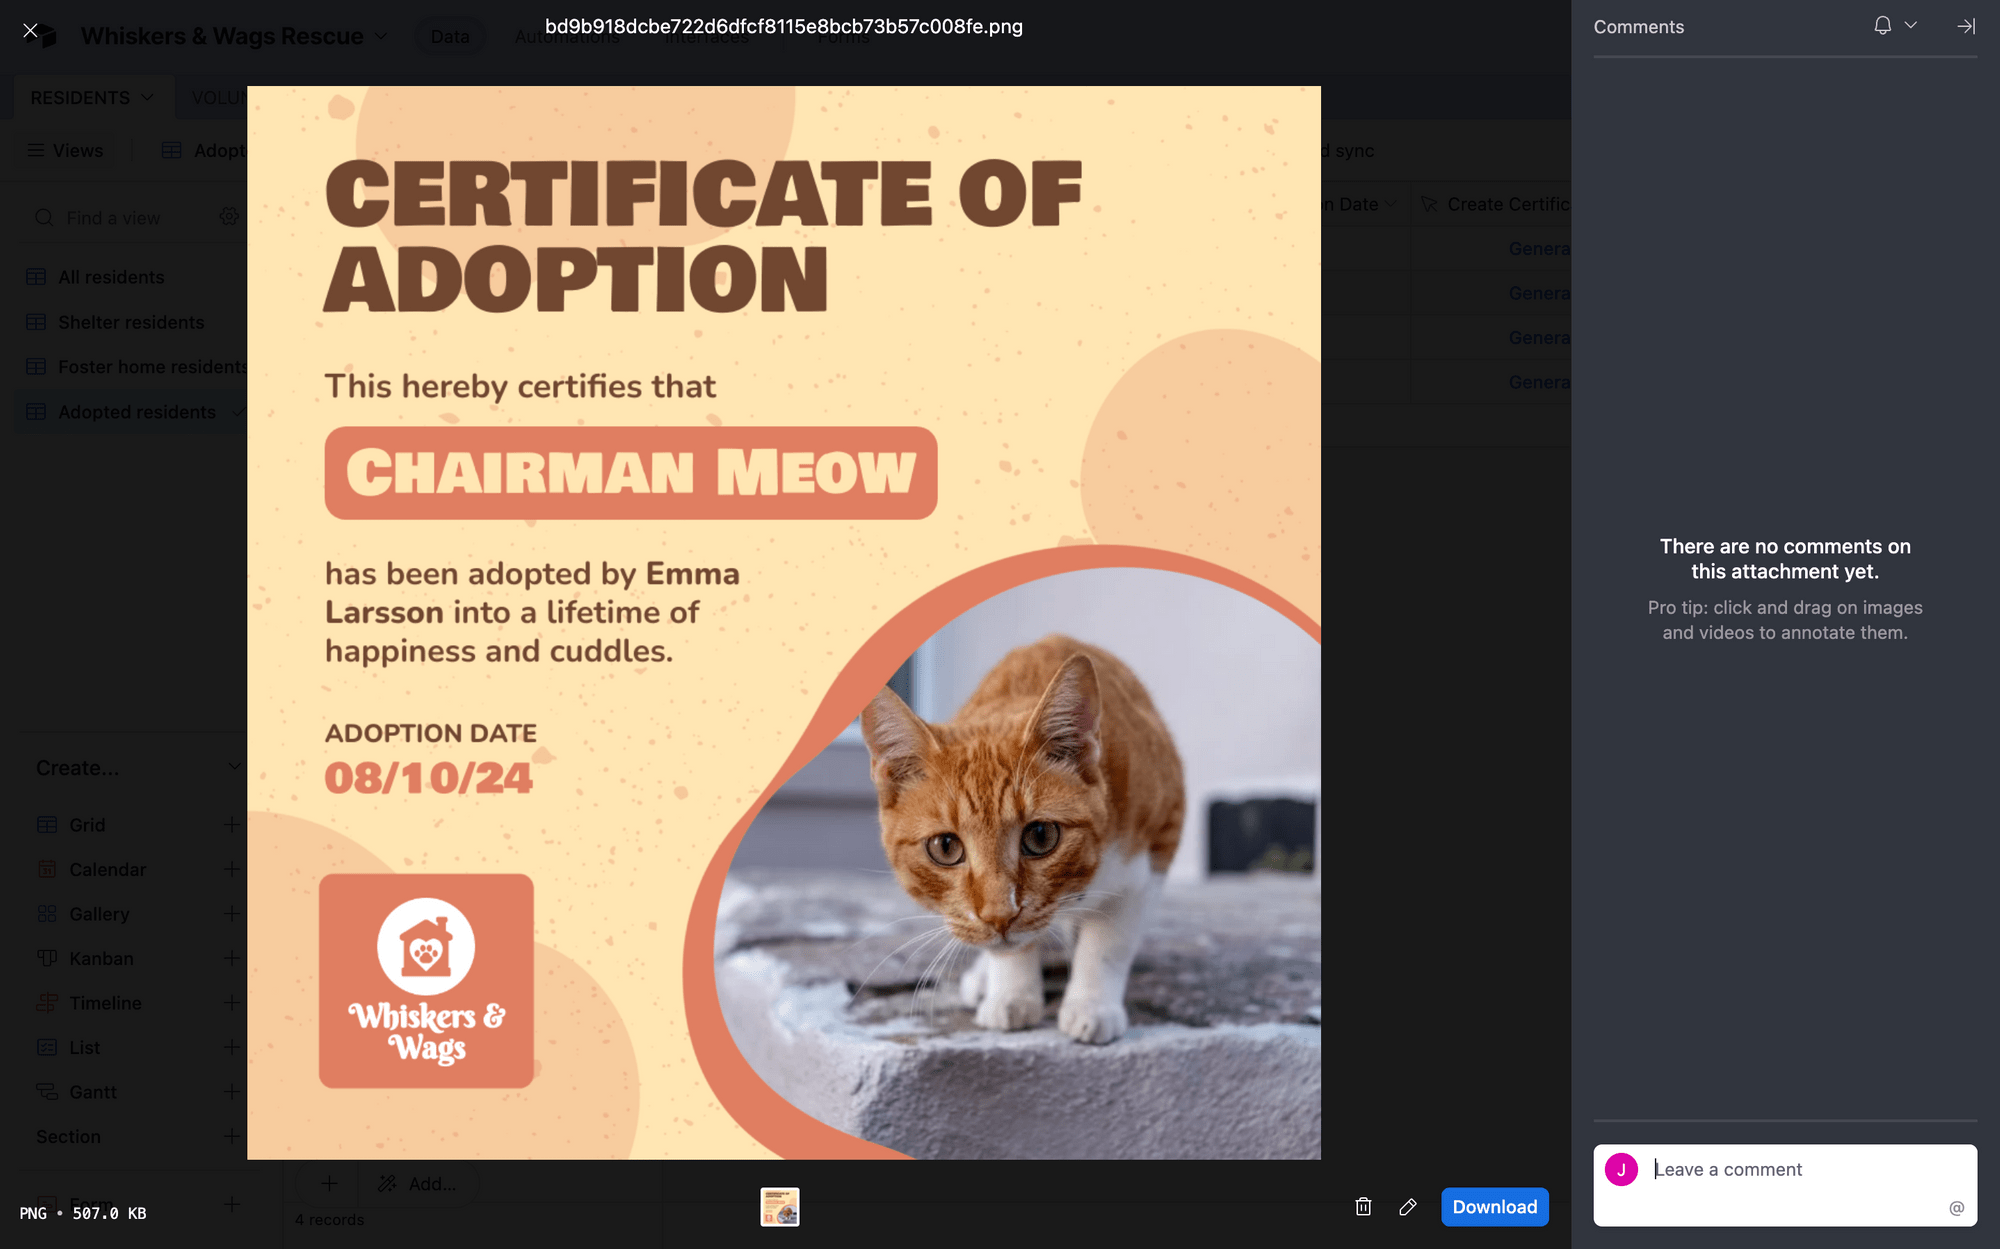
You can click on the attachment to view the completed photo.
Conclusion
Generating images on an as-needed basis suits many use cases where data is constantly changing and storage is limited. But rather than customizing each image, saving it, and uploading to your database, you can use a script that does all of that behind the scenes for you.
Bannerbear’s image generation capabilities can be integrated into your Airtable base, eliminating the need to switch between apps and streamlining your workflow.
For more Airtable image generation ideas, check out a few of our other articles:
👉 How to Generate and Save PDFs On-demand in Airtable
👉 How to Generate Bannerbear Images with Airtable (Integration Guide)
👉 How to Instantly Generate Certificates Online with Bannerbear and Airtable
