
How to Auto-Generate Social Media Posts For a Business Conference Using Bannerbear (Node.js)
Contents
In today's digital age, social media is essential for promoting events, including business conferences. Creating engaging content is crucial to attract and inform attendees. However, manually crafting posts for each speaker, session, and announcement can be time-consuming and tedious.
In this tutorial, we'll learn how to use Google APIs and Bannerbear, a powerful visual automation tool, to simplify the process of generating social media posts for a business conference. We'll write a Node.js script to retrieve the conference's guest list from a Google Sheets and the guests' photos from a Google Drive folder. This information will then be passed to Bannerbear to automatically generate images for social media posts.
By the end of this tutorial, you'll be able to write a script that creates consistent and visually appealing social media posts for a business conference with minimal effort:

What is Bannerbear
Bannerbear is a tool that allows you to automatically generate custom images, videos, and more from templates. It offers APIs and libraries in various popular programming languages, such as Nodes.js, Ruby, and PHP, making integrating image generation and other media manipulation functionalities into your application/project effortless.
To generate images or videos automatically, you need to create a design template which serve as blueprints for creating the images and videos in Bannerbear. A design template can consist of:
- Static objects - These remain the same in every generated image (e.g. a company logo)
- Dynamic objects - These change based on data you provide (e.g. text, images)
Here’s an example of a Bannerbear design template:
By passing different data to the API, you can alter the values of the dynamic objects and automatically create unique content based on a single template. Now that you have a basic understanding of Bannerbear, let’s get started!
Pre-requisites
Before we begin, make sure you have the following:
- Bannerbear account
- Google Cloud account
- Access to Google Drive and Google Sheets
- Node.js installed on your computer
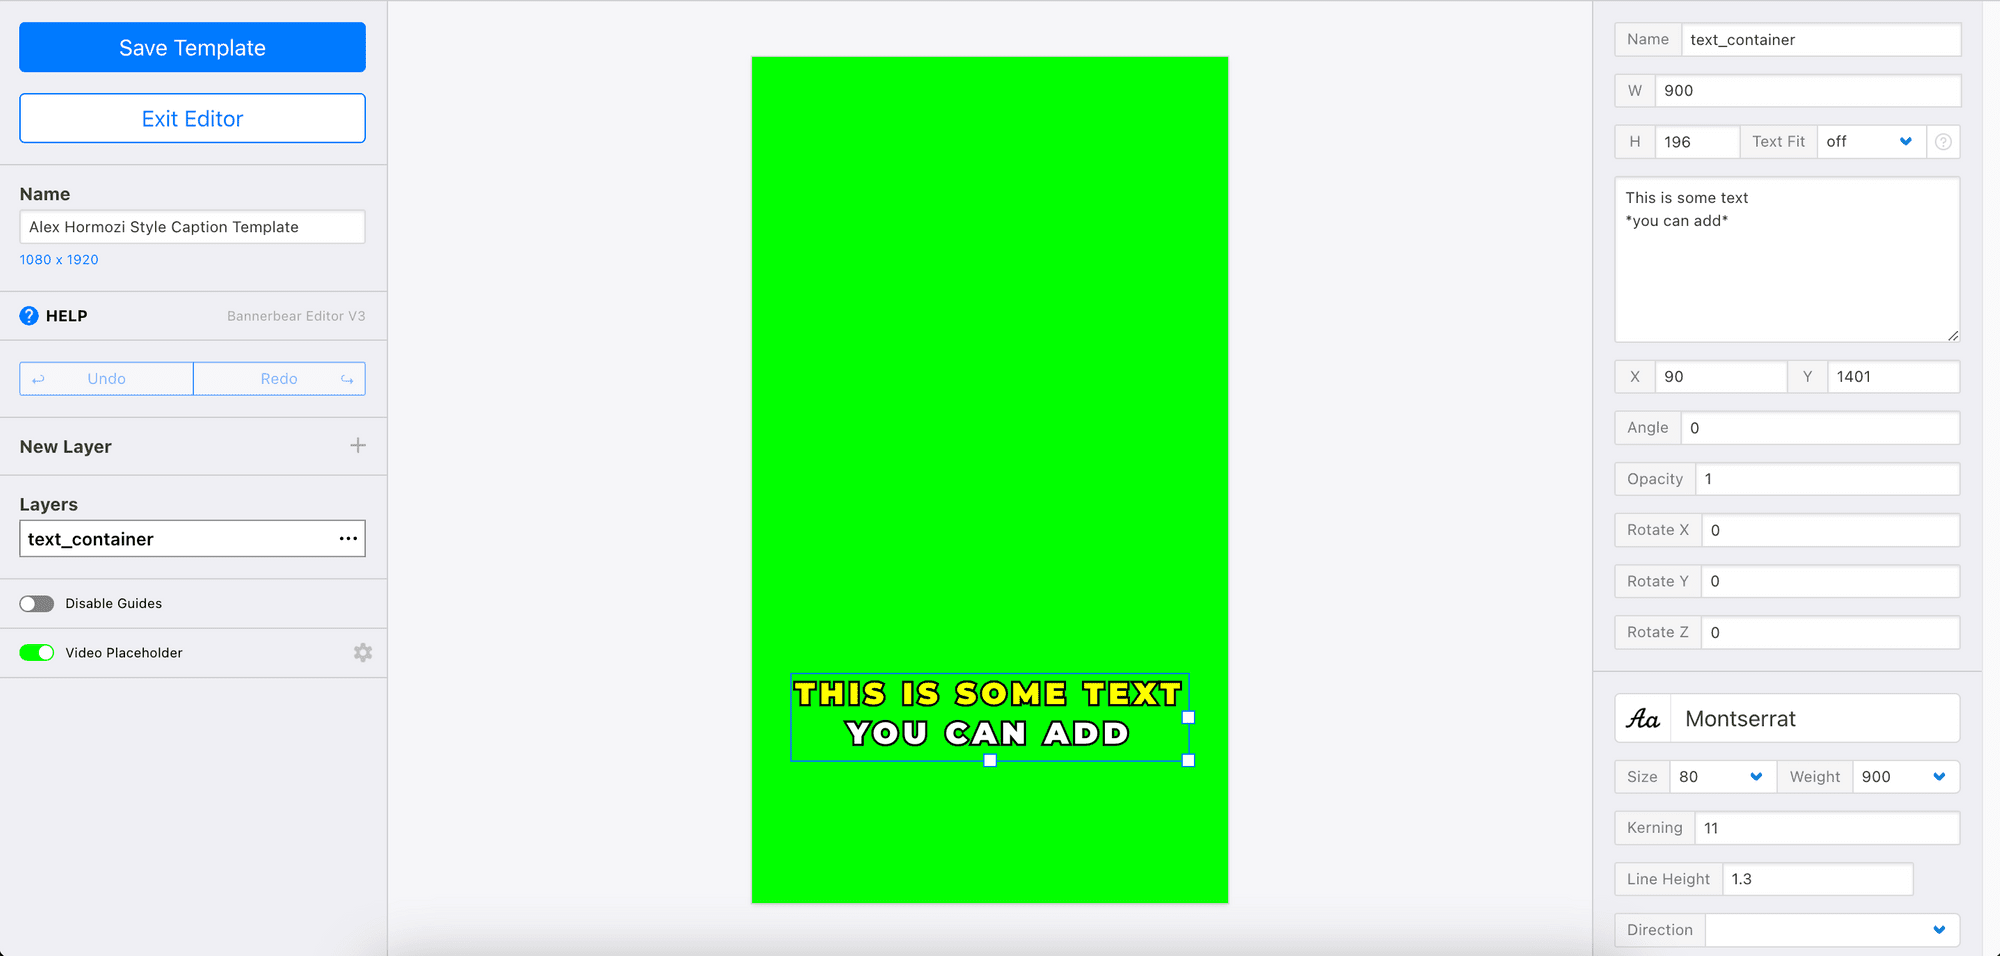
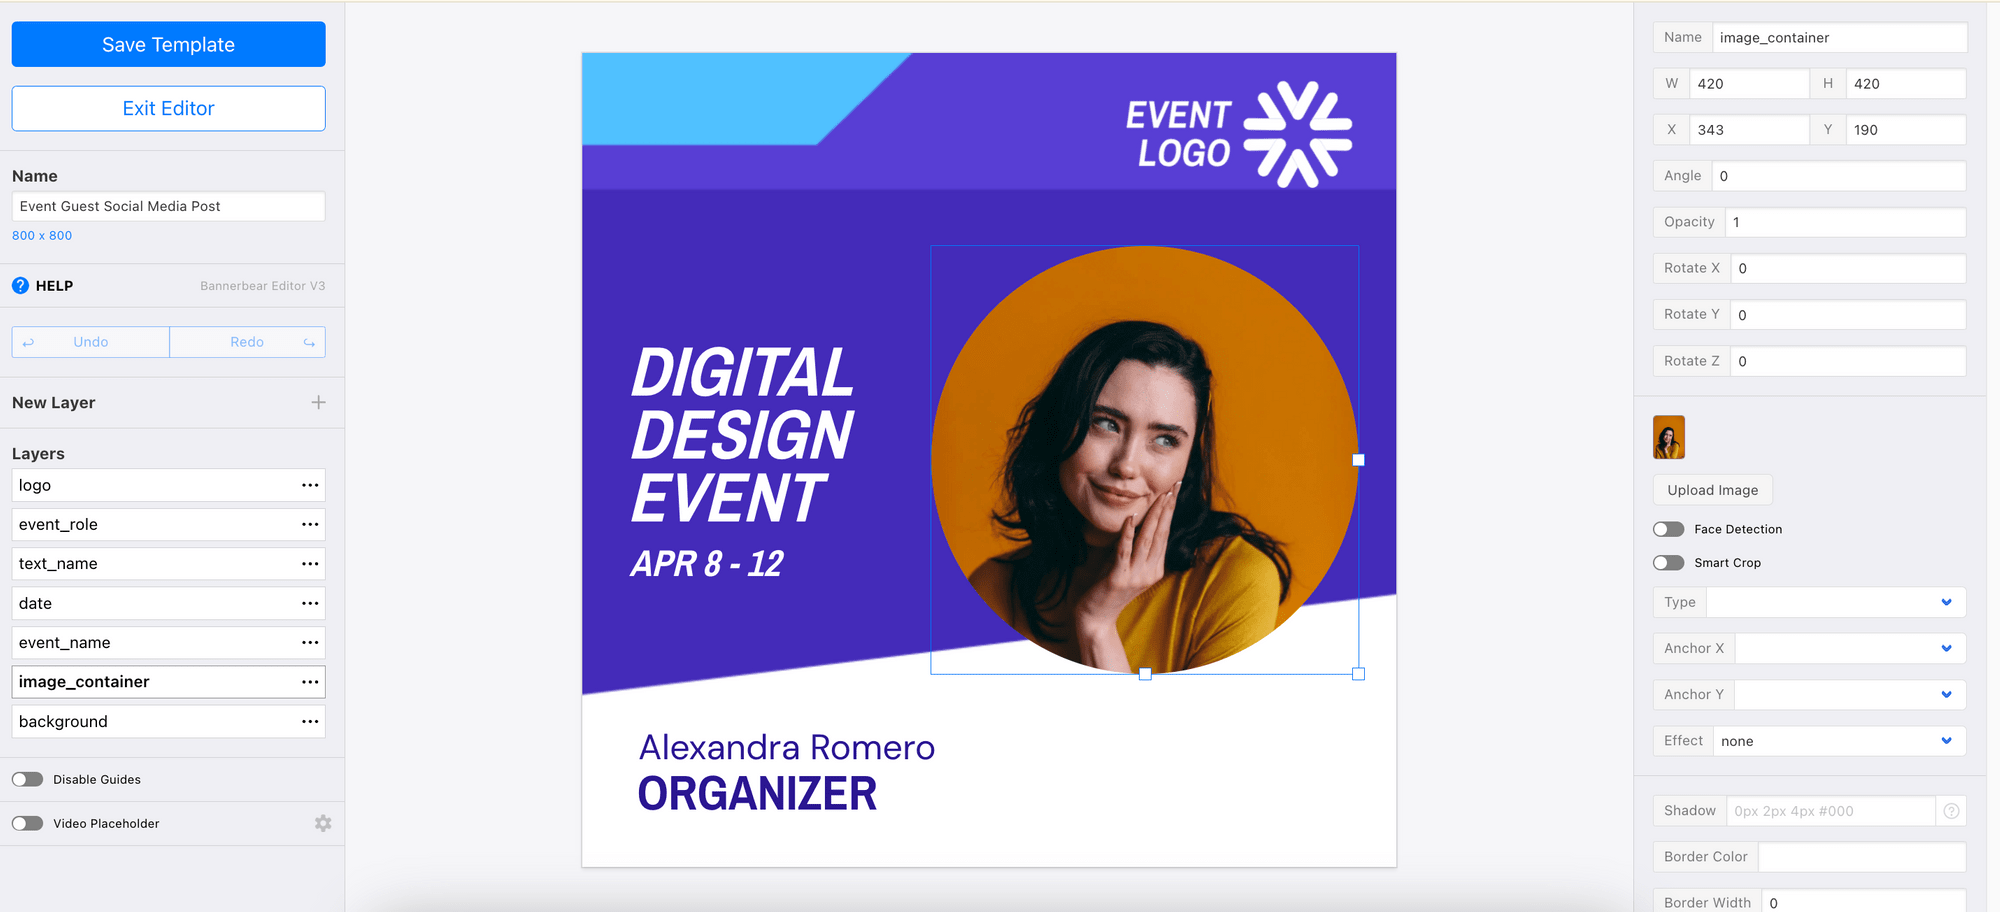
Creating a Bannerbear Design Template
First, sign up for an account and create a new project in your account. Then, duplicate the template below to your project by clicking on it:

The template contains dynamic objects like text_name, event_role, and image_container. The values of these objects can be changed when making an API call to Bannerbear to generate social media posts for different guests automatically:
Next, get the project API key and template ID. We will need them in our code to access the project and template later.

Setting Up Google Sheets and Google Drive
We will retrieve the guests' names, roles, and images from a Google Sheets and a Google Drive folder to automatically generate social media posts for the business conference.
Google Sheet
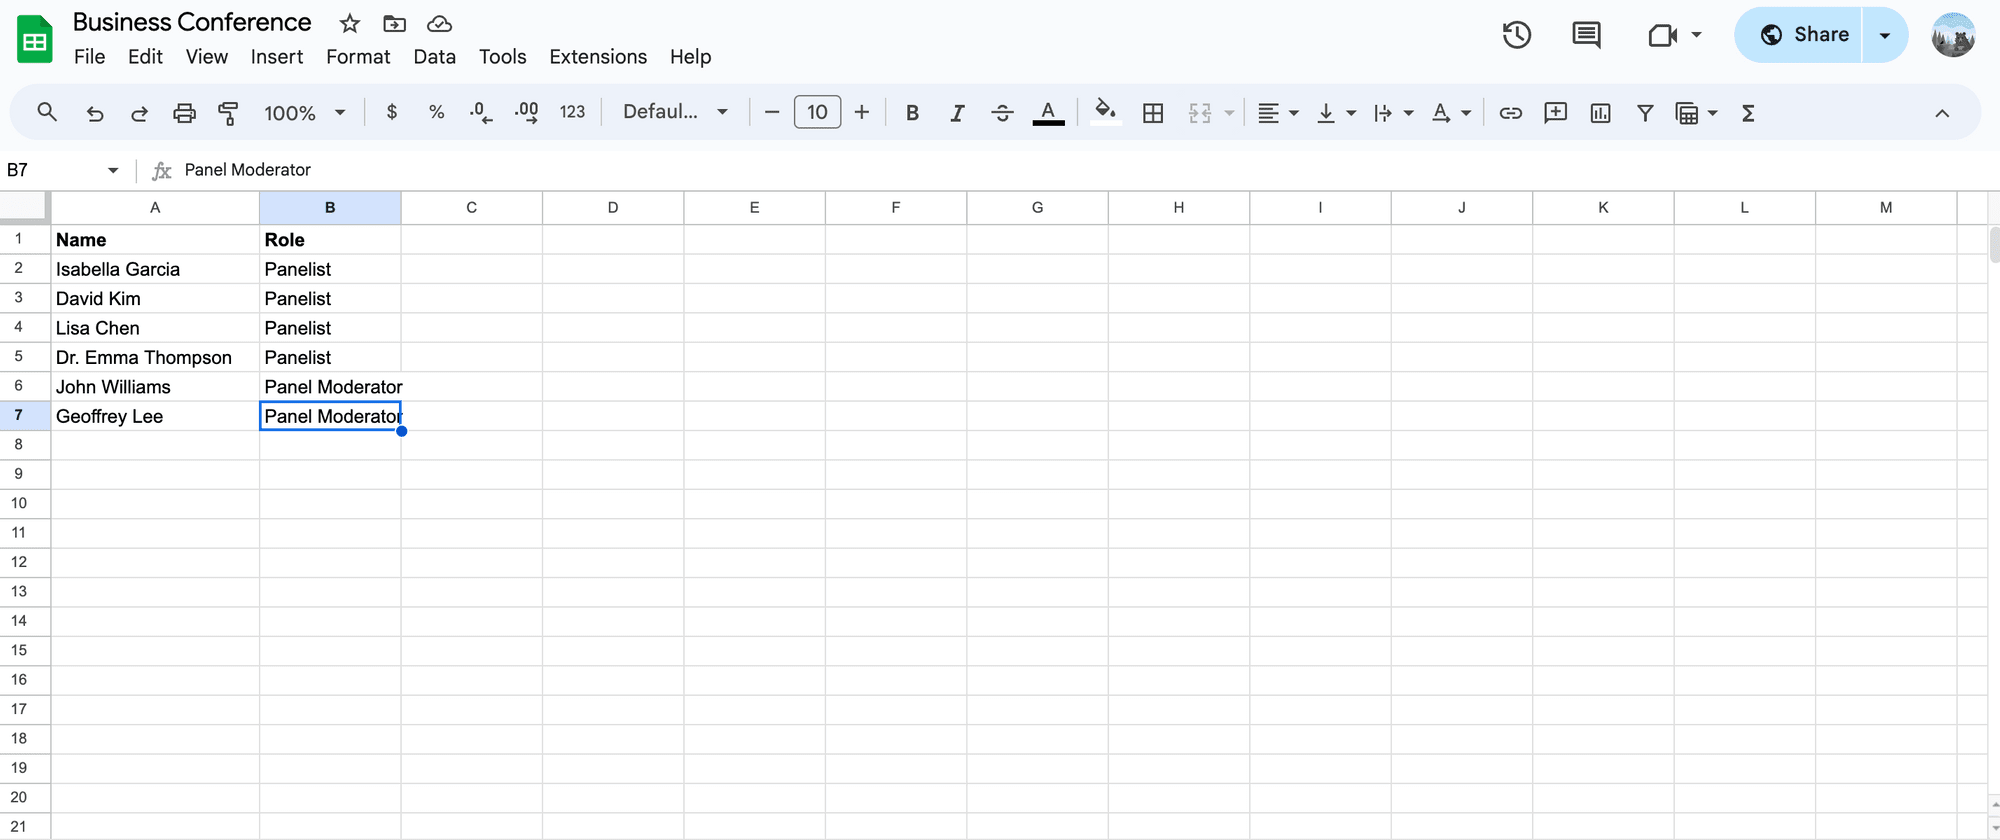
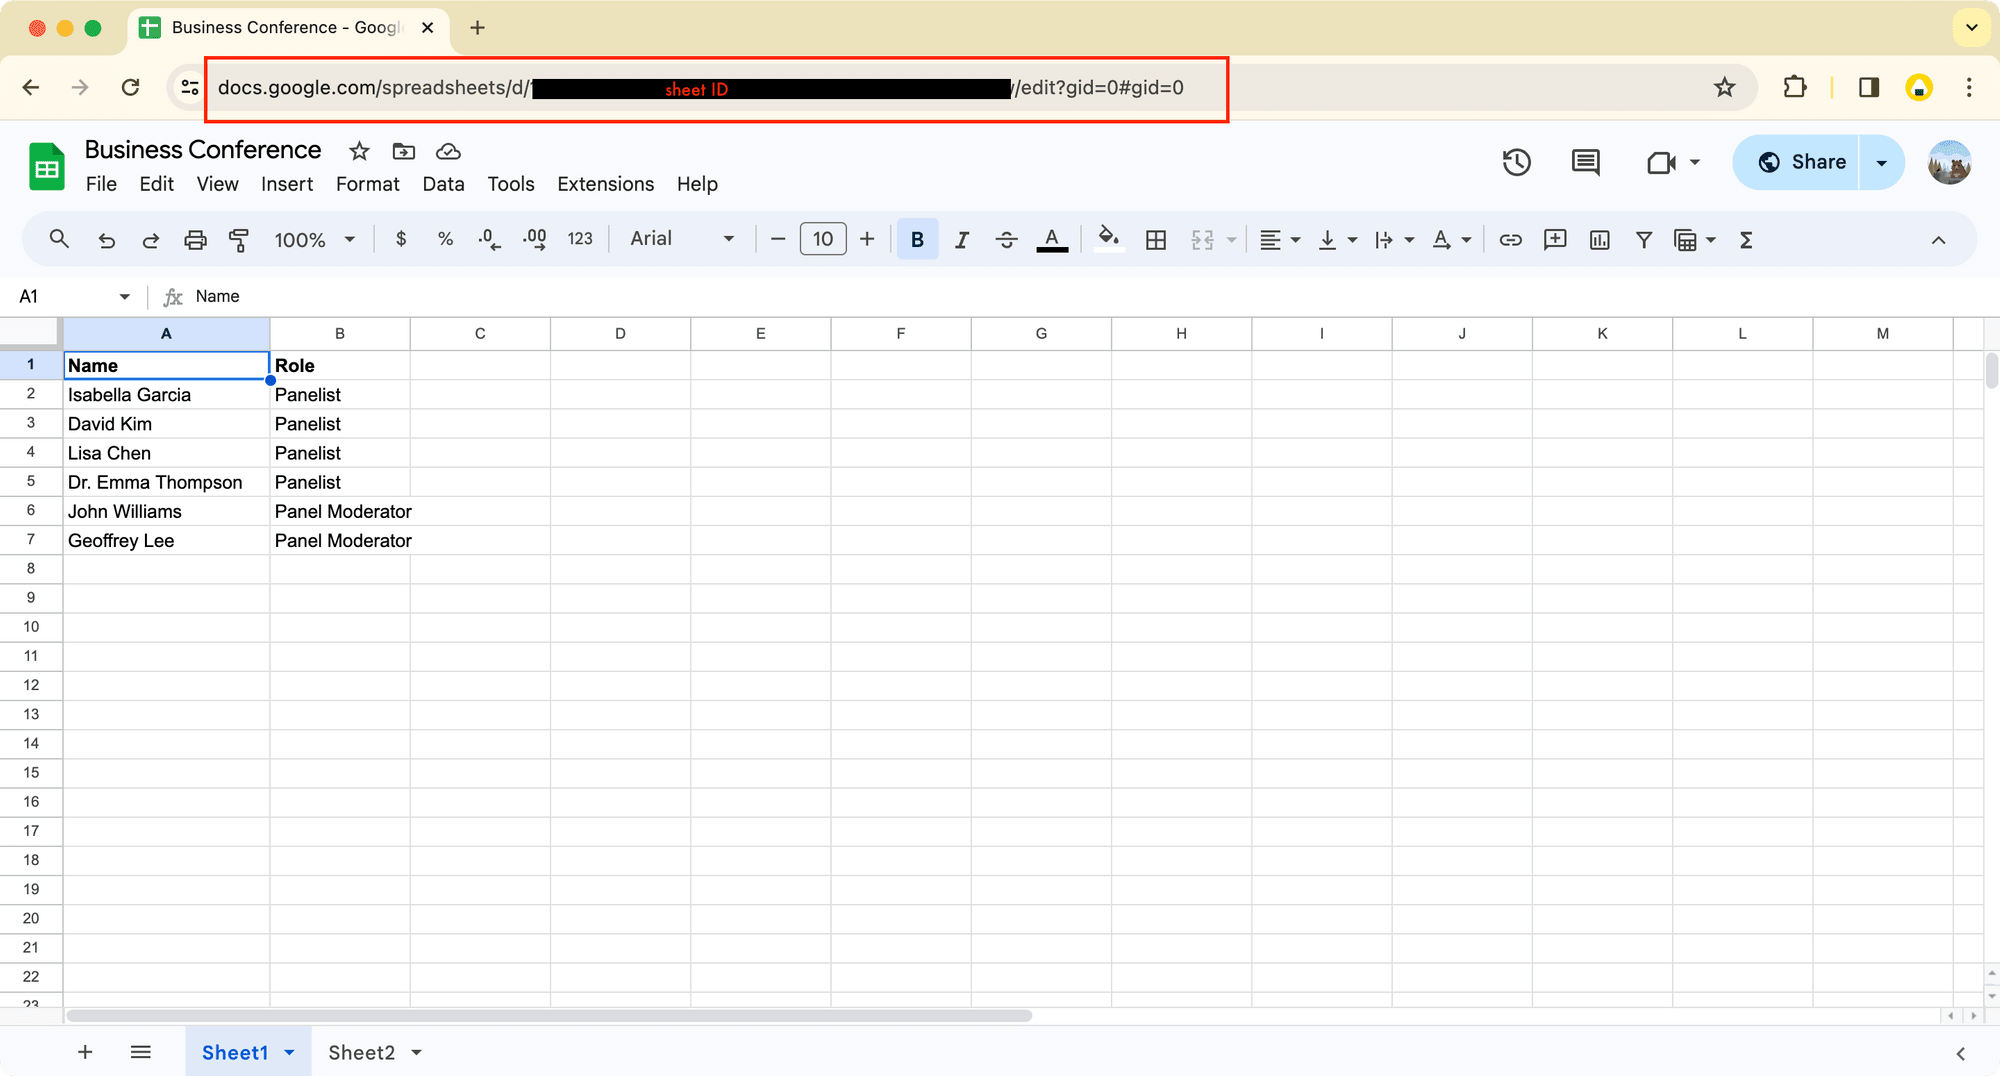
Open Google Sheets and create a new spreadsheet with the following columns: Name and Role. Populate the sheet with the guest details:
We will need the sheet ID to access it in the code. You can find your sheet ID from the URL, located between d/ and /edit:
🐻 Bear Tip: Change the access to “Anyone with the link” to ensure that it is accessible.
Google Drive
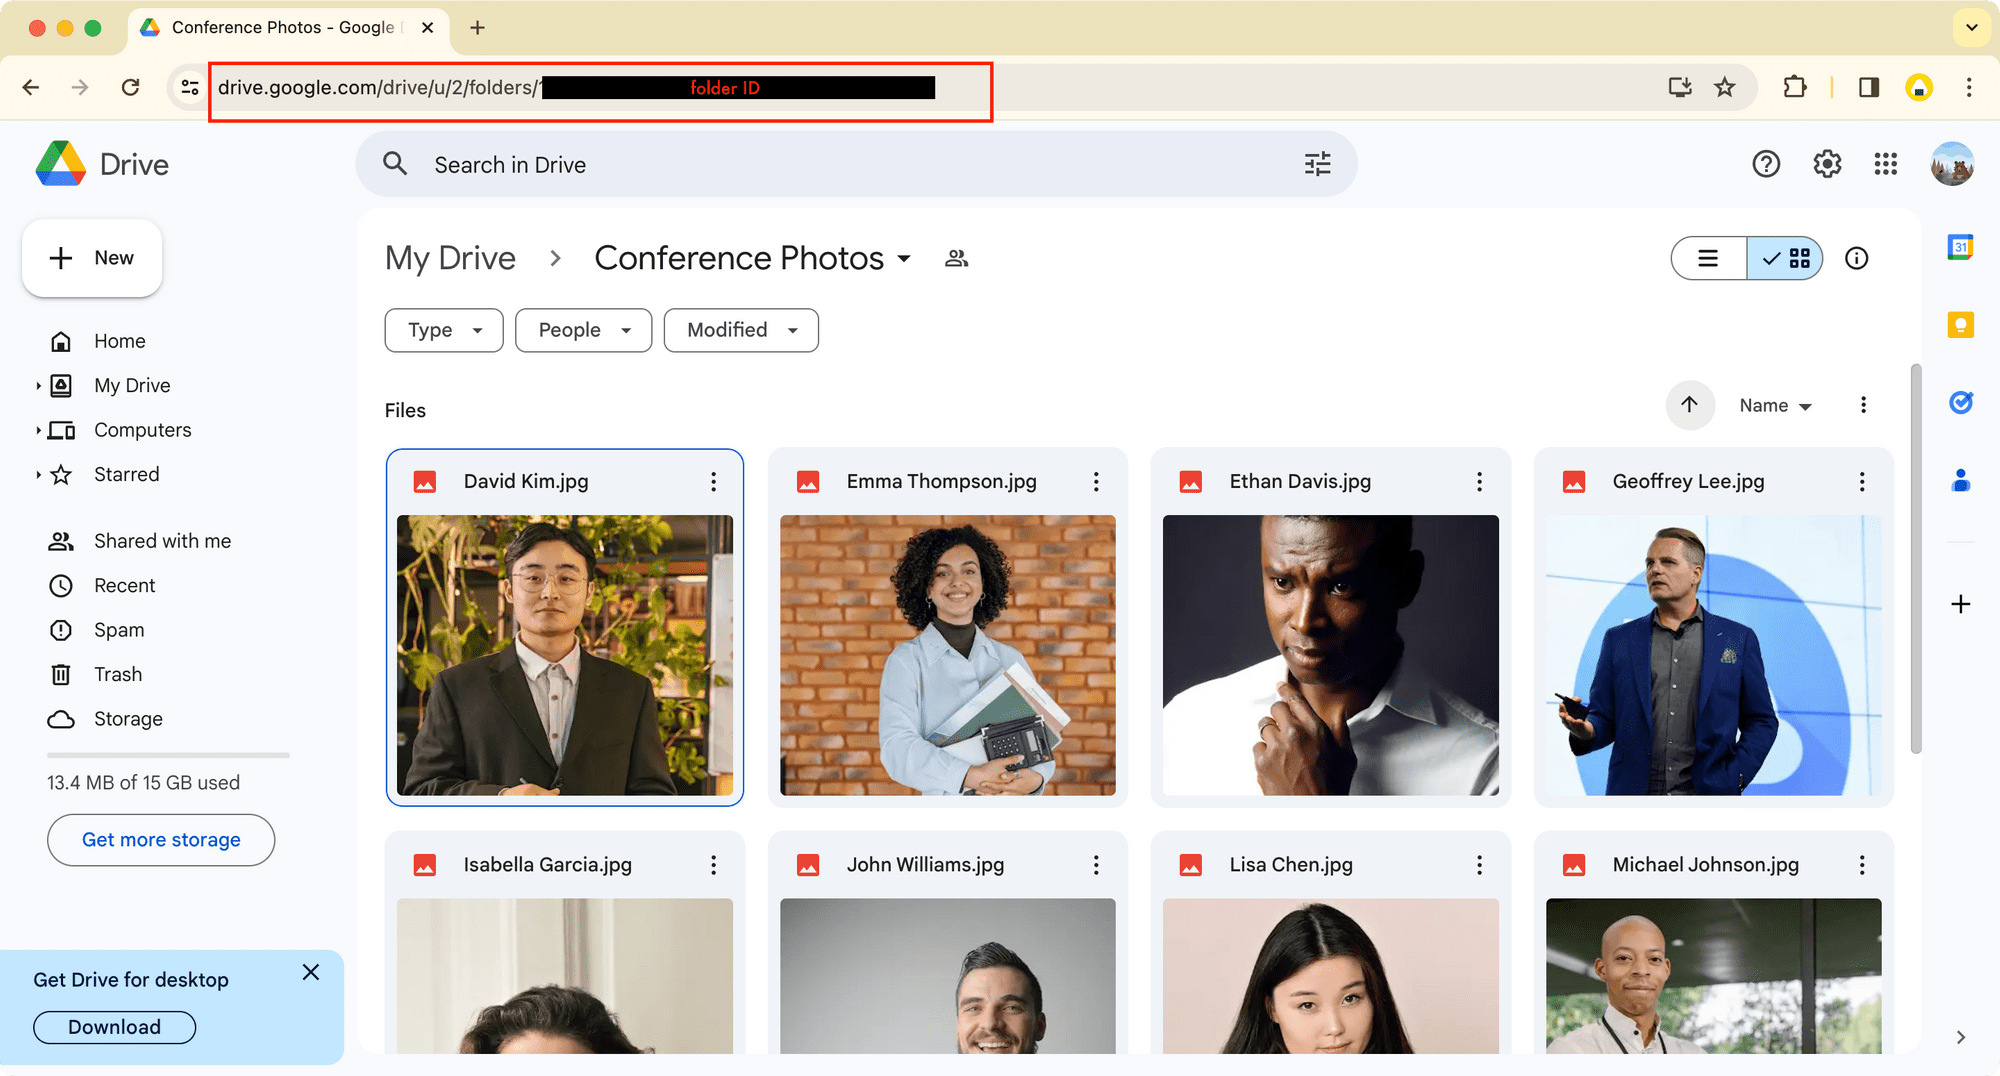
Create a folder in Google Drive and upload the guests' photos to it. Make sure the filenames match the names listed in the Name column of the Google Sheet:

Similarly, we need the folder ID, which can be found in the URL after folders/:
Save the IDs in a secure location, as we will need them in the code later.
Enabling Google Sheets and Google Drive APIs
To retrieve data from Google Sheets and photos from Google Drive using Node.js, we need to enable the Google Sheets and Google Drive APIs on the Google Cloud Platform.
Step 1. Create a New Google Cloud Project
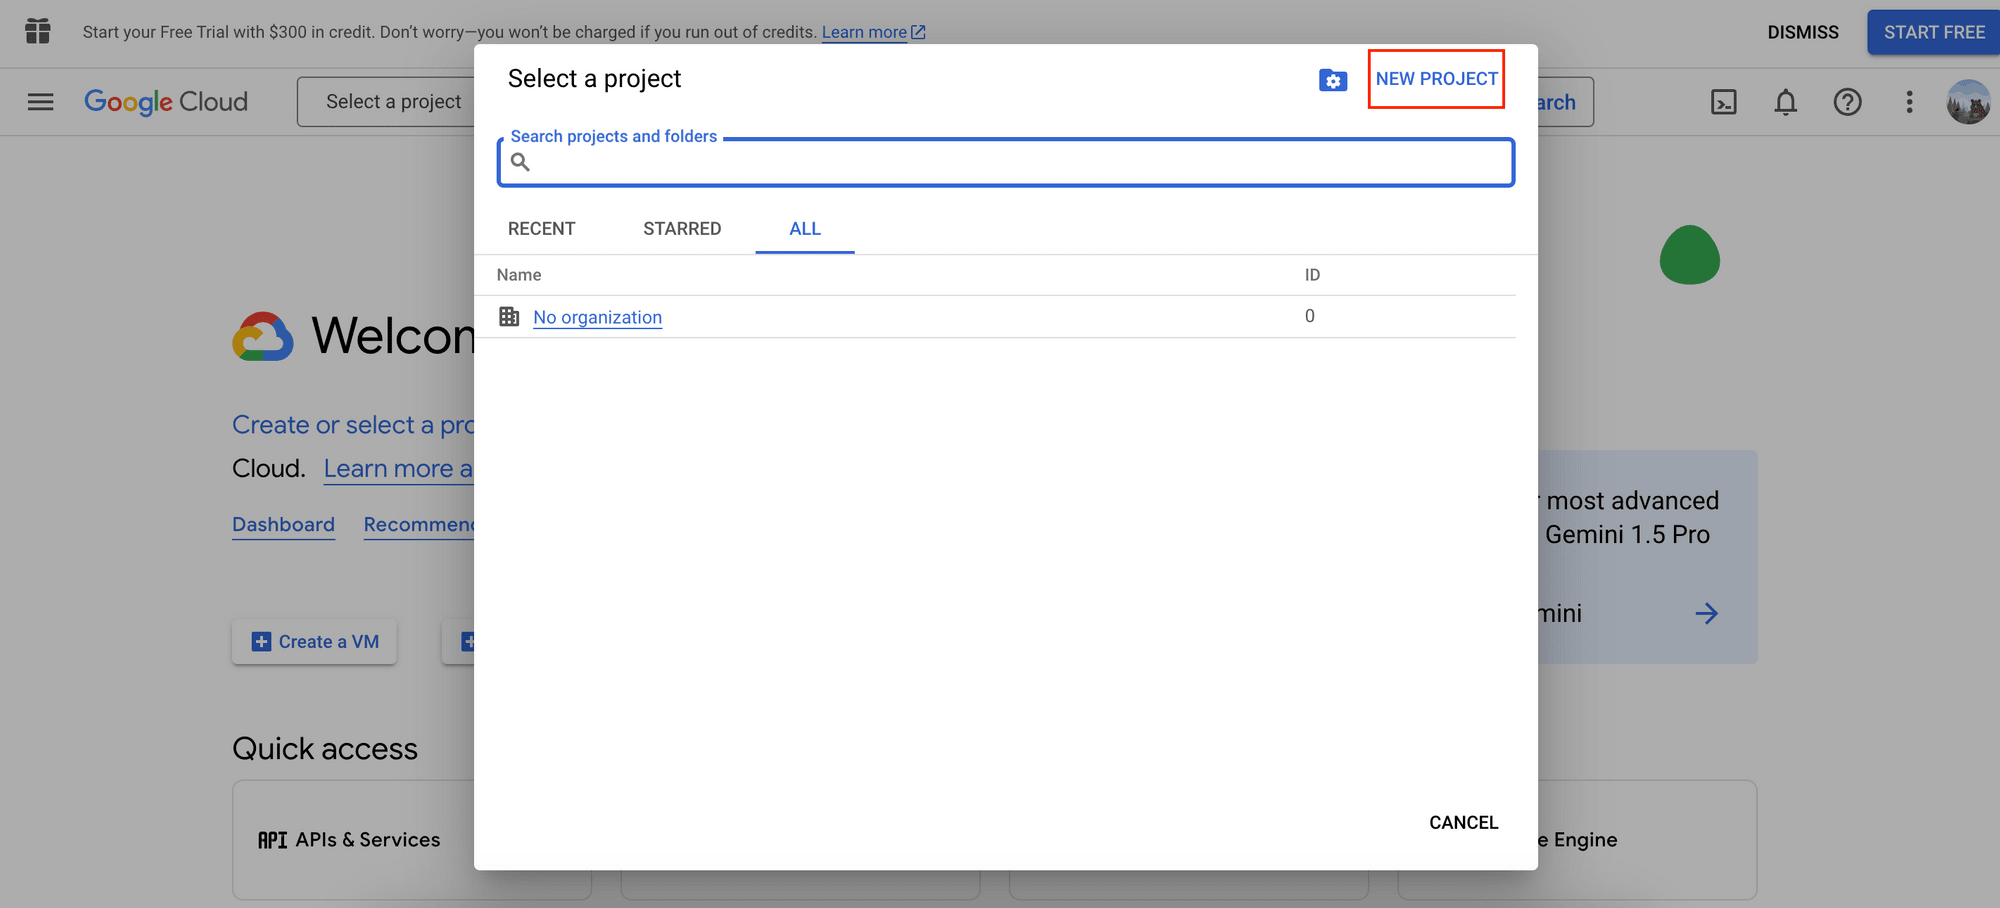
Go to the Google Cloud Console and create a new project:
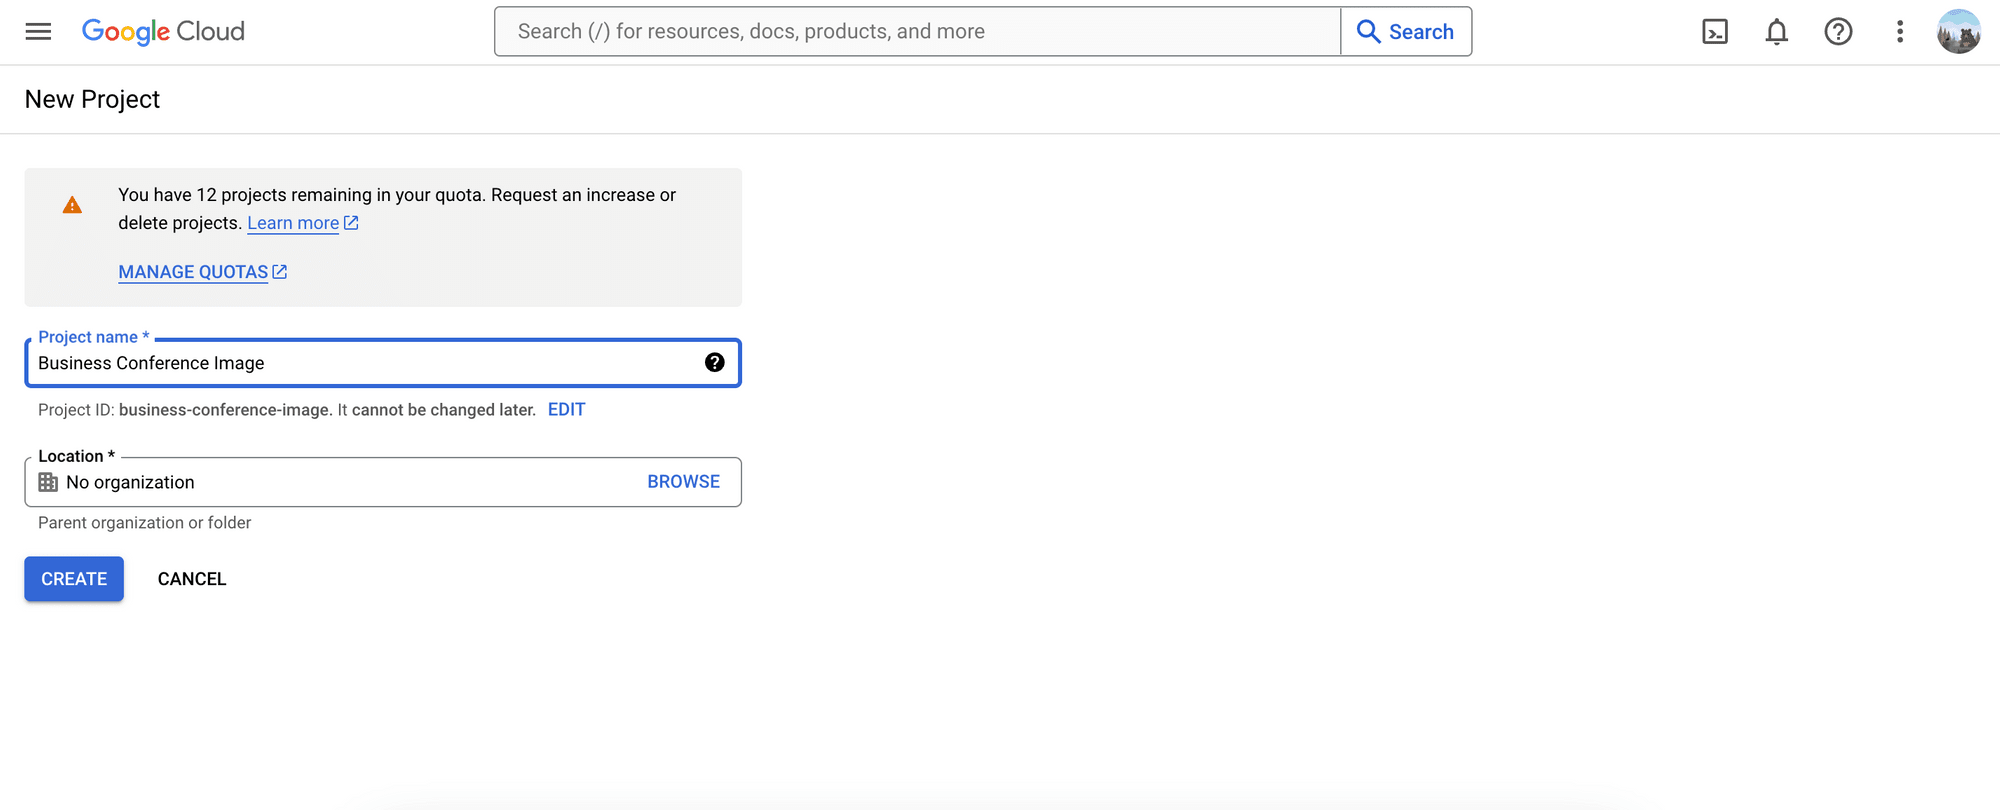
Enter a name for your project and click “Create” to continue:
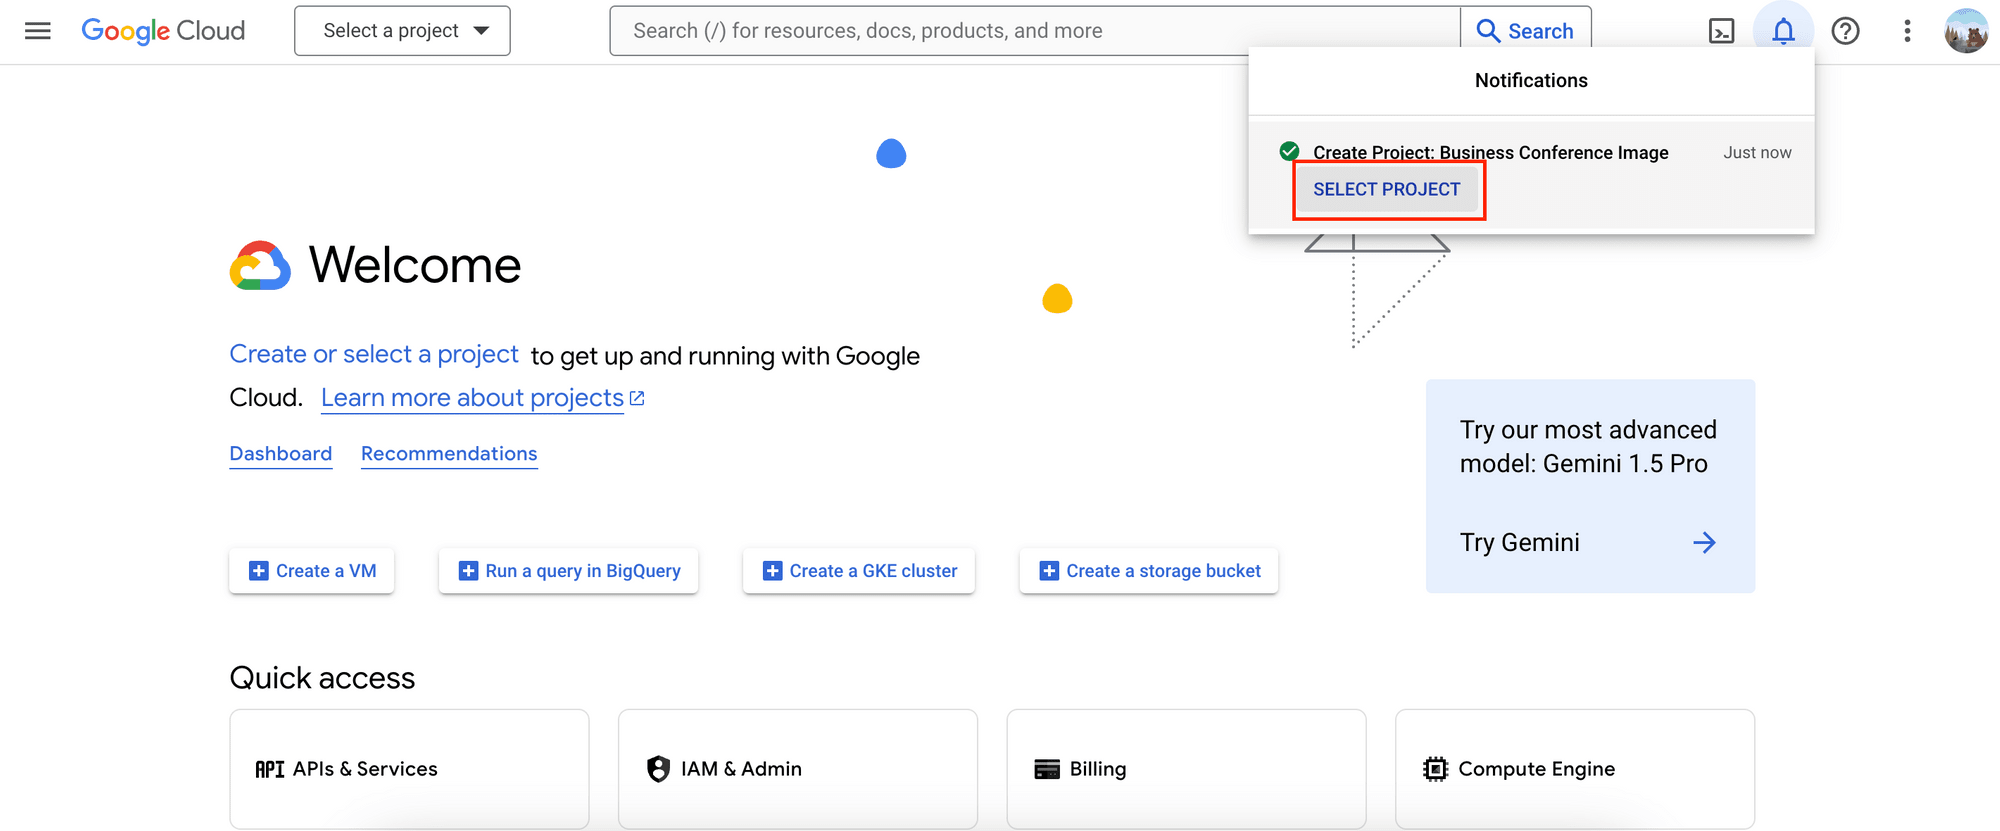
Then, selected the project as your working project:
Step 2. Enable Google Sheets and Google Drive APIs
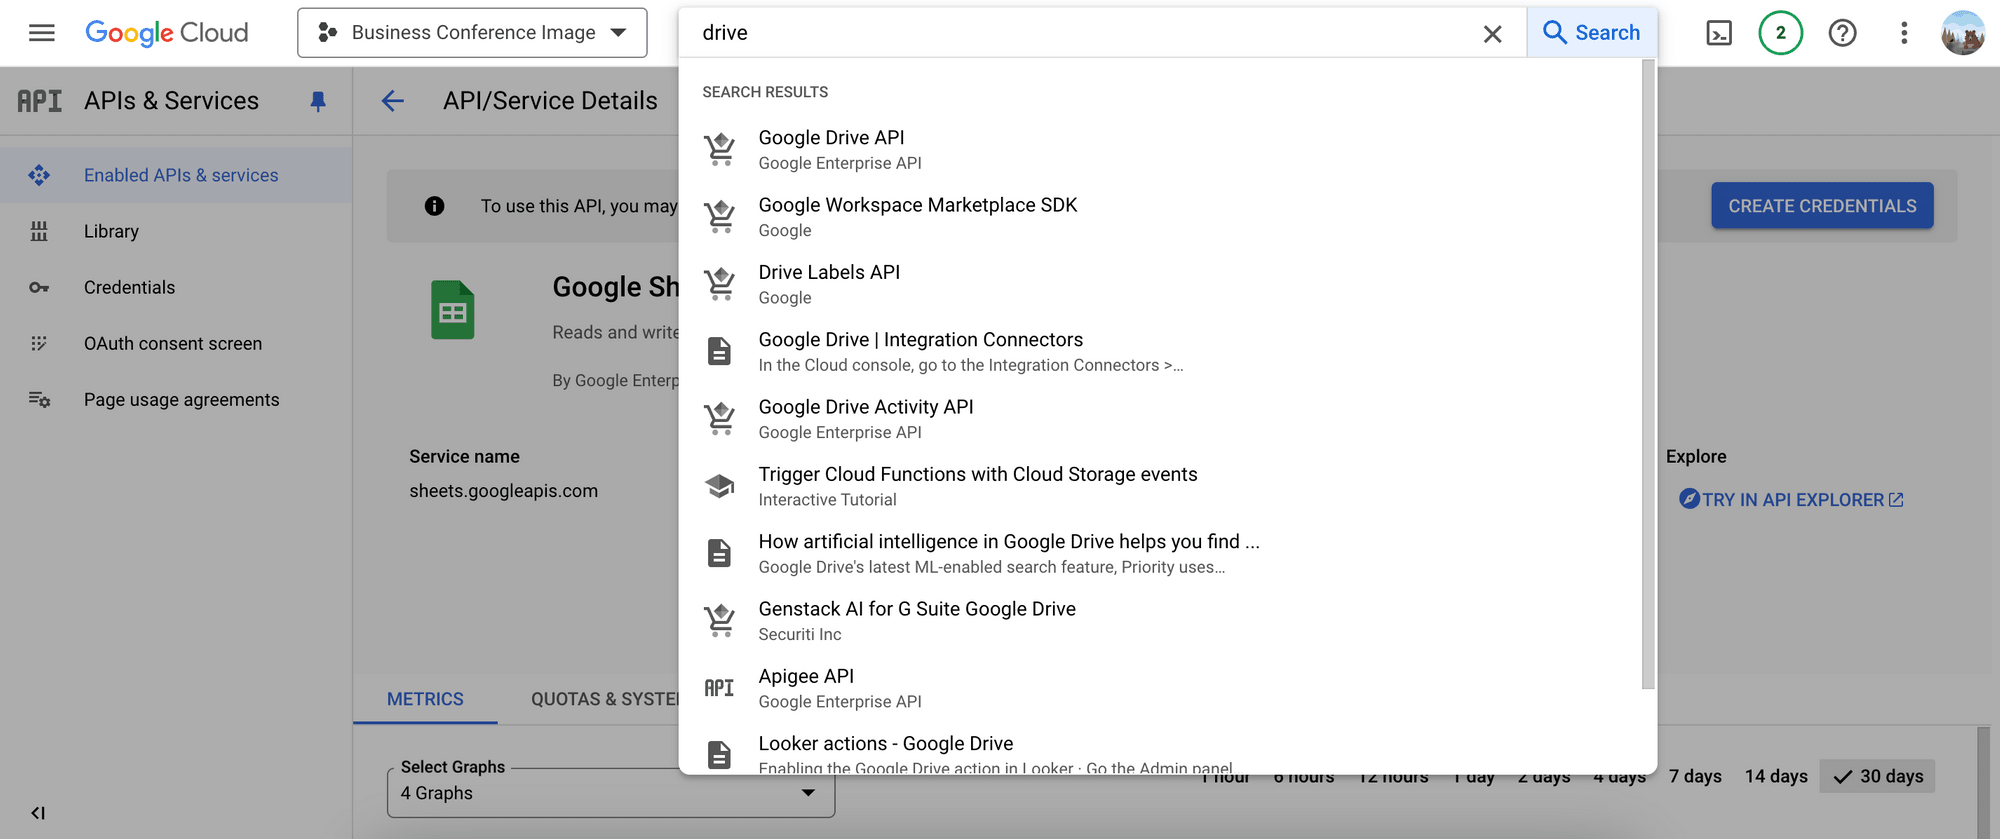
Search for "Google Sheets API" and "Google Drive API" in the search bar, and enable both of them:
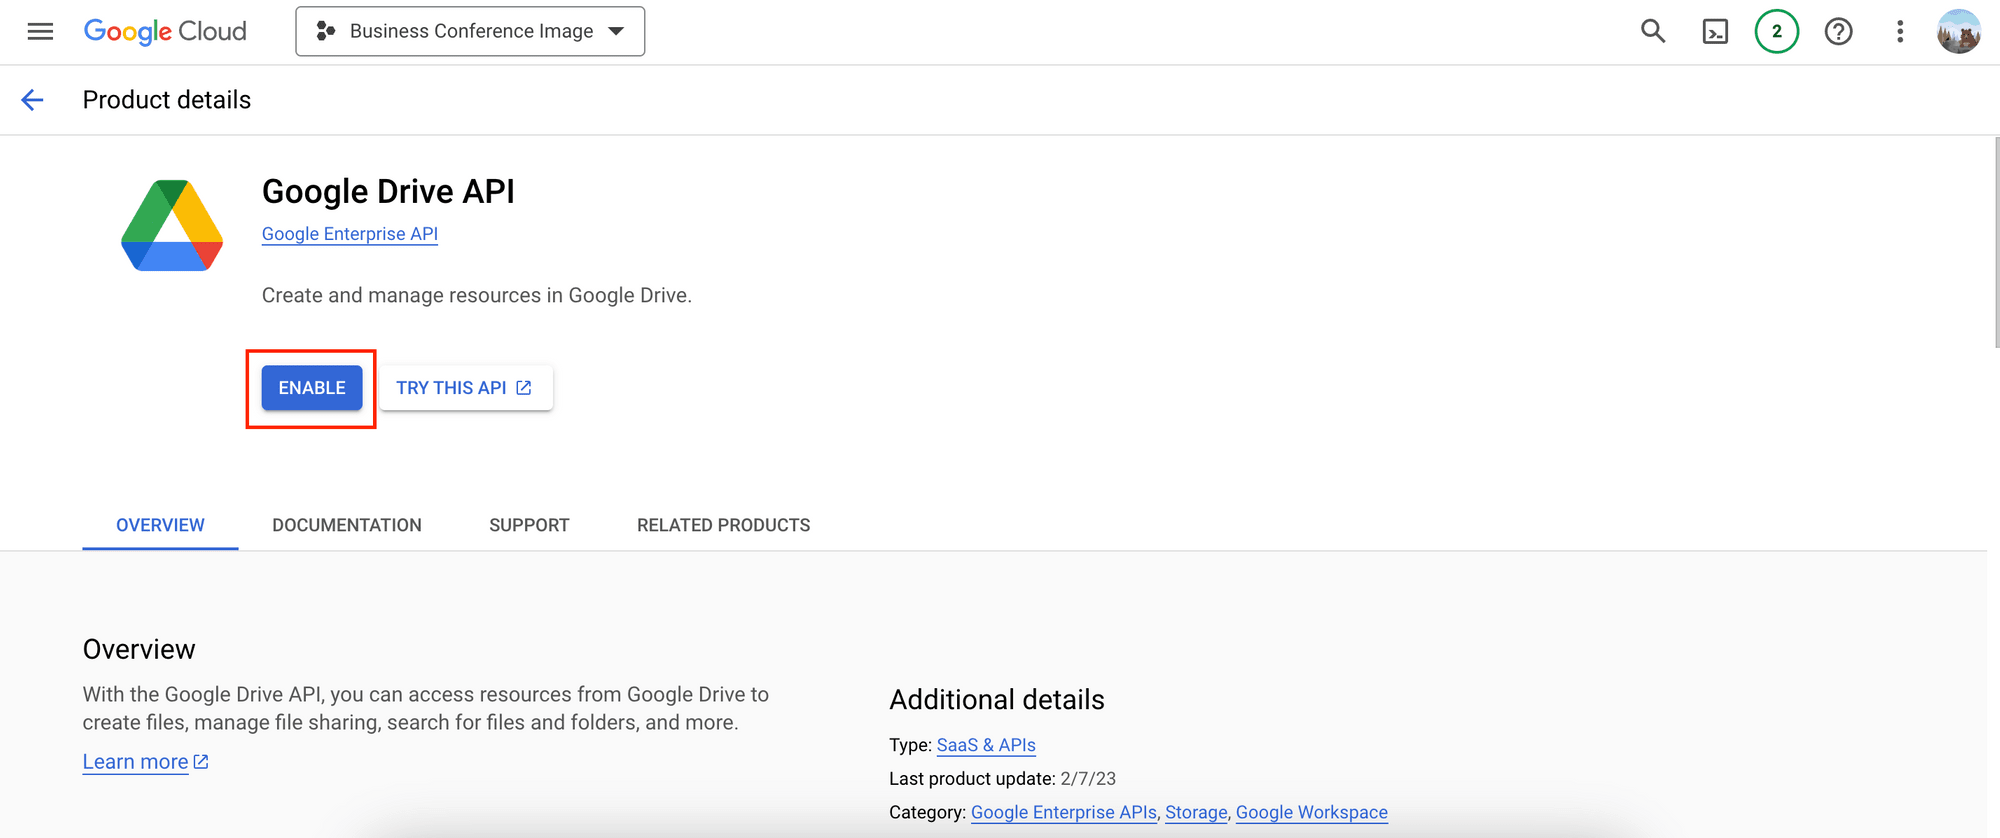

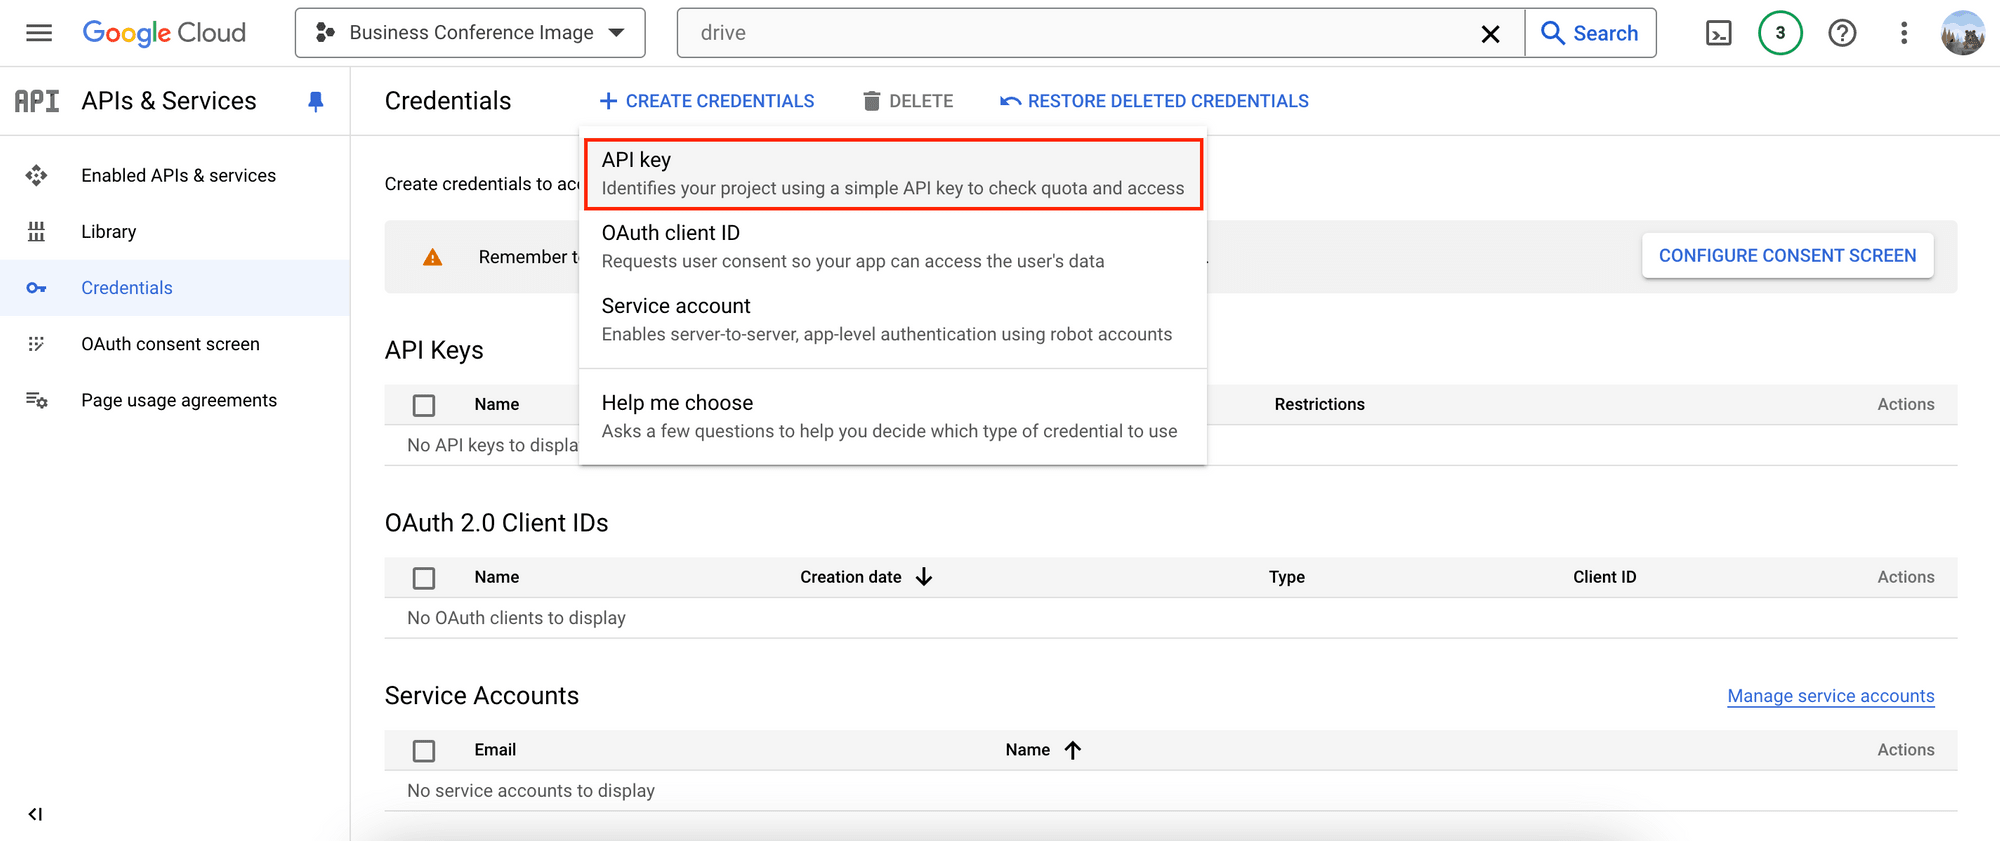
Step 3. Create an API Credential
To use the APIs in our Node.js code, we need to create credentials. The available options include API keys, OAuth 2.0, and Service Accounts. For this tutorial, we'll use an API key.
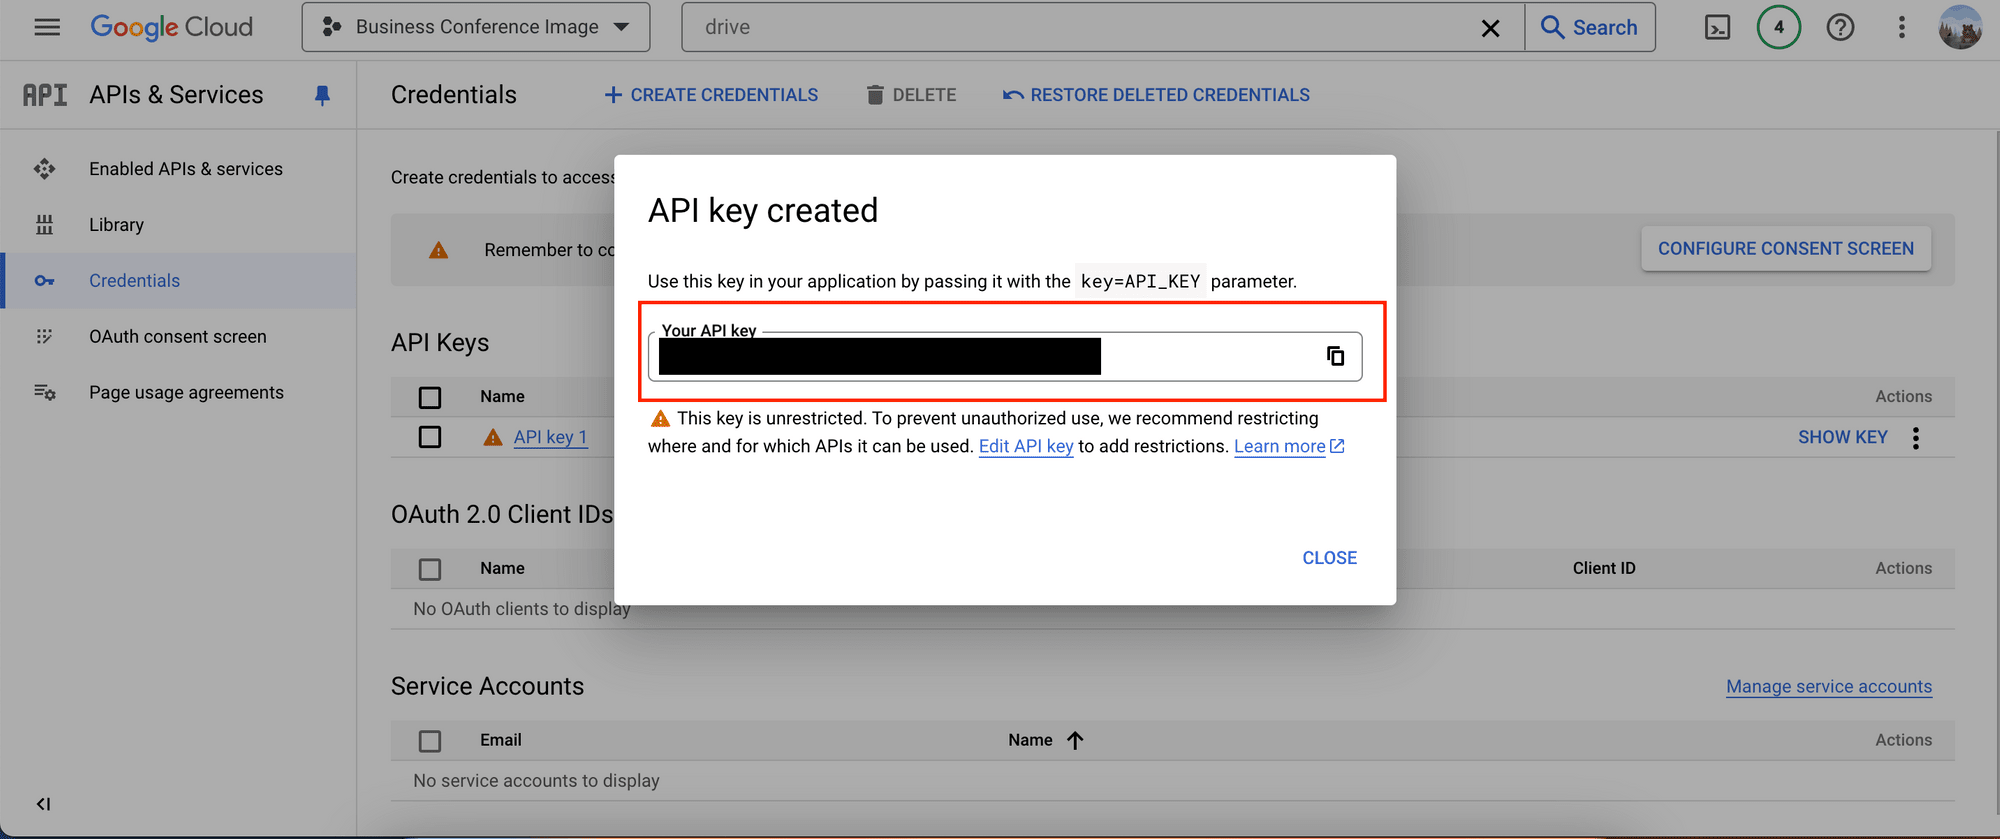
Go to the “Credentials” tab and click “Create Credentials > API key” to generate a new API key:

Once the API key is created, copy and keep it somewhere safe:
Setting Up the Node.js Project
Step 1. Initialize the Project
Create a new directory for your project and navigate to the directory. Then, run npm init in the teminal/command line to initialize a new Node.js project. Then, install the necessary libraries:
npm install googleapis bannerbear
Step 2. Import the Libraries
Create a new file named index.js in the same directory and add the following code to import the libraries:
const { google } = require('googleapis');
const { Bannerbear } = require('bannerbear');
Step 3. Declare the Constants
Next, declare your Google and Bannerbear API keys and relevant IDs as constants:
const GOOGLE_API = 'your_google_api_key';
const SHEET_ID = 'your_google_sheet_id';
const SHEET_RANGE = 'Sheet1!1:1000';
const FOLDER_ID = 'your_google_drive_folder_id';

const BANNERBEAR_API = 'your_bannerbear_api_key';
const TEMPLATE_ID = 'your_bannerbear_template_id';
Step 4. Access Google Sheets and Drive Data
Create a function named getSheetData() and add the following code to read data from your Google Sheet:
async function getSheetData() {
  try {
    const sheets = google.sheets({ version: 'v4', auth: GOOGLE_API });
    const response = await sheets.spreadsheets.values.get({
      spreadsheetId: SHEET_ID,
      range: SHEET_RANGE,
    });
    const rows = response.data.values;
    return rows.slice(1);
  } catch (err) {
    console.error('Error:', err);
  }
}
The data from the Google Sheet, including the table header, should be returned as an array:
[
  ['Name', 'Role'],
  ['Isabella Garcia', 'Panelist'],
  ['David Kim', 'Panelist'],
  ['Lisa Chen', 'Panelist'],
  ['Dr. Emma Thompson', 'Panelist'],
  ['John Williams', 'Panel Moderator'],
  ['Geoffrey Lee', 'Panel Moderator']
]
🐻 Bear Tips: Since the table header is not needed for generating the social media posts, the function returns
rows.slice(1), which excludes the header.
Create another function called getImageFiles() to retrieve the images from the Google Drive folder:
async function getImageFiles() {
  try {
    const drive = google.drive({ version: 'v3', auth: GOOGLE_API });
    const response = await drive.files.list({
      q: `'${FOLDER_ID}' in parents and mimeType contains 'image/'`,
      fields: 'files(id, name)',
    });
    return response.data.files;
  } catch (err) {
    console.error('Error:', err);
  }
}
The function should return an array of objects, with id and name properties for each image found in the folder:
[
  {
    id: '1UXsohu04aZtyPlmX99HlfKzBQX0SzNIS',
    name: 'Emma Thompson.jpg'
  },
  {
    id: '1ix3WXzeyKkZSkal4NxfvbzD-rILnE9Ap',
    name: 'Michael Johnson.jpg'
  },
  ...
]
Step 5. Create Images with Bannerbear API
Add the following code to read data from Google Sheets, retrieve photos from Google Drive, and generate images with Bannerbear:
(async () => {
  const bb = new Bannerbear(BANNERBEAR_API);

  const guestList = await getSheetData();
  const imageFiles = await getImageFiles();
  const imagesObj = {};
  imageFiles.forEach((image) => {
    imagesObj[image.name.split('.')[0]] = `https://drive.google.com/uc?id=${image.id}`;
    fetch(imagesObj[image.name.split('.')[0]]);
  });

  guestList.forEach(async (guest) => {
    const images = await bb.create_image(
      TEMPLATE_ID,
      {
        modifications: [
          {
            name: 'text_name',
            text: guest[0],
          },
          {
            name: 'event_role',
            text: guest[1],
          },
          {
            name: 'image_container',
            image_url: imagesObj[guest[0]],
          }
        ],
      },
      true
    );

    const imageUrl = images.image_url;
    console.log(imageUrl);
  });
})();
Bannerbear will generate images for each guest using the design template created earlier. Here are some examples of the results:


🐻 Bear Tips: View the full code on GitHub.
What's Next
Throughout this tutorial, we’ve covered the essential steps for integrating Google Sheets, Google Drive, and Bannerbear to automate the creation of visuals for social media posts for a business conference. You can further enhance the automation by creating different templates for the event, like:
- Speaker quotes - Share notable quotes or insights from the speakers to build excitement.
- Session spotlights - Highlight individual sessions or workshops with details about the topics and speakers.
- Speaker insights - Post quick takeaways or insights from the sessions.
- Personalized event ID cards - Allow attendees to easily share networking information using QR codes.
By automating the process, you can focus more on strategic aspects of the conference and less on the repetitive tasks of content creation. If you haven’t done so yet, sign up for a Bannerbear account and start automating today!
